How To Create Professional Business Website With WordPress
Hello WordPress readers and enthusiasts, today we are going to cover a very interesting topic that how you can setup your business website on WordPress. To achieve this purpose, we will be using free business WordPress theme from the WordPress theme repository. There are countless free themes available in the WordPress theme repository, henceforth, I’m going to suggest a few of those in my article as these may help you get started without any further delay.
Why You Should Use WordPress for Building Your Business Website
The real question that ponders our mind is, why one should use WordPress for building not only business websites but almost any kind of website? The answer is simple. WordPress is now one of the most famous CMS platforms across the world. WordPress has this huge plugin repository which allows users to extend their website functionality by adding flexibility to it. According to statistics, the total number of free WordPress plugins are 47,775 plugins with over 1,469,853,599 total downloads.
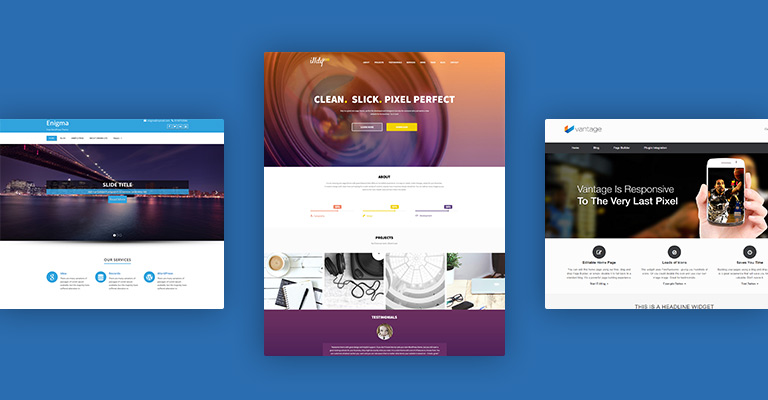
Here are a few free small business WordPress themes that I have assembled from WordPress repositories that are absolutely free and business oriented:
- Active
- Ascent
- Asteria Lite
- Emmet
- Enigma
- Illdy
- Interface
- Llorix One Lite
- Singlepage
- Vantage
What’s Next! When You Are Done Choosing Your Desire Theme:
Let’s get started with building stuff now, rather than just talking about it!
Assuming you have your WordPress installed on a private, shared or managed cloud server and you are ready to install one of my suggested themes; you might want to go with one of your desired ones. However, in this article, I’m going to use Vantage WordPress theme and will give you a detailed step by step guide of the overall process encircling theme installation.
How to Install Free WordPress Theme
Install Theme via WordPress Dashboard (Recommended)
You can easily find and install any free theme of WordPress by visiting Appearance > Themes > New
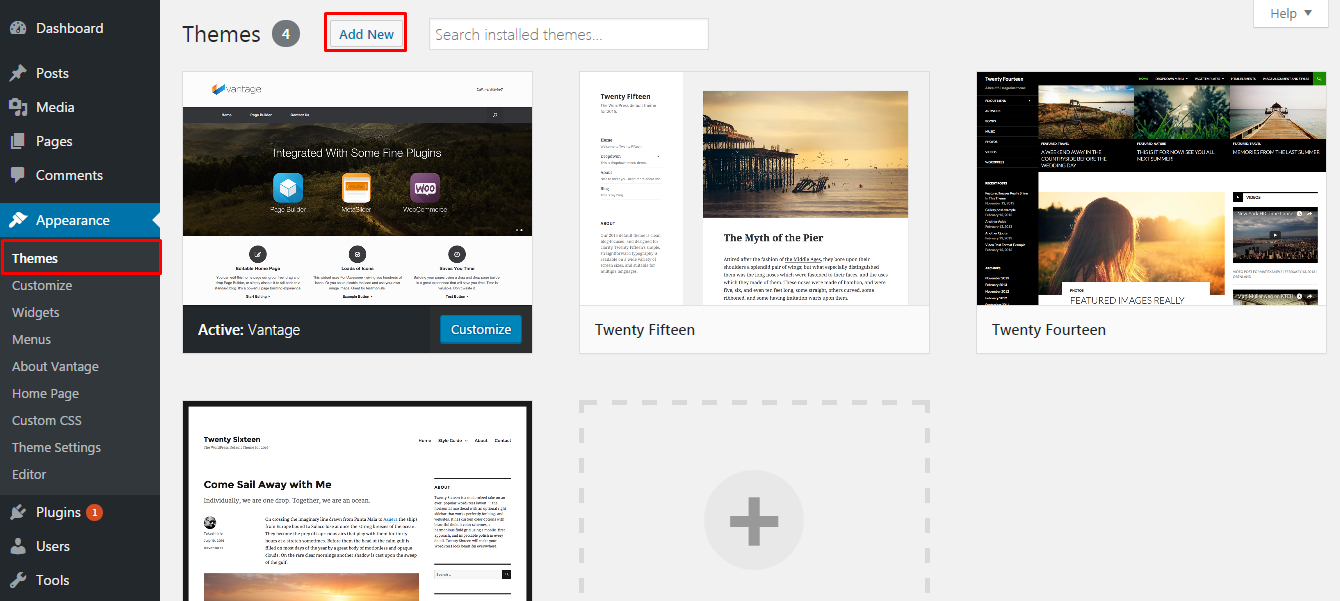
In order to search for your desired theme via the search box at the top right corner of your dashboard screen. In my case, its “Vantage” as shown below:
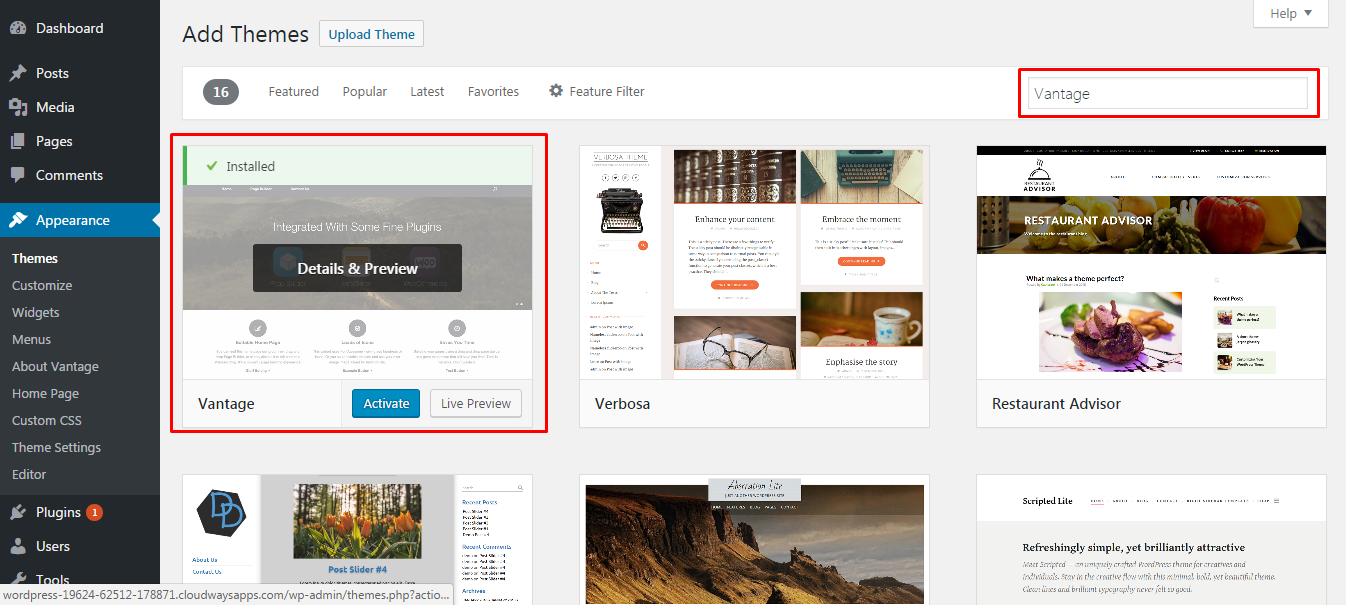
Click on the install button and then activate the desired theme; however, you can still watch the live preview first by clicking on the live preview button adjacent to the Activate button as shown in the screenshot above.
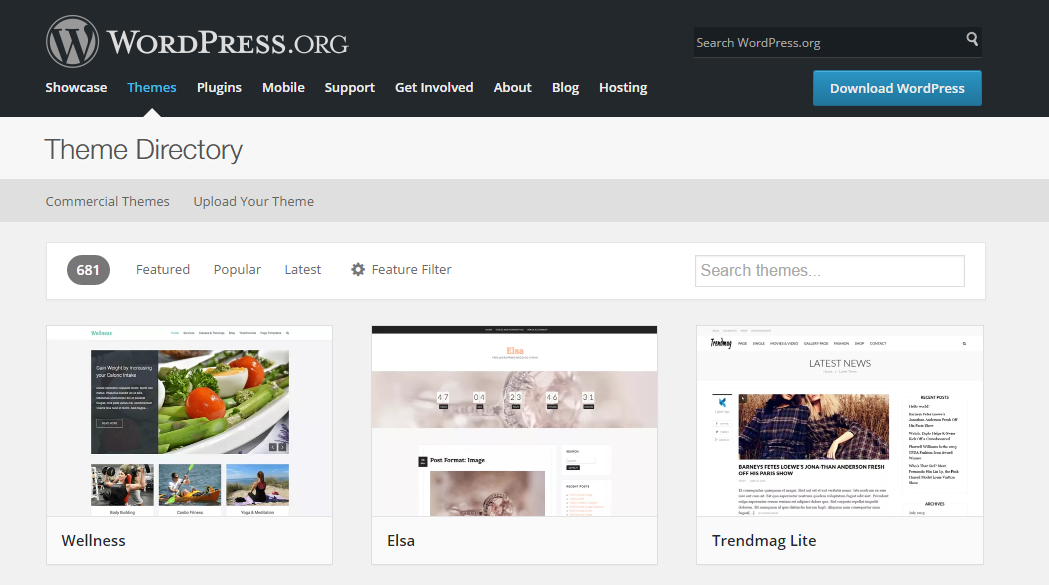
Install WordPress Theme via Theme Directory
You can easily find your desired WordPress theme via WordPress theme directory
Remember, in this process; you will need to download the theme files in your local drive first and then upload it manually on your WordPress business website.
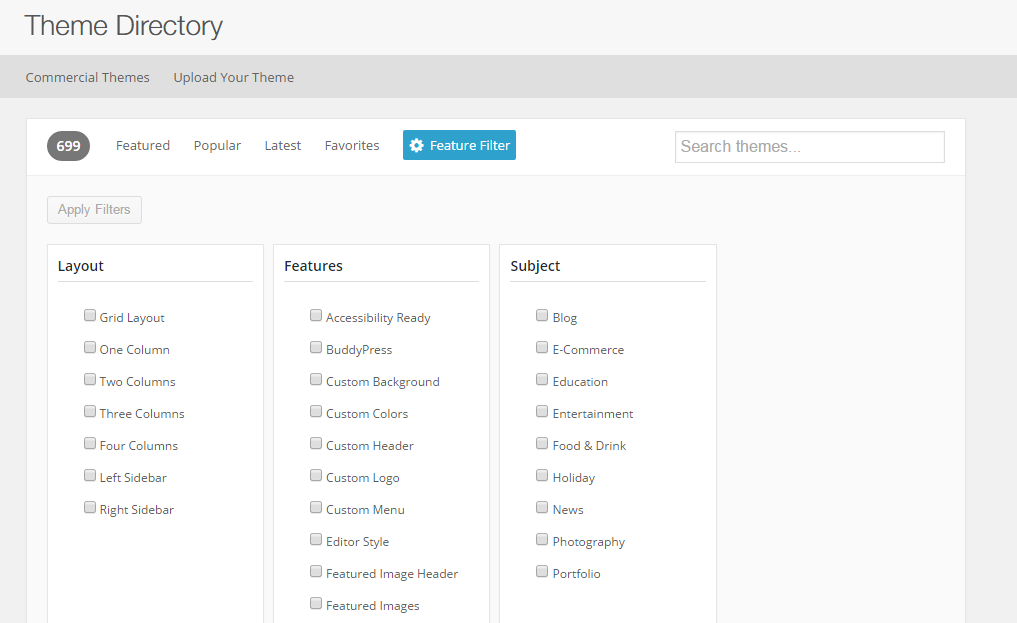
The only good thing I personally like about the WordPress theme directory is its search filter which allows you to modify the search results by category and find the theme of your choice.
Starting with the Theme Settings & Layout
Basic theme customization can be easily done by going to the Appearance > Customize. However, WordPress paid themes provides you more functionalities and options to customize individual elements and play around with the whole layout. It’s one of the many reasons why WordPress offers users a separate theme options area which can usually be found at Appearance > Theme Option or at the left panel allowing a user to organize other more options and functions easily without getting into coding hassles.
Each WordPress theme comes with some required add-ons to install. Similarly, in our case, Vantage theme has some required add-ons as well. Once you are done activating them, you will get the notification at the top to install the required add-ons.
Vantage theme has three required add-ons and can be seen in the screenshot below:

Learning to Create Pages and Post in WordPress
How to Create a Post
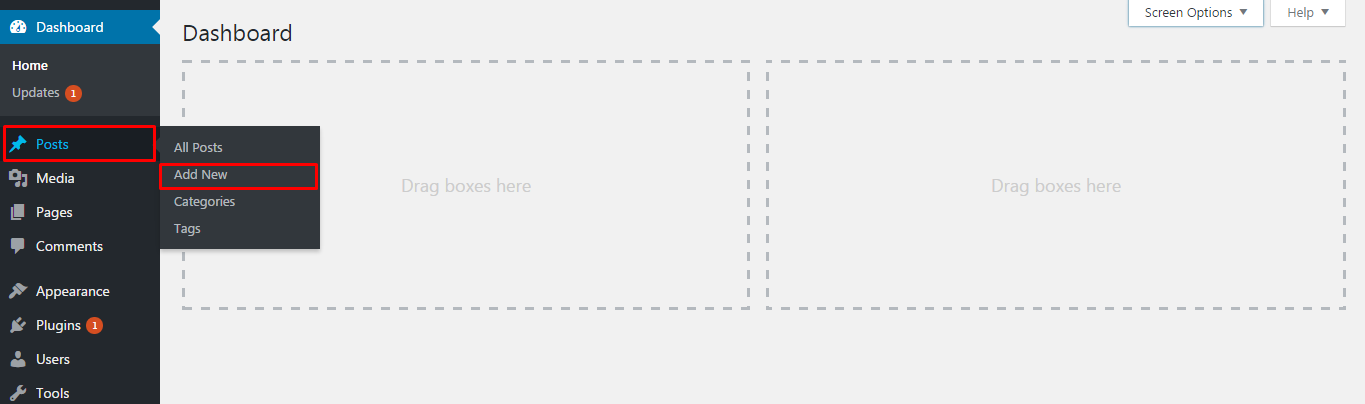
The post can be easily created by navigating to the Posts and clicking on Add New. You will be automatically redirected to the post creation screen as shown below.
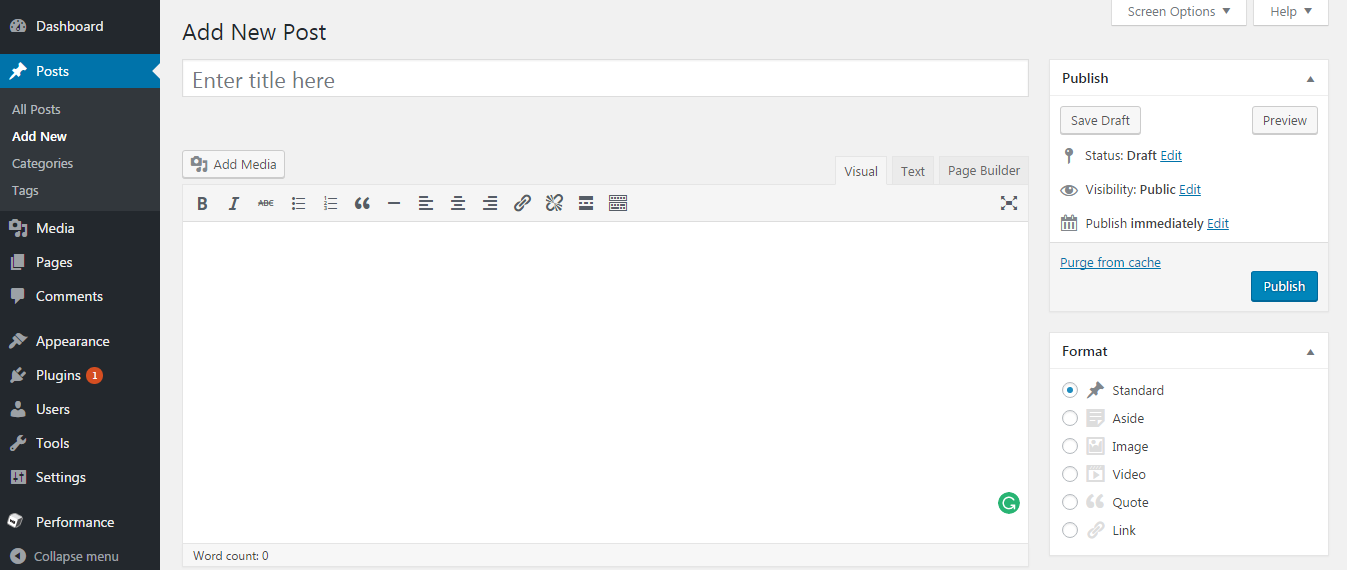
It’s as easy as it looks like. You need to put your post title in the title box similarly post description goes in the description area. Once you are done, simply hit the publish button, and that’s all! Your post is published.
To learn in-depth knowledge on posts and pages refer to our article on Understanding Posts or Pages on WordPress.
Wait! We have just missed as an essential task that is the category part & the feature image part of the post.
How to Create Post Category in WordPress
Post category can be easily created via Posts > Categories, or you can just click on the +Add new category link on the right panel as shown below:
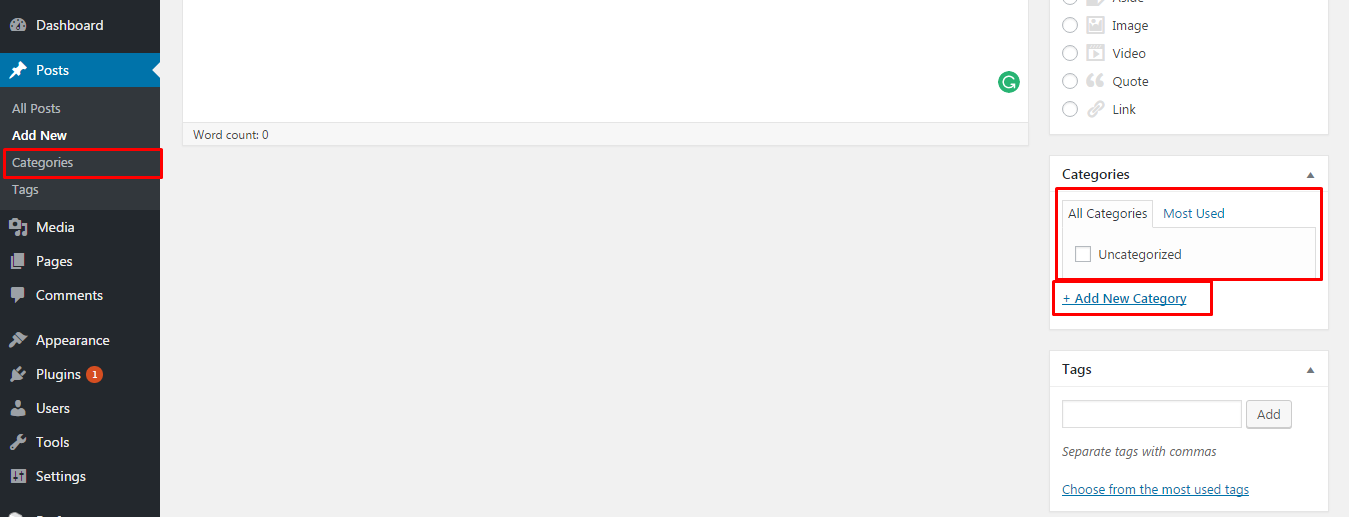
You can observe the tags box in the right panel. It is used to be a recommended thing to do to add as many tags as you want for your required post. Tag element is good from an SEO perspective but not recommended anymore. However, you can still use it.
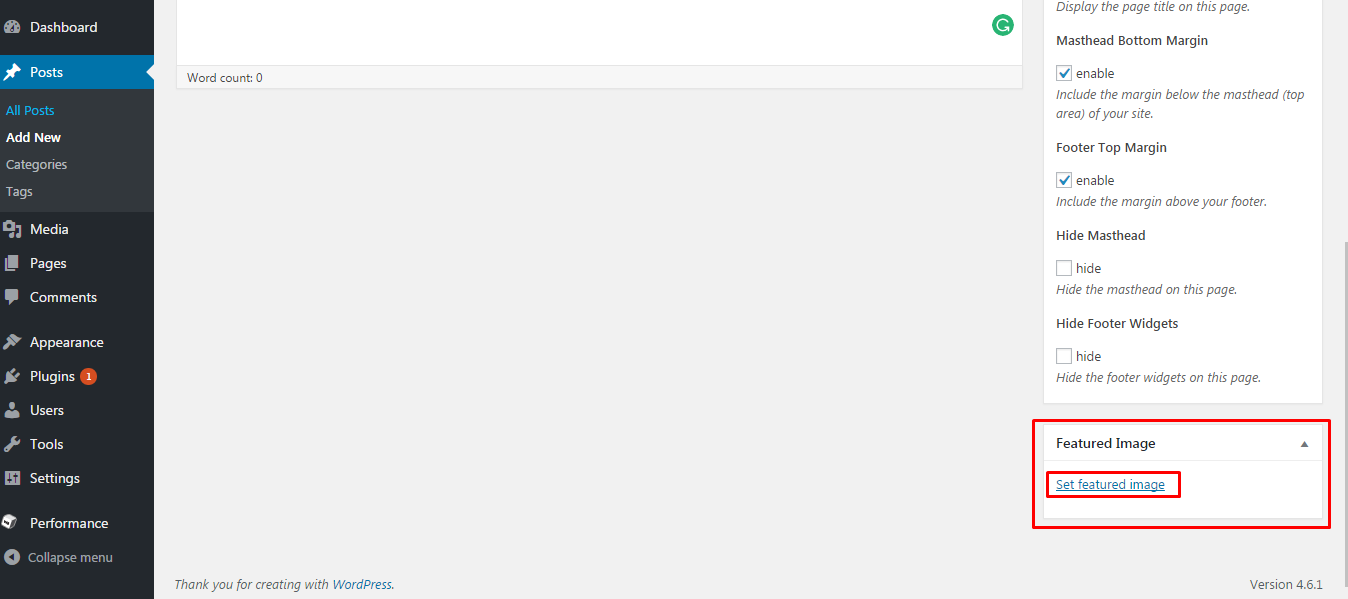
How to Upload Post Feature Image
You can easily upload your post’s featured image by clicking on Set Featured Image link, as shown in the screenshot below:
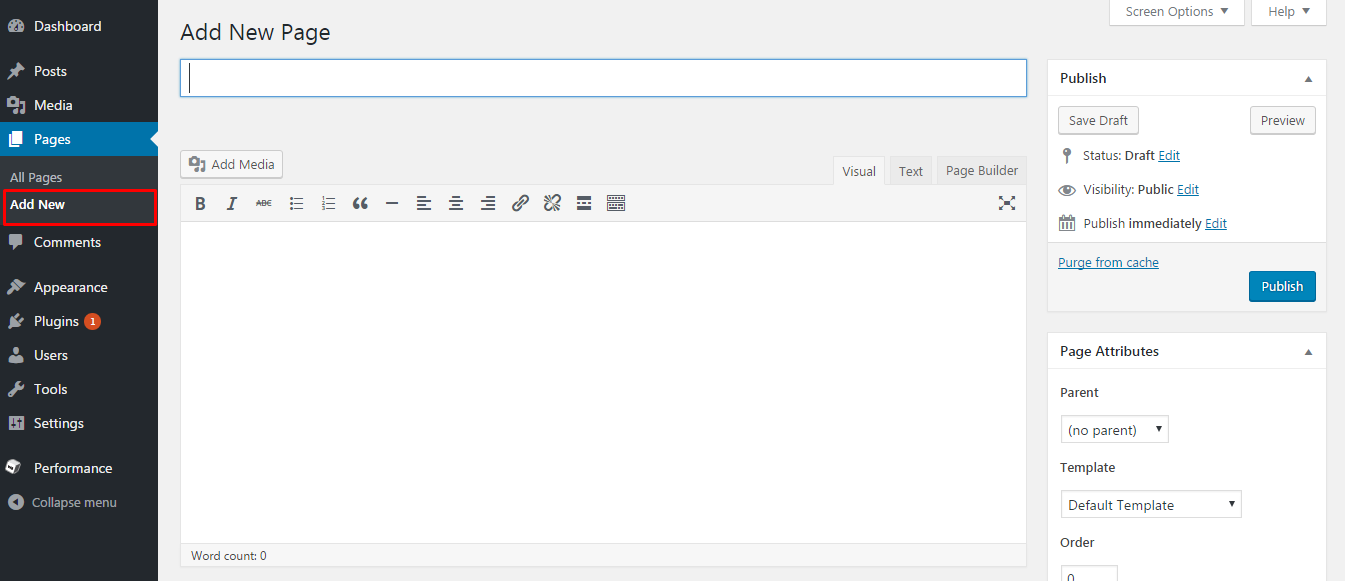
How to Create Pages in WordPress
Pages can be created similarly as posts, check out the screenshot below.
Okay… so now we are done with adding blog posts and pages to our website; let’s create a menu for these pages on the top menu bar.
How to Create Menu on WordPress
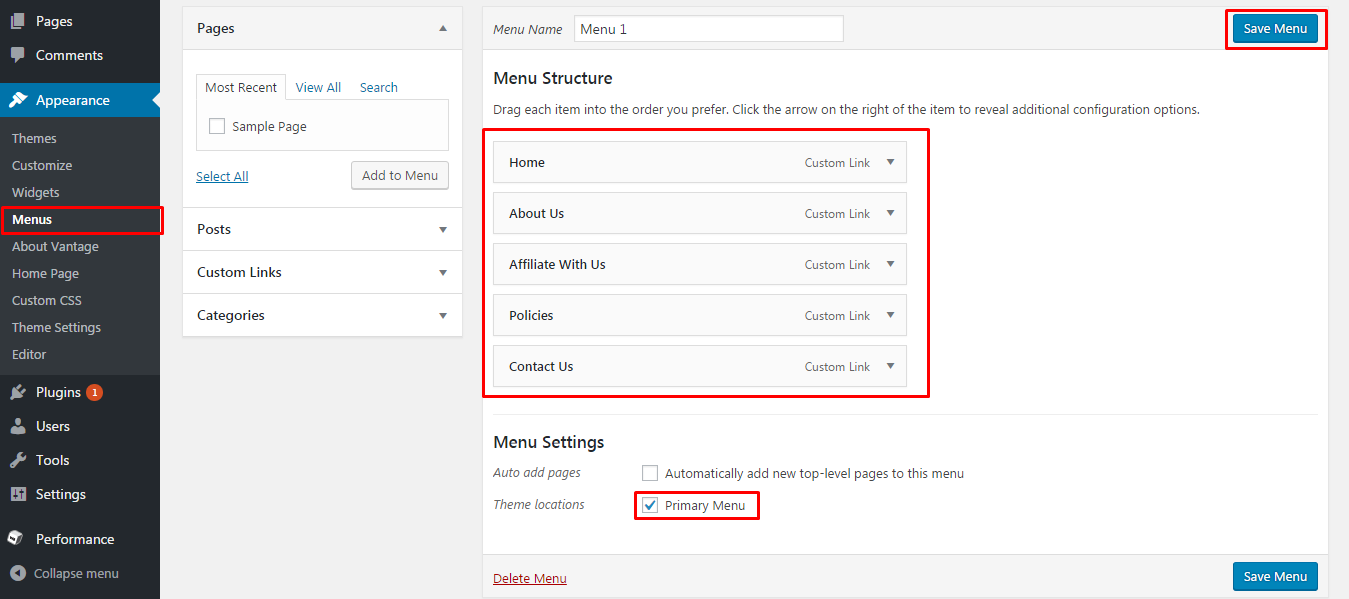
The menu can be easily created by going to the Appearance > Menu.
Make sure, you check the primary menu box once you are done with the page alignment and then hit the save menu button.
Ok, so this is what we have so far…
We are now done with the post, pages, and menu. Let’s jump to the banner now.
How to Change Banner of Vantage Theme
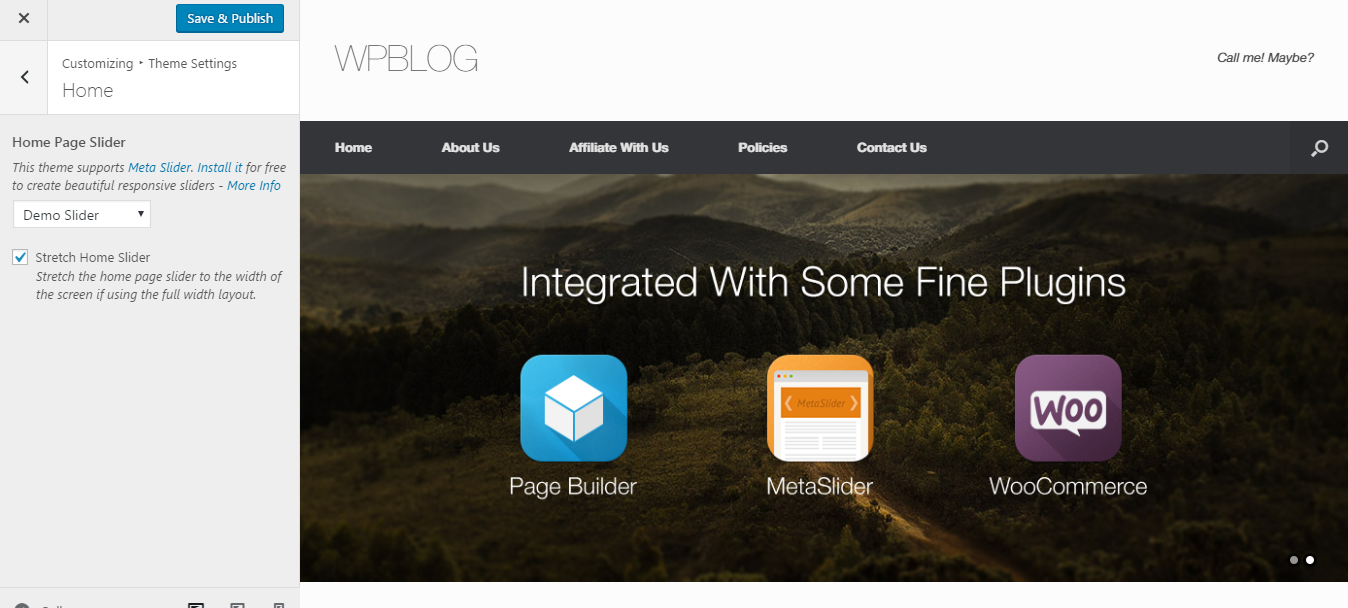
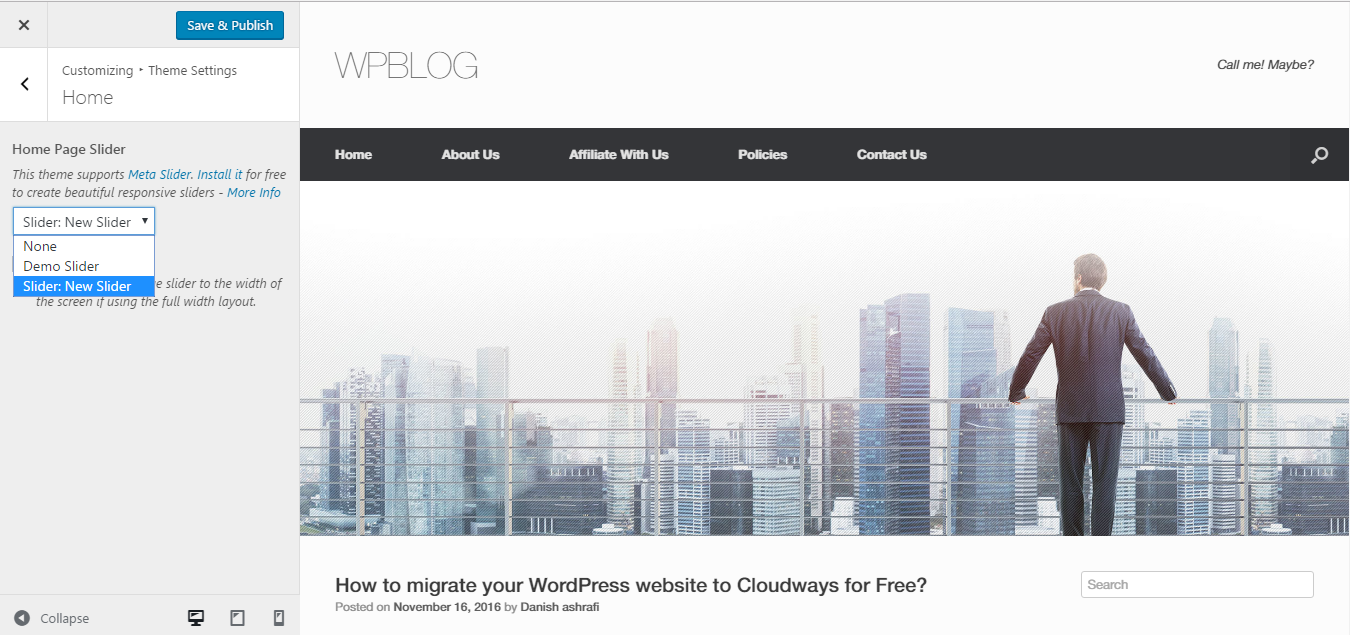
Vantage theme banner can be changed and modify via Appearance > Customize > Theme Settings > Home
Ok, it seems like we need to install the Meta Slider plugin as well to control the banner. So just hit the install link as shown above, and it will activate it for you.
Once you are done installing the meta slider, you need to upload slides. It is shown below:
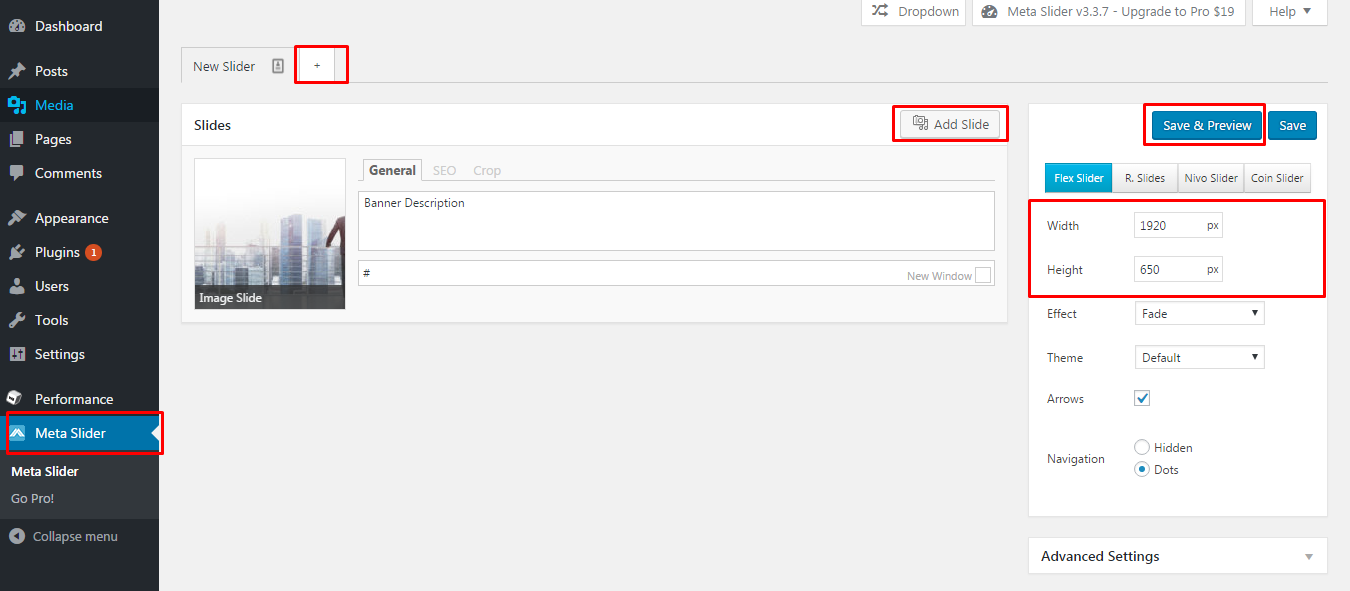
It’s quite simple actually and doesn’t need much modification. Just upload your slide by clicking on the add slide button as shown above and give a slider a proper width and height. In my case, I recommend 1920 x 650 then hit the save button. And you are done.
Now again go to the Appearance > Customize > Theme Settings > Home and choose your slide.
Now, you might want to set a static page for your homepage URL if you are not planning to show your post blogs on the homepage screen.
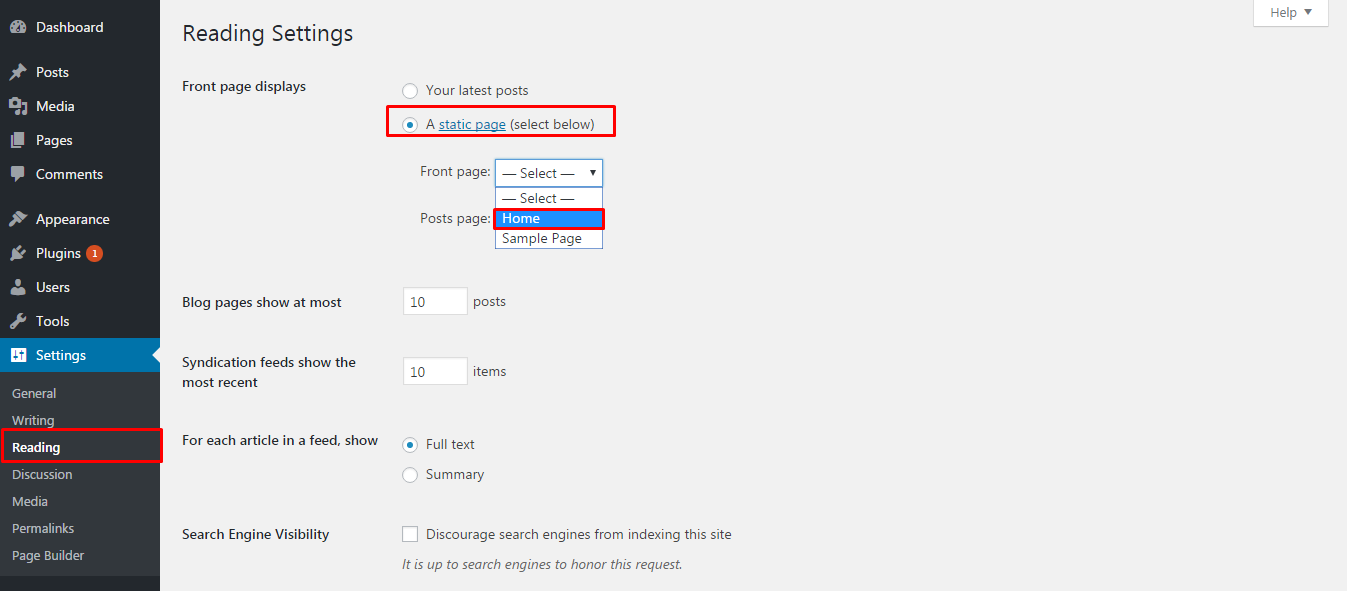
How to Setup Static Page for Homepage
Static homepage page can be set up from Settings > Reading > Click on a static page find the page that you want to be set for your homepage. Once done, then just hit the save button, and you are all set.
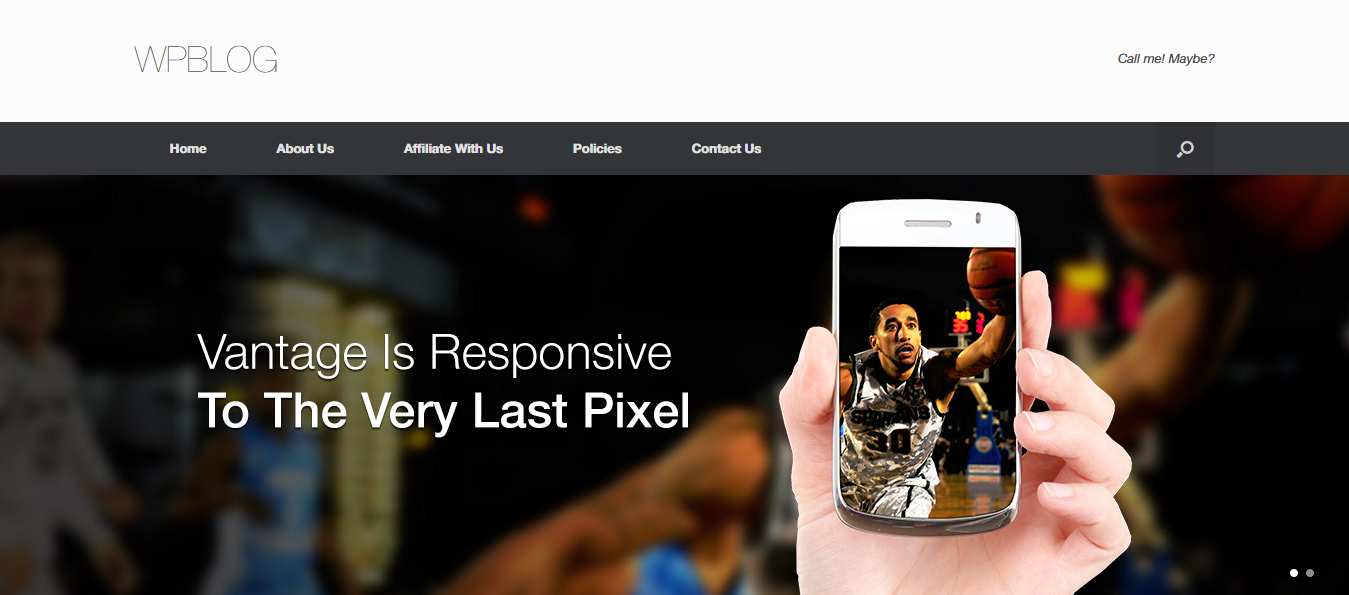
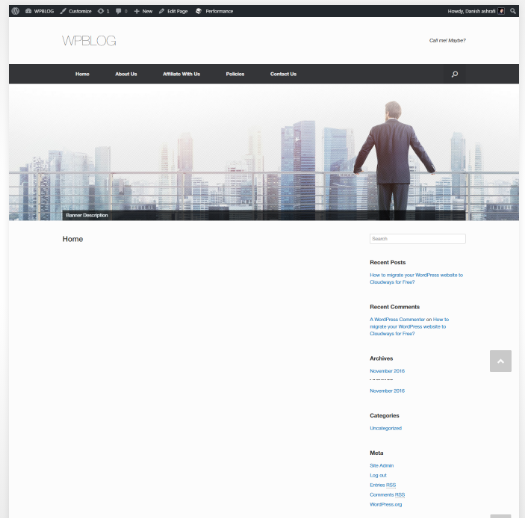
This is how your home page must look like now.
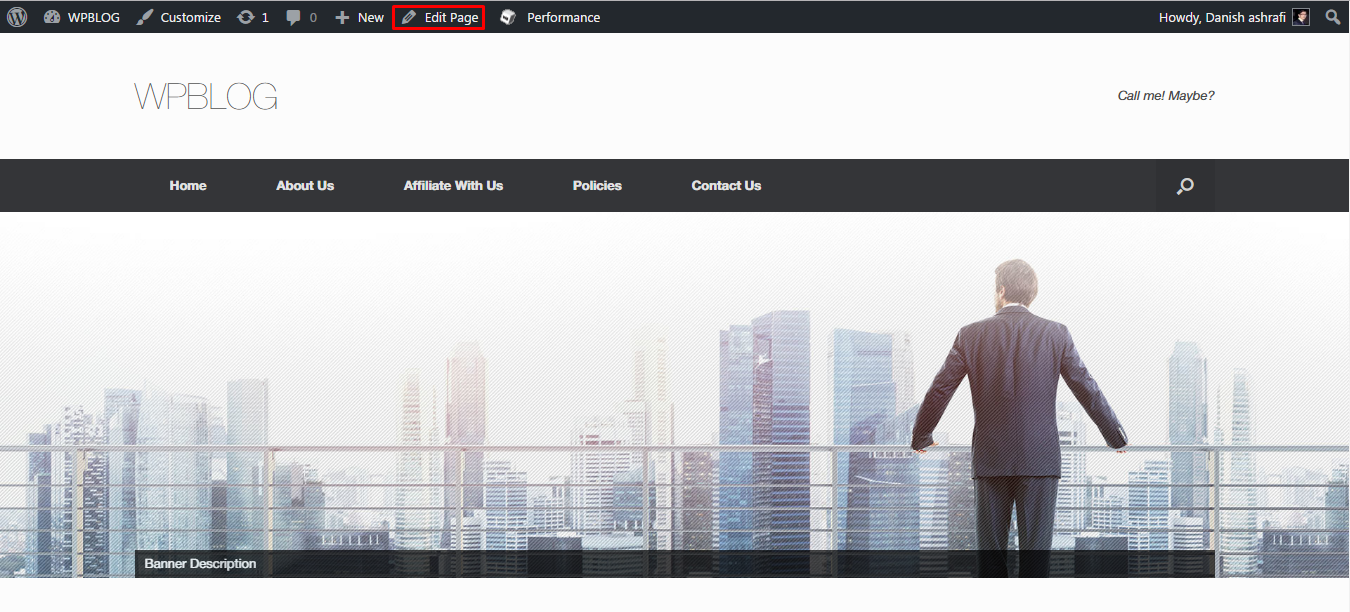
Now you can easily put the content on the homepage by clicking on the edit page option at the top or find your homepage from the pages > pages
Vantage theme has its own page builder which lets you easily modify theme layout into rows and columns style.

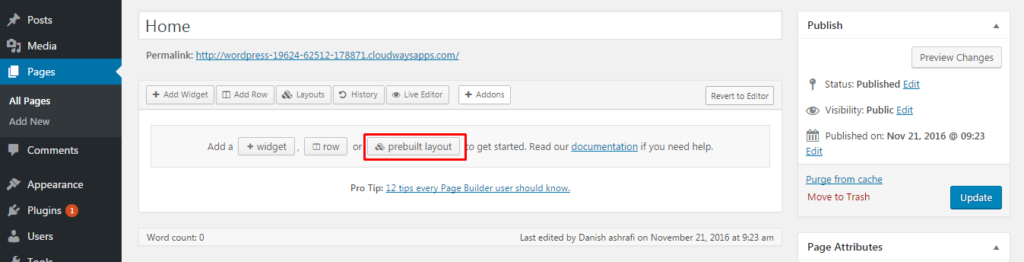
In my case, I’m going to show you how you can setup a default layout of the homepage which is the original theme homepage. Click on Prebuilt layout button, See the screenshot below.
After clicking on the prebuilt layout button, you will get the following screen. Here, you need to select the default home layout screen and then hit the insert blue button at the right bottom.

This is what you will get. The basic rows and columns based layout to play around with.

Make sure you choose the full-width template from the page attribute panel as shown below:

So finally we have our homepage ready.

Now you can easily play around with the page builder and make it as required from the page builder settings as shown below:

Similarly, you can use the page builder on you other inner pages as well and make the custom layout as per your design requirements.
How to Create and Manage Footer
Now while we are done with the pages, post, menu and the banner let’s get to the footer now.
Footer can be modified via Appearance > Widget as shown below:

You can also put any element on footer box as per your requirement. Just drag and drop any element that you want.
In my case, i have a textbox, calendar, and custom menu element.

And you are all set to go 🙂
If you have any confusion regarding setting up the theme, do leave a comment below I would love to hear from you.

Create Faster WordPress Websites!
Free eBook on WordPress Performance right in your inbox.

Moeez is ‘The’ blogger in charge of WPblog. He loves to interact and learn about WordPress with people in the WordPress community. Outside his work life, Moeez spends time hanging out with his friends, playing Xbox and watching football on the weekends. You can get in touch with him at moeez[at]wpblog.com.