How to Install WordPress on Localhost Using XAMPP
Disclaimer: WPblog is a part of Cloudways, a Managed Cloud Hosting service, but any assumptions or analysis made on this property belong solely to their writers.
If you are seeking to run your WordPress website in a much smoother environment, then setting up your WordPress on localhost, such as XAMPP, is the ultimate solution you have. It gives you the liberty to tweak around with themes and plugins and plays a vital role in your workflow.
Also, here on WPblog:
- How to update PHP version in XAMPP.
- If your website is ready, then migrate your site from localhost to live server.
5 Reasons Why You Should Develop Your WordPress Site on Localhost
As far as the significance of localhost is concerned, here is a list of reasons why you should consider launching your WordPress website on localhost before uploading it to a web-host:
- It incurs no cost.
- It is the most secure platform for testing your website.
- No external influence is involved giving you the leverage of being as flexible as you want.
- You can perform more efficiently and quickly.
- You suffer no downtime.
But, before we go ahead with educating our readers on how they can setup an ultimate localhost environment for WordPress, it is first necessary that they should know what XAMPP is.
Supporting PHP 7, XAMPP is a lightweight tool that enables you to create an amazing web server environment on your local machine for testing your WordPress website. It is composed of four elements; Apache, MySQL, PHP, and Perl.
Although, you can run XAMPP environment on Mac and Linux, however, today we are going to educate you how you can set up XAMPP on Windows 10.
Installing XAMPP
First off, download XAMPP from a reliable source such as the Apache Friends website.
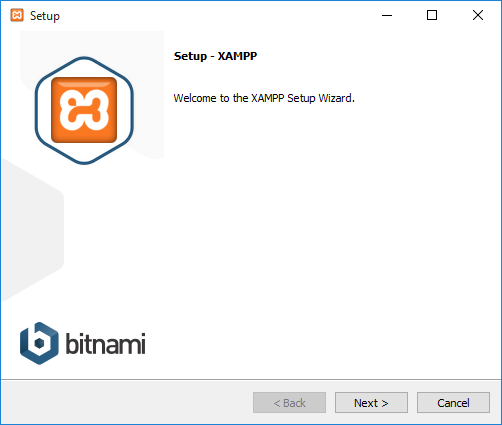
The file size is around 109 MB. As soon as your download completes, initiate the launcher. XAMPP setup wizard is all that you need to guide you through the installation.
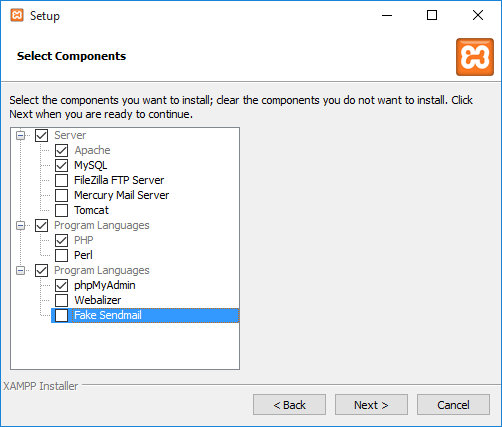
Click Next. It will lead you to a new screen where you can custom select the components that you wish to install in your localhost. Since, we want to run WordPress in our localhost environment, leave MySQL and phpMyAdmin checked and uncheck the remaining options.
Create the directory path where you wish to install your XAMPP file; for example, C:\Program Files\XAMPP.
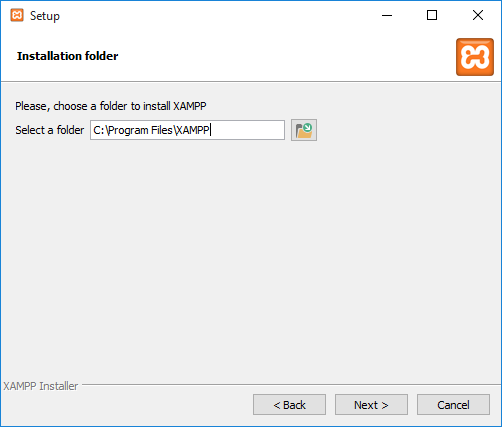
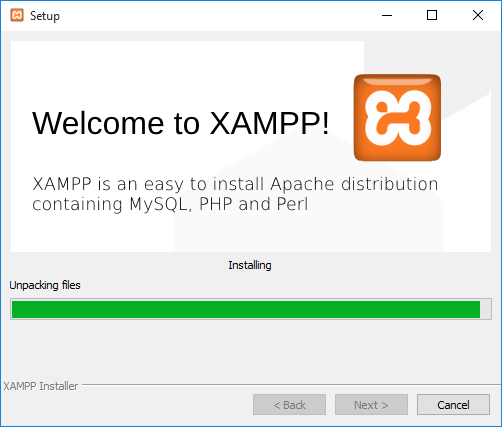
After providing the root path to the directory, click Next and wait for XAMPP to install required files on your local machine.
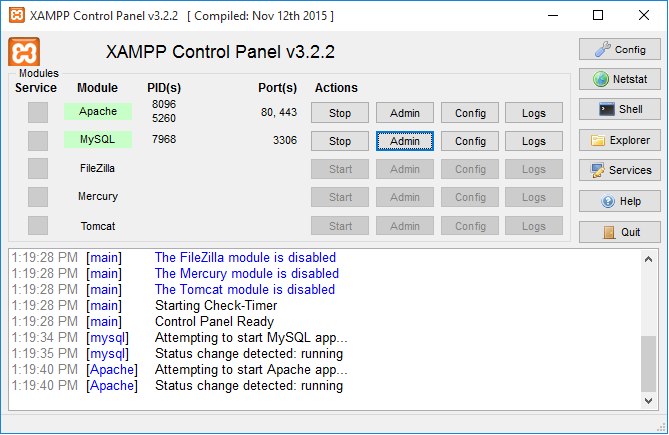
From your operating system’s Applications folder, navigate to the XAMPP subfolder and launch XAMPP Control Panel. The following screen will be shown:
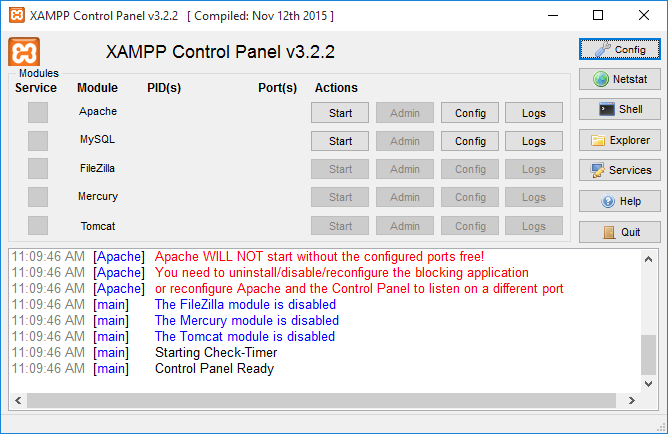
See all that red text! This happens when you have port errors on your local machine.
Fixing Port Errors
XAMPP usually prompts errors when other different programs are running on port 80 and 443. These two ports are required by Apache and MySQL to run.
In order to fix the errors related to ports, follow these simple steps:
- Go to Start, type in “services.msc”, and select the best match.
- Scroll down in the Services window to find World Wide Web Publishing Service.
- Right-click on it and select Stop.
- This should free up port 80. When you restart XAMPP, it should run without errors.
If the issue remains unresolved, you can force unblock the ports by imposing a new firewall rule:
- Open Windows Firewall on your machine and click on Advanced Settings on the left
- Click on Inbound on the left and then on the far right, click New Rule.
- Click Port and then TCP. In the field below for Specific Port types in “80, 443” and click Next.
- Check Allow the Connection box and then click Next.
- Make sure all options are checked and click Next.
- In the Name field, enter whatever you want, but for the sake of consistency let’s type in LOCALHOST1. Click Finish.
- Now repeat steps 1-6, but name this new rule LOCALHOST2 and click Finish.
- Restart your computer.
By implementing these steps, you will see that ports 80 and 443 are now locally open on your computer.
Starting Up XAMPP
Once all your port errors are all fixed, we will continue with setting up the localhost environment. Keep in mind that the above steps are only applicable if the operating system observes port errors. In this case, it’s Windows.
Now enter XAMPP Control Panel, start Apache and MySQL.
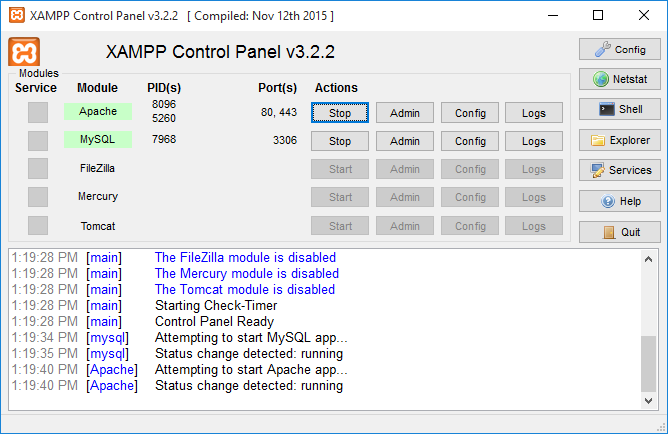
As you can see, both the services are working perfectly now.
Creating A MySQL Database
To run WordPress on localhost, we require a database. The database helps in organizing and securing the content of your website effectively.
To create a database, click the Admin button in the MySQL option from your XAMPP control panel.
You will be navigated to phpMyAdmin window. It will automatically pop open on your screen.
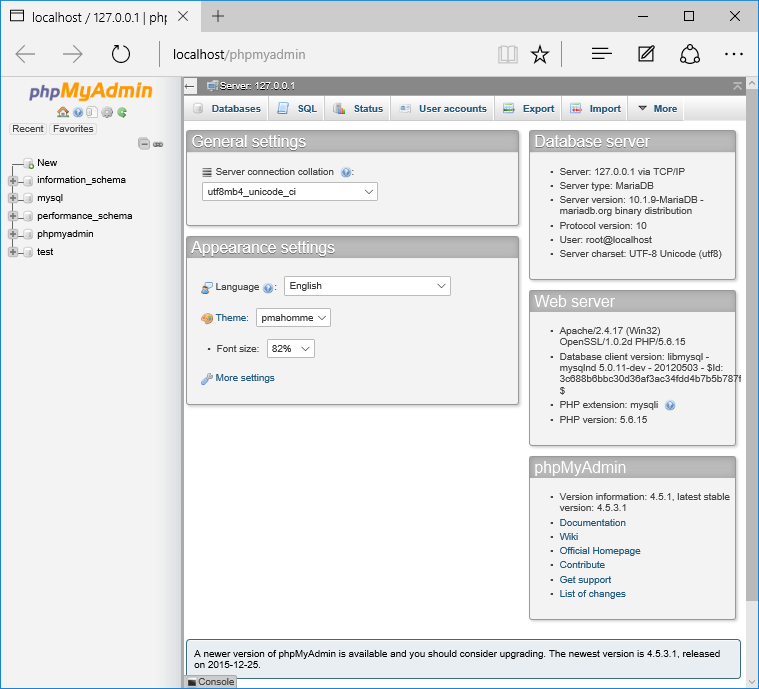
In the menu bar of the phpMyAdmin, select Databases.
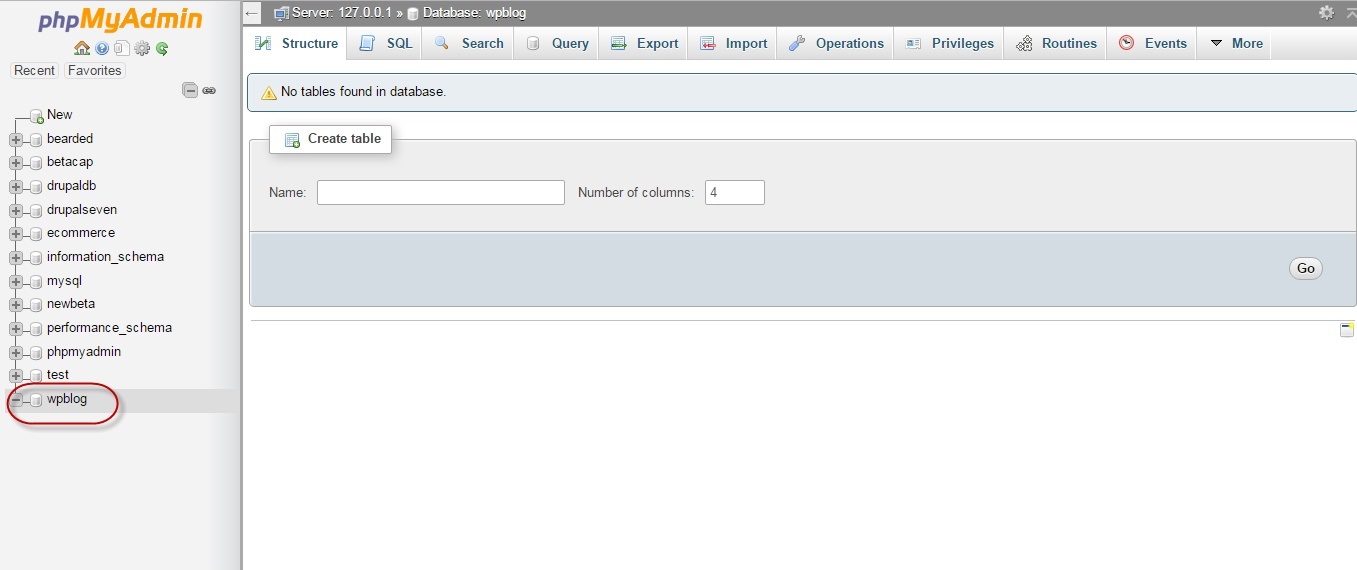
It will display a number of pre-created databases on your computer. All you have to do is create a new database. For now, we will create a database termed as WPBlog and hit Create.

A new database named “wpblog” will now be created for your WordPress website running on localhost. You can observe and access it from the left panel of phpMyAdmin.
Setting Up WordPress
We are finally done with creating the database and launching XAMPP on our local machine.
First, download WordPress installation package.
To ensure full functionality, the WordPress should be installed in the htdocs folder available in the XAMPP root directory.
As discussed above, XAMPP is installed in the folder “Program Files” of in the C: drive.
Locate the folder “XAMPP” and then install WordPress in the subdirectory “htdocs”.
Unzip the files in C:\Program Files\XAMPP\htdocs\[Folder name].
In our case, we have set the folder name to WP.
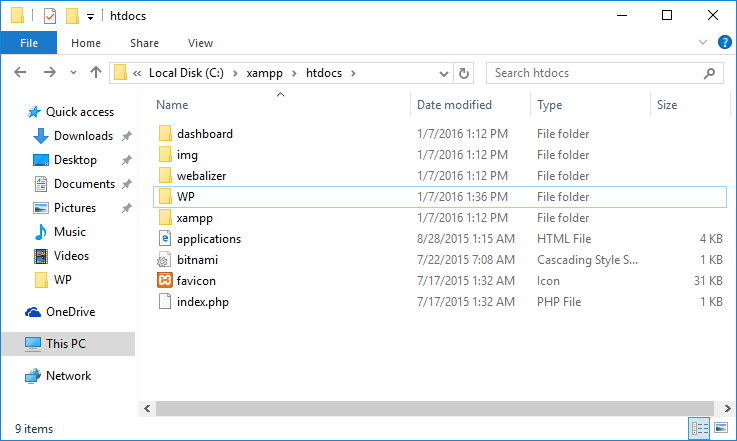
Voila! We have successfully set up WordPress on our local machine. Make sure that the XAMPP is running.
In order to access WordPress, start up your browser and in your address bar, type down the following address http://localhost/wp/.
Installing WordPress
Now, it’s time to install it before you start playing around with your test website.
Choose a language.

For now, we will select English (United States).
Click Continue.
Next, enter wpblog in the Database Name field. Make sure that your username is set to root. Leave the password section blank.
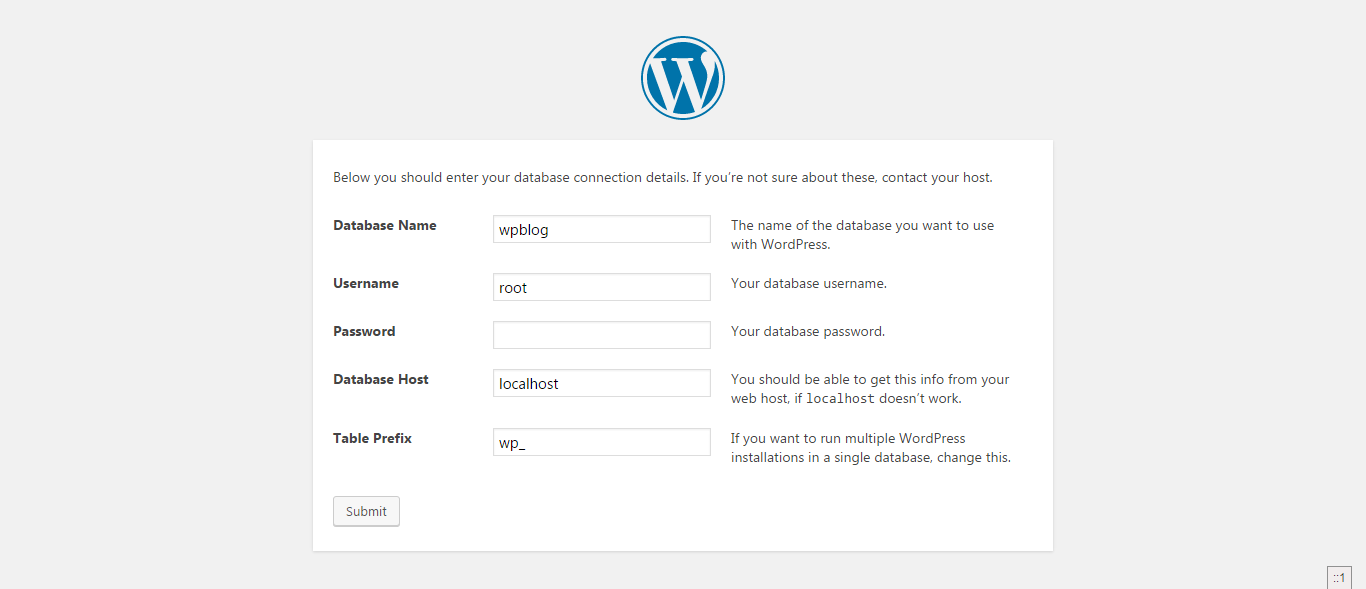
Leave the rest as it is. Click Submit.
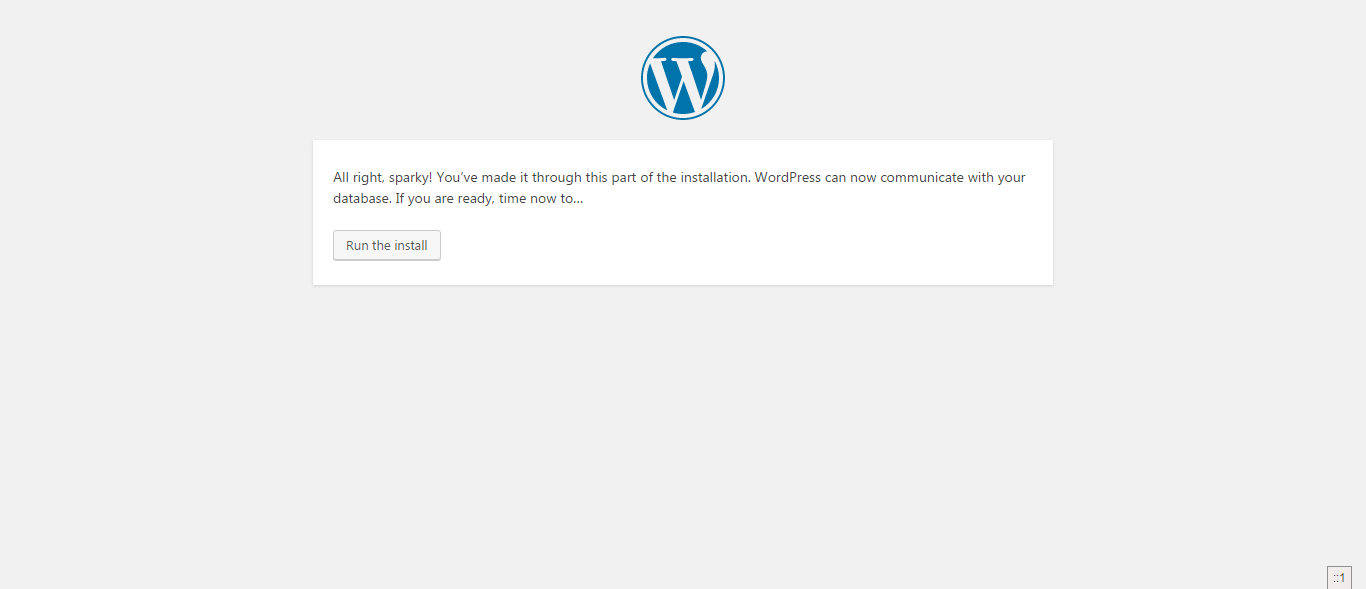
As soon as you hit the submit button, you will be directed to a small message where you have nothing, but click Run the Install.
Now, set your Site Title, Username, Password and Email Address for accessing the WordPress admin panel.

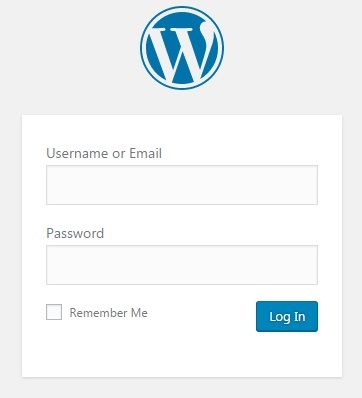
There you go, your WordPress will be installed and launched automatically on completion. Every time you wish to access your WordPress admin panel, you simply have to use your localhost address with a prefix wp-admin. Now your host address will become http://localhost/wp/ wp-admin which will lead you to a login page as shown below.
Hope you find this article helpful as we have explained a thorough step-by-step process on how one can set up WordPress site on localhost.
So You’ve Installed WordPress Locally, What Now?
Once you have installed WordPress on your localhost, you would want to treat it like a live website. Log in to your WordPress website and get used to the admin panel by exploring through different options on the sidebar.
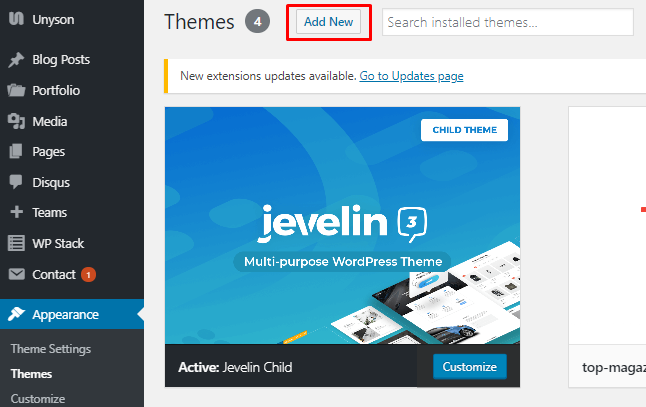
To kickstart your WordPress website, you would need to download and install a theme. To do that, navigate to Appearance and select Themes
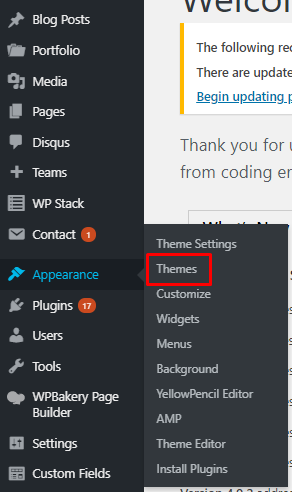
From the Themes window, select the Add New option to download and install the WordPress theme of your choice.
Next comes plugins. Plugins are essential to make your WordPress website function smoothly. Check out this list of essential WordPress plugins that you must install on your new website.
Navigate to Plugins on the sidebar of your WordPress admin panel and select Add New.
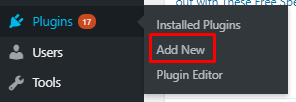
From the Add New option, you will be able to download and install new plugins to your WordPress website.

Migrate from Local to Live
While you are jazzing up your local website with a nice theme and cool plugins, you must also migrate your WordPress from localhost to live site.
But before you do that, you must create duplicates of your locally hosted WordPress website.
Creating Duplicates
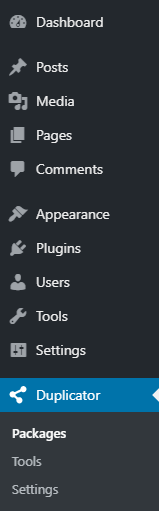
To create duplicates, you must download the Duplicator plugin on your WordPress.
Once you have downloaded and activated the plugin, navigate to Duplicator option on the sidebar of your admin panel.
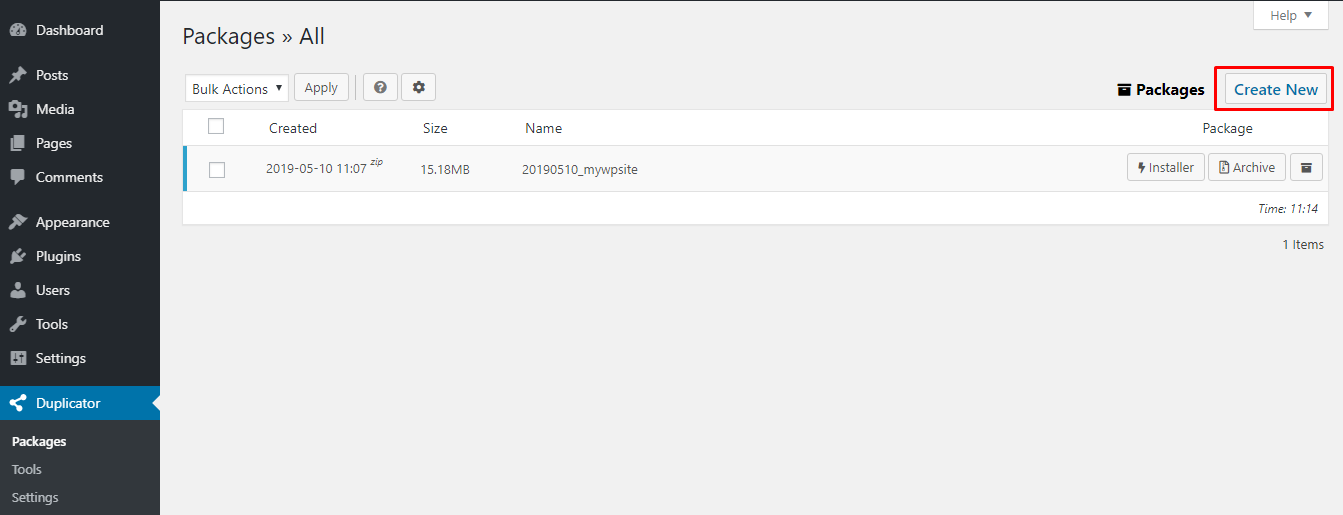
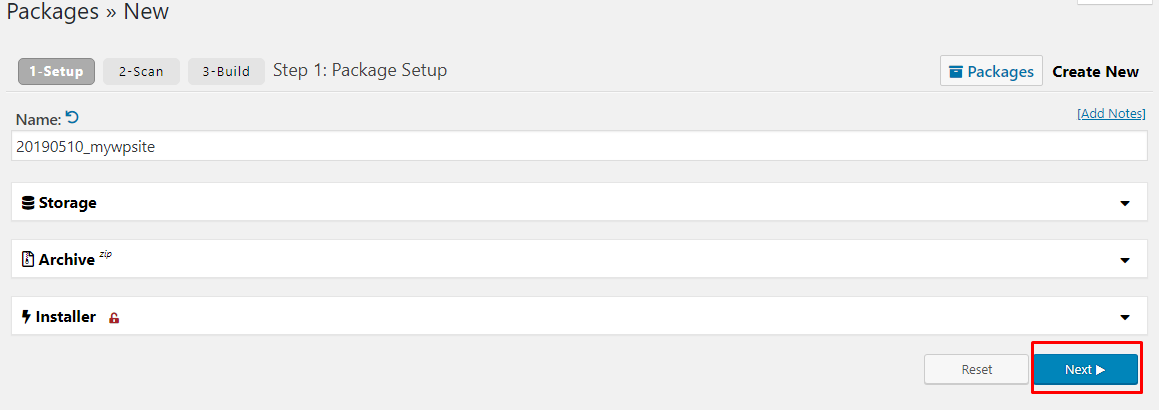
Click on Packages to open new window. Click on Create New to start creating duplicate of your WordPress website.
The next step is to name your duplicate WordPress and click Next.
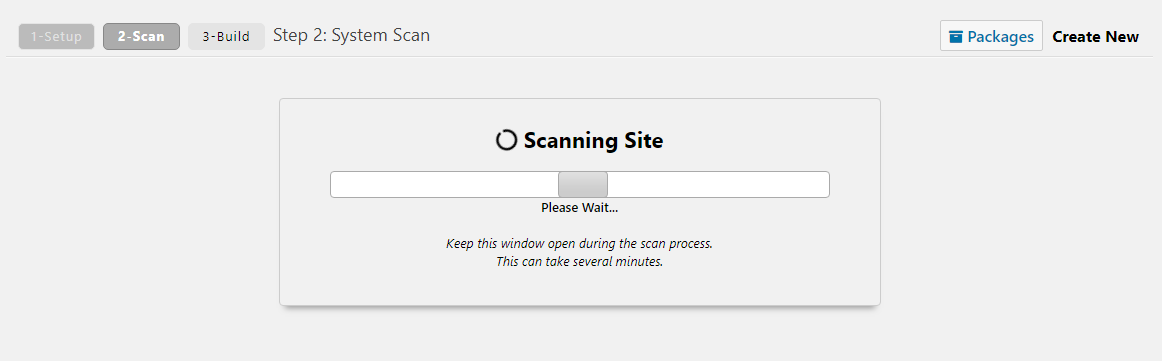
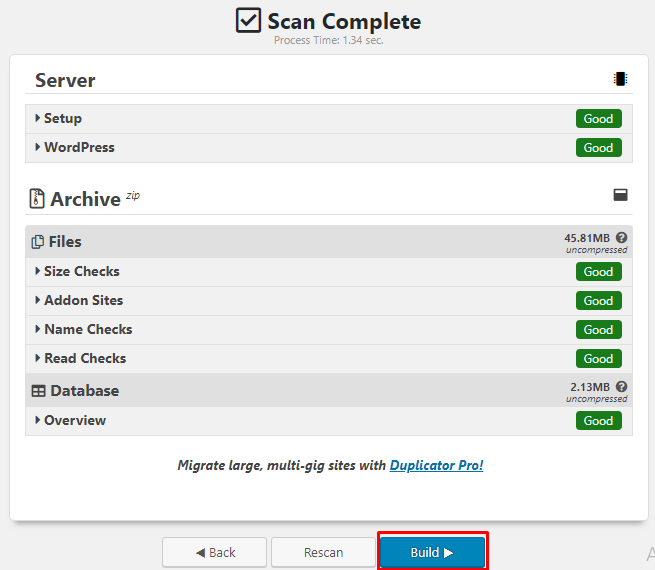
The plugin will run a few tests and scan your website to see if everything is in place.
Click on Build to create a duplicate of your WordPress.
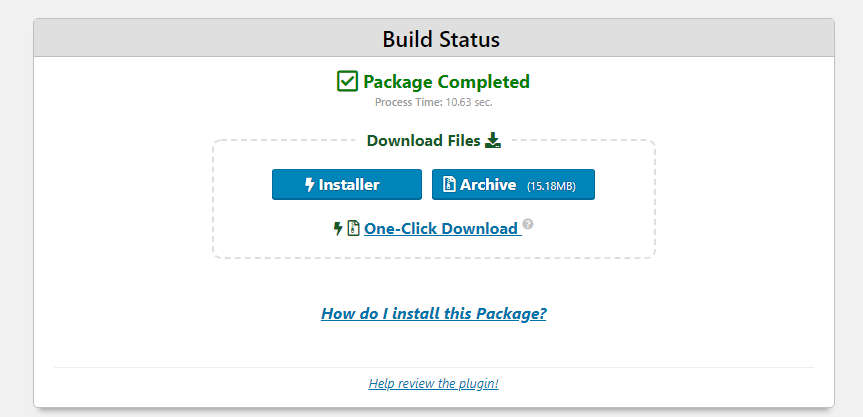
Once your duplicate is ready, click on One Click Download to download the files of your WordPress’s duplicate.
Now it’s time to migrate your WordPress from local to live host.
I am going to use Cloudways hosting to show you how you can move your locally hosted site to a live host.
The first step is to sign up and login to your Cloudways platform.
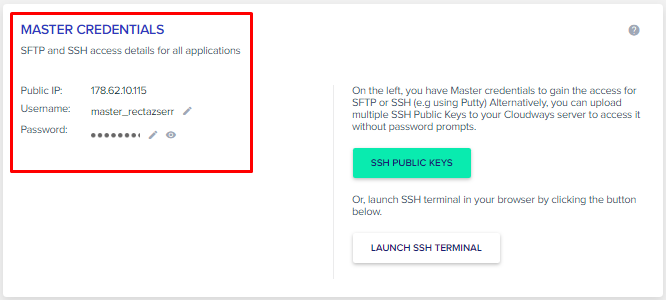
Once you have logged in, click on Server to get Master Credentials to your FTP.
At this point, you have your WordPress files on your computer. To take it live, you must transfer them to the server. In order to do that, you would need a FTP. I am using FileZilla for this tutorial.
Once you have installed FTP, copy the master credentials and login.
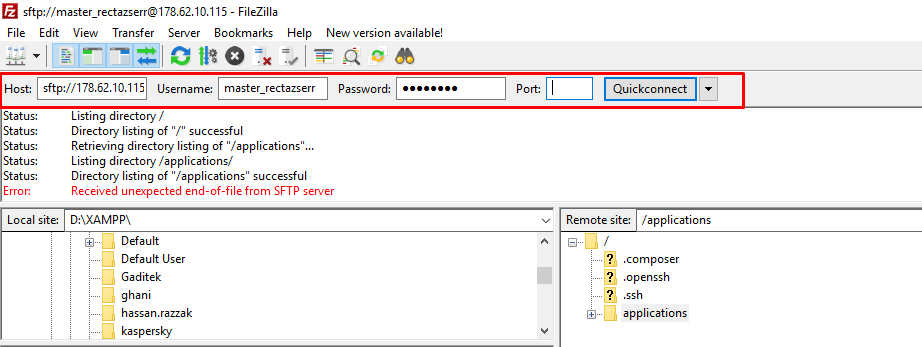
On the bottom right, you will see a list of applications on your Cloudways server. Select the specific application and open the public_html folder.

As you can see, I have multiple applications on my server. So I will select one of these and enter the public_html folder of that specific application.
Copy the WordPress installation from your system to the public_html file. Make sure that you delete the current files from the public_html folder before copying the new files.
The next step is to run the installer setup on your live server.
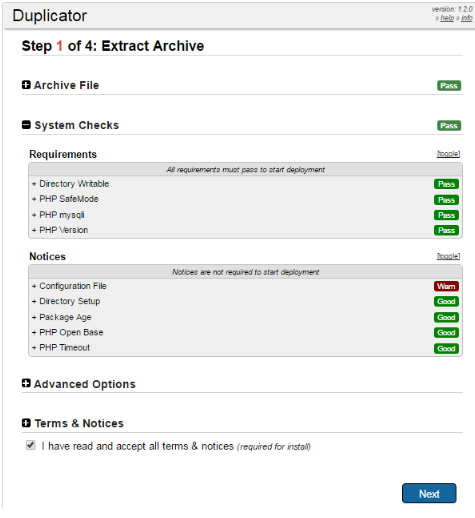
Type your website address on your browser and add installer.php at the end of it. Once you are on the installer page, you will be taken through 4 steps.
The first step is to Extract Archive. To do that you just need to click Next button at the bottom of the page.
The next step is to install database. You will be asked to add database credential which you can find from the Applications tab in the Cloudways platform.
Head over to the application that you are working on and you will see the credentials at the bottom.
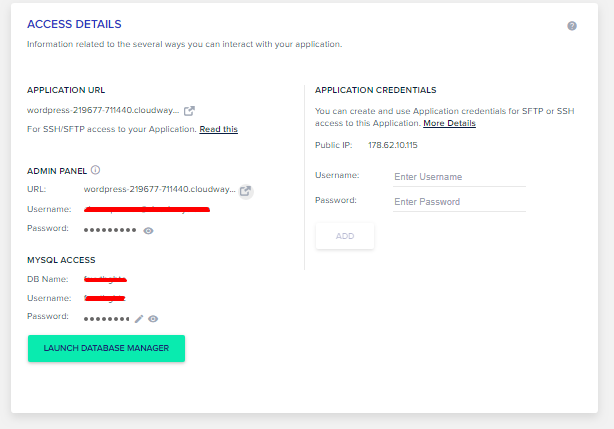
Enter these credentials in the fields below and click next.

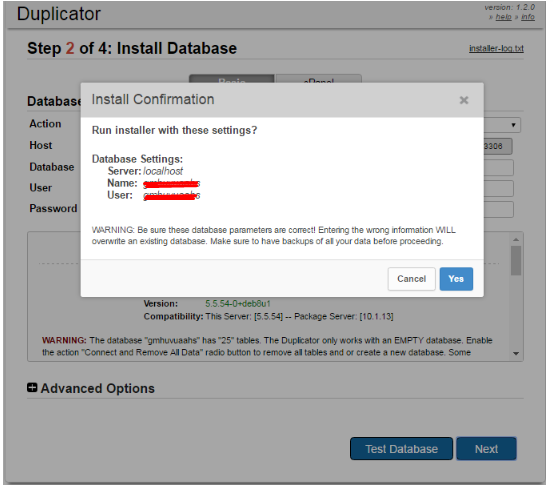
The Duplicator plugin that you installed earlier runs on empty databases. To empty your database, check the boxes in the tables. You can also create a new database altogether.
Once you have emptied your database, click Yes and move to the next step.
Next, you will be given a URL, Title, and Path for your website.
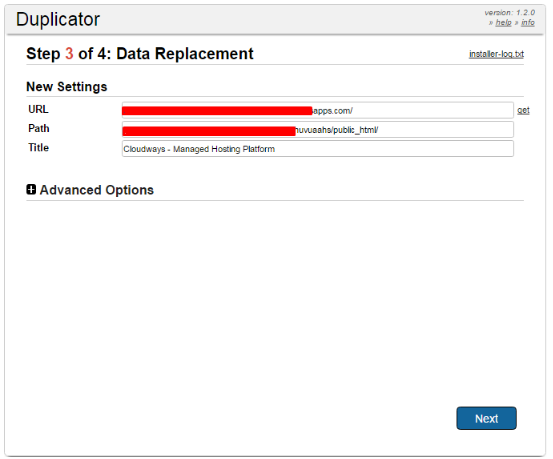
Click Next to move to the final step. The final step consists of 3 more steps. Don’t worry, these are small steps and won’t take long.
The Duplicator plugin will ask you to:
- Save Permalinks
- Test Site
- Security Cleanup
Once you are done here, your new live WordPress website will be ready.
Also Read: Fix USB Device Not Recognized Error in Windows 10
Frequently Asked Questions
Q1. What is XAMPP?
XAMPP is an open source solution and a stack package developed by Apache Friends. The stack consists of:
- Apache HTTP server
- MariaDB database
- Interpreters for scripts written in PHP
- Perl programming languages
Q2. How do I use XAMPP?
Step 1: Click the Admin button in your XAMPP Control Panel from the MySQL section.
Step 2: To launch phpMyAdmin, click on Admin in the MySQL.
Step 3: On the new browses, click Admin to setup MySQL. You can also go to “localhost/phpmyadmin” from your browser.
Q3. How do I open a php file in XAMPP?
In your C: drive, you will see the “HTDocs” folder. Place your PHP files in that folder. The file path is “C:\xampp\htdocs” for your web server. Your filesmust be saved with the “.php” file extension. Openup any Web browser on your desktop and enter “localhost” into the address box.

Create Faster WordPress Websites!
Free eBook on WordPress Performance right in your inbox.

Moeez is ‘The’ blogger in charge of WPblog. He loves to interact and learn about WordPress with people in the WordPress community. Outside his work life, Moeez spends time hanging out with his friends, playing Xbox and watching football on the weekends. You can get in touch with him at moeez[at]wpblog.com.