How to Add and Organize Custom Menus in WordPress
Even on a simple WordPress website, the volume of data and the form of media and posts could be mind boggling. There are two important ways of making sense of the chaos. The first is the use of categories and tags option.
In this tutorial, I will describe preferably the second method and demonstrate the use of custom menus for WordPress websites. Menus are a more effective way of organizing posts and pages. While categories and tags are generally limited to post management, menus help categorize pages.
Menu Creation
WordPress has a very comprehensive menu creation process. However, in practical terms, menu creation and placement is influenced by the current theme of the WordPress and the UI/UX policy. It all comes down to the ease and user-friendliness experience that the website developer likes to extend toward the users.
I will start with demonstrating how to create custom menus.
The first step in creating a menu is to define it. You have to define what type of menu you want on the website.
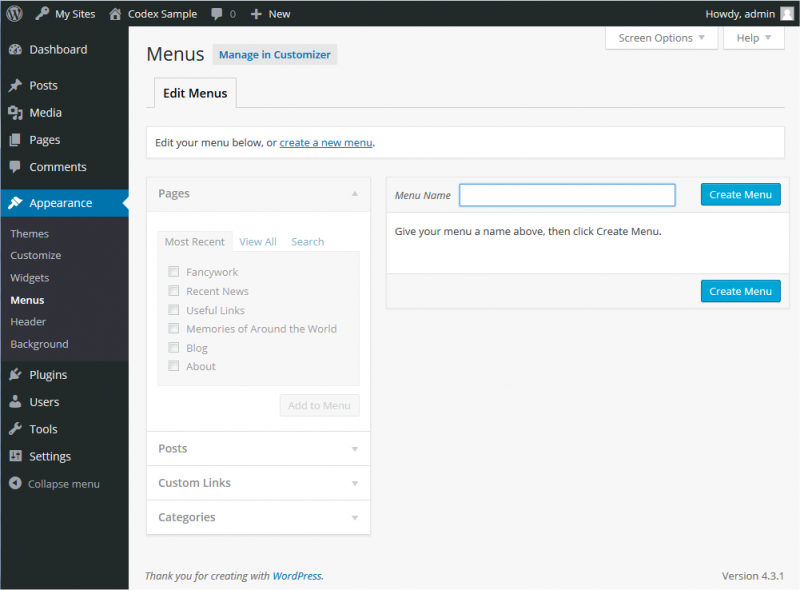
To access menu items, navigate to Theme > Appearance, select Menus. This will open a new page with the title Edit Menus. This page is used to create a new menu item for the website. The page contains separate sections for adding pages, posts, custom links and categories to the menu’s structure. Once you are done with defining the menu structure, give the menu an appropriate name and hit the Create Menu button to finalize the menu creation process.
Following are some of the functionalities that you can perform once you have successfully created a menu in WordPress.
Example
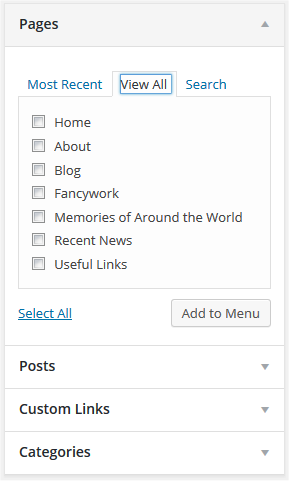
Available menu items that could be added to a menu are available through the widgets on the left side of the page. These widgets include pages, posts, custom links and categories. To add a particular menu item, simple check the appropriate box in the widget.
Here is an example of how you can create a menu:
Click the drop down menu for the Pages widget and select View All. This will present all the available pages in a checkbox format. Simple check the boxes against the pages that you wish to include in the menu. Once done, click Add to Menu to finalize the selection.
Note: Don’t forget to click the Save Menu button on the Menu screen. This will permanently save the changes to the menu.
Delete Menu Items
To delete a menu item, go to the menu editor window. As discussed above, it is the list of drop down option located at the left side of the WordPress menu editor.
Expand the drop down menu for the menu to be modified and simply remove the item by unchecking the appropriate box. Once done, simply click Save Menu button to save the changes.
Note: To delete an entire menu, use the Delete Menu option at the bottom of the menu editor window.
Customize Menu Items
Customizing a particular menu involves changing several options for the menu. These options include:
- Navigation Label
- Title Attribute
- CSS Classes
- Link Relationship
- Description
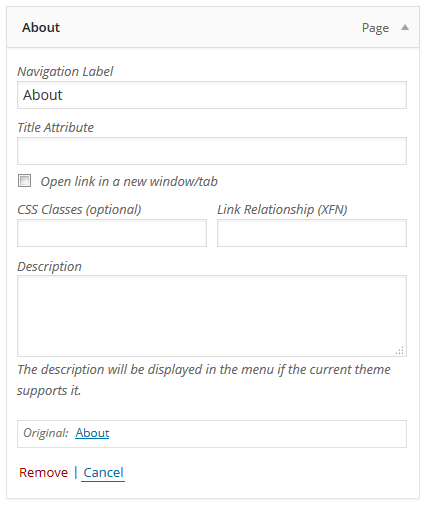
Customization options are available on the right side of the menu editor window. Simply go to Appearance > Menus. You can customize specific menu items by selecting the menu items (available as drop down menus)
In order to learn more about these options, please refer to the WordPress Codex.
Multi-Level Menus
You can also create multi-level menus from the WordPress Admin panel. These menus are present in the right side of the screen accessible through Appearance > Menu.
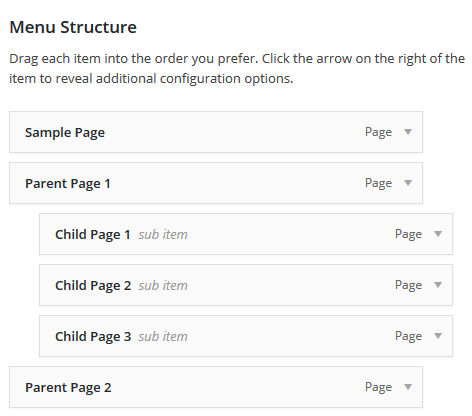
Multi-level menu items are generally presented as headings in a formal report document. Level 1 headings are the main section headings, nearest to the left of the page. Level 2 headings are sub-section headings indented a little further to the right. Level 3 and Level 4 headings are subordinate headings and are indented further to the right.
In the WordPress menu editor, you could use the simple drag-and-drop process to create a multi-level menu. Similarly, you could drag items up or down to change the order of appearance in the menu. In order to create sub levels, simply drag them to left or right.
Here is how a sample multi-level menu structure looks like:
Add Menus to the Website
To add a custom built menu to the website, simply scroll to the bottom of the menu editor and click Save Menu. Before you do so, always remember to check the box of the location of the menu in the theme (use the Theme locations checkbox menu).
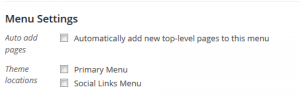
Note: Addition of custom menus is very much dependent upon the current theme installed on the website. If your current theme does not support custom menus, you could add custom menus via the Custom Menu widget in the Appearance Widgets Screen.
Conclusion
In this tutorial, I discussed how you could create, edit, delete and add custom menu items to a WordPress website. I hope you could now add these menu items without any issues. However, if you still have an issue or would like to add to the discussion, please leave a comment.

Create Faster WordPress Websites!
Free eBook on WordPress Performance right in your inbox.

Moeez is ‘The’ blogger in charge of WPblog. He loves to interact and learn about WordPress with people in the WordPress community. Outside his work life, Moeez spends time hanging out with his friends, playing Xbox and watching football on the weekends. You can get in touch with him at moeez[at]wpblog.com.