How To Setup Cloudflare CDN On WordPress For Free

There are a lot of webmasters around that spend a lot of time optimizing their WordPress websites for better speed. Optimizing static elements like images, CSS and JS files can be a lot of work, especially if your website has a large set of images and custom CSS and JS files.
A better approach on how to optimize such a media-heavy website is to use a content delivery network or better known as CDN. There are many best WordPress CDN Providers available that can easily be connected to any WordPress website in order to speed it up.
In this tutorial, I am going to teach you how to easily configure Cloudflare’s free CDN on any WordPress website.
Step 1: Create An Account on Cloudflare
First things first, to use Cloudflare, you obviously need to sign up for their service. The first tier is free to use and to start with.
Head over to Cloudflare.com and sign up, and after that, add your website. Cloudflare will scan your website, that may take a few minutes. Meanwhile you can watch a helpful video on how Cloudflare helps and works to speed up your website.
Once the scan completes, you will see a few settings; Make sure your website points to the IP address of your server and the www record points to your website name. The cloud icon should also be orange as shown in the image. The orange icon means that these records will be served through Cloudflare servers.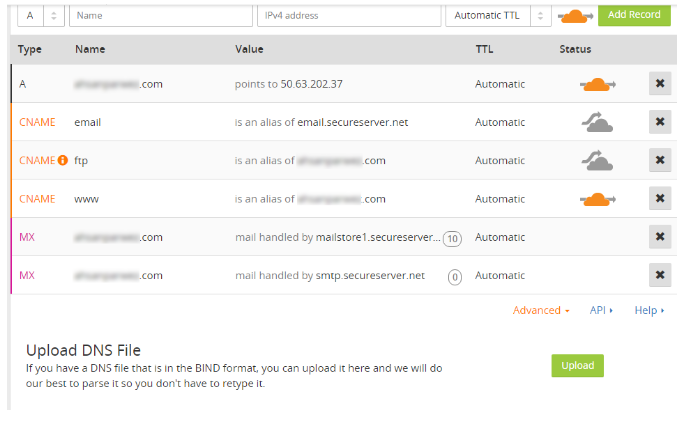
On the last step you will see nameservers of Cloudflare; you will need to add these nameservers to the domain registrar. For now copy the nameservers.
Step 2: Install & Activate Cloudflare WordPress Plugin
Cloudflare has their very own WordPress Cloudflare plugin that is available for free in the WordPress.org plugin repository. You can easily install it on any WordPress website by logging into your WordPress Admin -> Plugins -> Add New and search for Cloudflare.
Install then > activate the WordPress Plugin and then jump into its settings to configure it.
The plugin will ask for your email and the API key of your Cloudflare account. To get your API key, sign in to your Cloudflare account and go to account settings. Scroll down and you will see Global API key, copy the key and paste it in your WordPress website.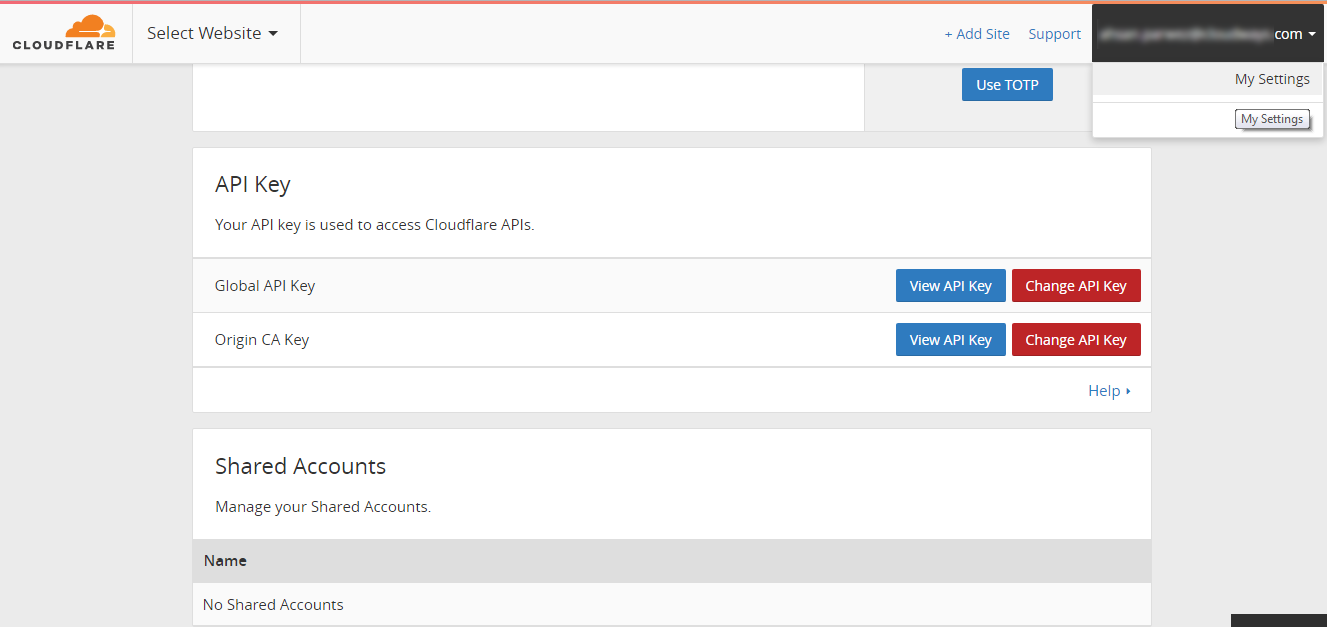
By configuring this plugin you can easily control the settings of your Cloudflare CDN and other features directly from the WordPress backend.
Step 3: Configure DNS Records on Domain Registrar
Finally, you will need to add DNS records in your domain registrar. Most of the hosting providers have similar methods of customizing DNS records.
In this tutorial, I will show you how to do it on Godaddy. Log in to your Godaddy account and then navigate to domain management, find and click the option “Manage DNS”.
Scroll down and you will see Nameservers. Click ‘Change’ to add custom nameservers. In our case, it is Cloudflare’s nameservers.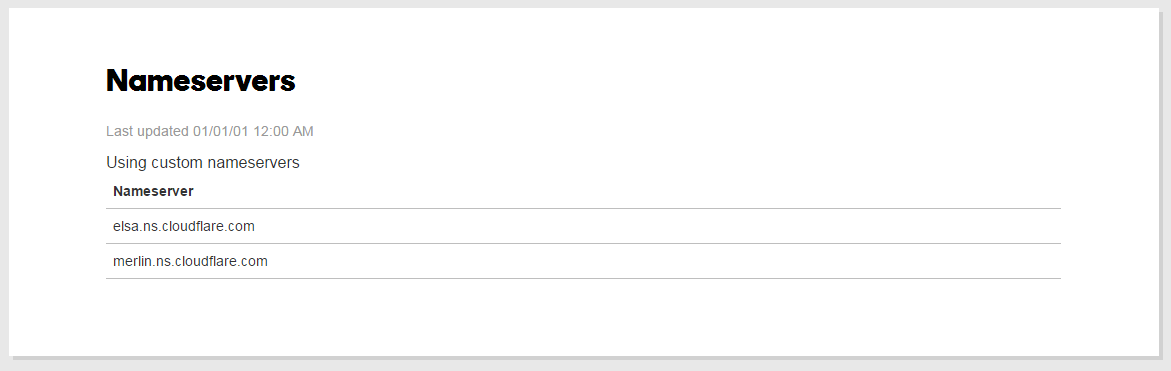
You will see the status as pending, but in a few minutes, you will get an email from Cloudflare that your domain is now configured to free plan on the Cloudflare CDN.
That’s it! CDN will help you smooth out the loading times of your website. Adding a CDN will also make your website handle more traffic spikes. If you have any questions do let me know in the comment section below.

Create Faster WordPress Websites!
Free eBook on WordPress Performance right in your inbox.

Moeez is ‘The’ blogger in charge of WPblog. He loves to interact and learn about WordPress with people in the WordPress community. Outside his work life, Moeez spends time hanging out with his friends, playing Xbox and watching football on the weekends. You can get in touch with him at moeez[at]wpblog.com.