WordPress Genesis Framework – Layout Customization
In the previous article, I helped you out with the basic Genesis Framework settings. In this part of the series, I will share how the Genesis Layout system works and what layout customization options are available. You will know the actual power of the Genesis Framework when these Layout customization’s are understood.
1 – Configuring Homepage
You can set a static page as homepage or select the latest posts as your homepage. There are a lot of widgets that you can use to build an amazing homepage.
Blog-Style homepage
This style displays the latest posts on your homepage.
Note: Do not add any widgets in the homepage-specific widget area, as you would want your homepage to only show the latest posts.
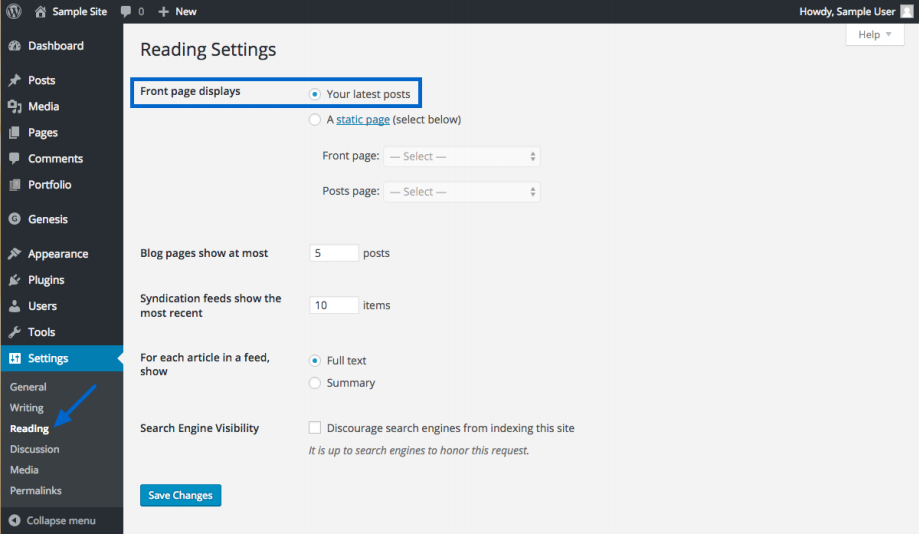
Static Homepage

Use the static homepage option if you want to show a single page as your homepage. From the Dashboard, go to Appearance > Reading and select A static page option.
Now, select a static page for Front page and Posts page.
2 – Navigation Menu
Genesis utilizes the WordPress default menu feature to build menus. You can create and manage menus either on the WordPress Dashboard or Customizer.
Create Menus on the WordPress Dashboard
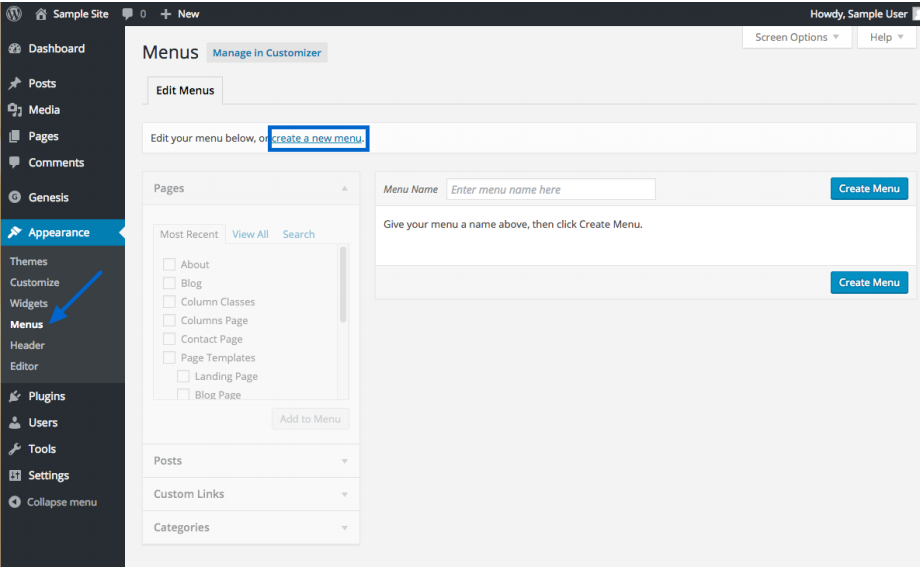
To add a menu via Dashboard, go to Appearance > Menus and click Create new menu.
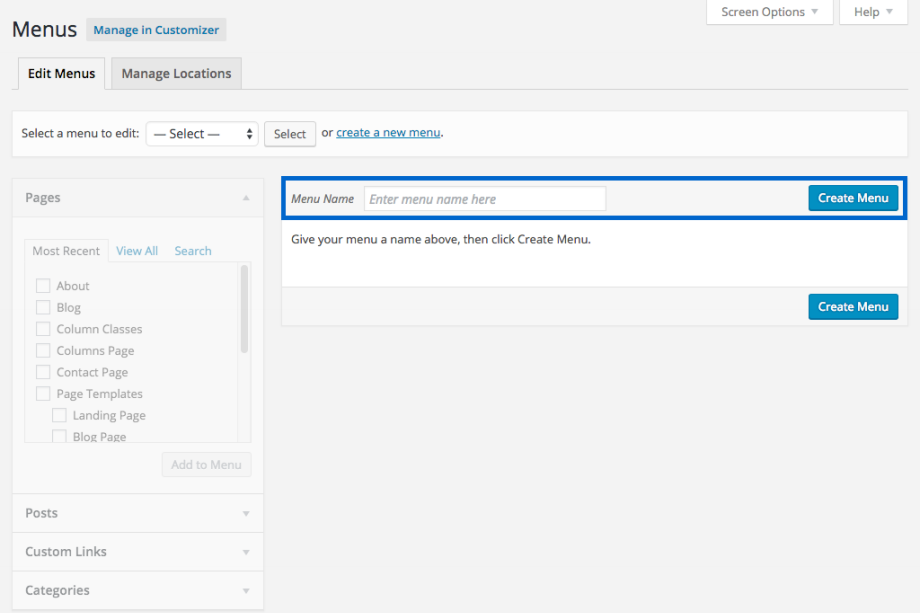
Click Create Menu and start building your menu as you do for WordPress.
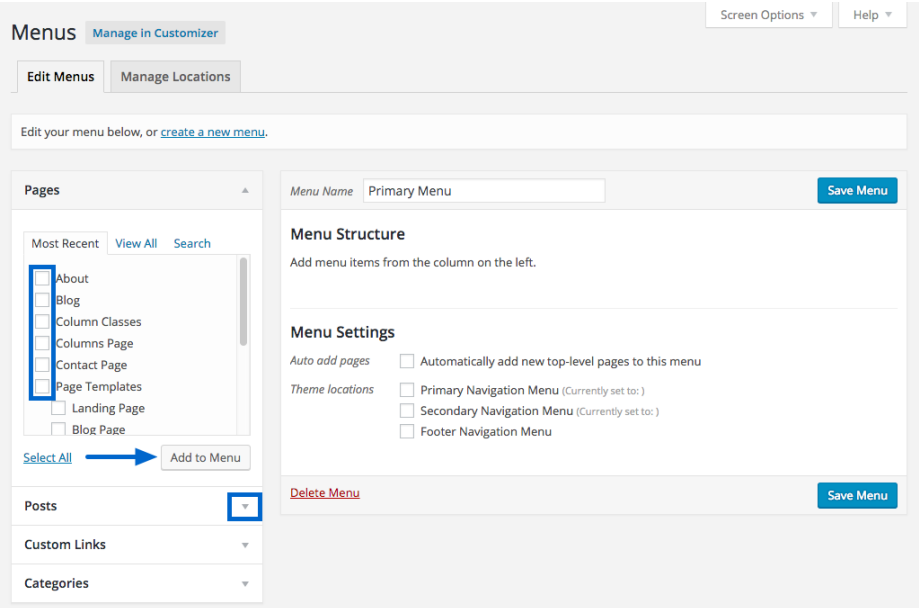
Select the Pages, Posts, Custom Links and Categories that you want to show in the menu and then press Add to menu.
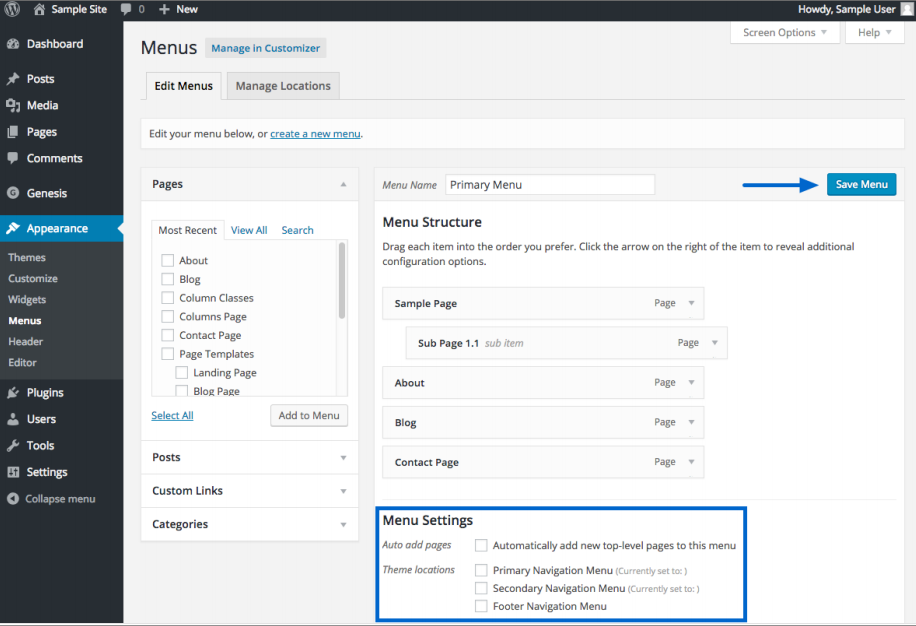
Click Save Menu to save the menu.
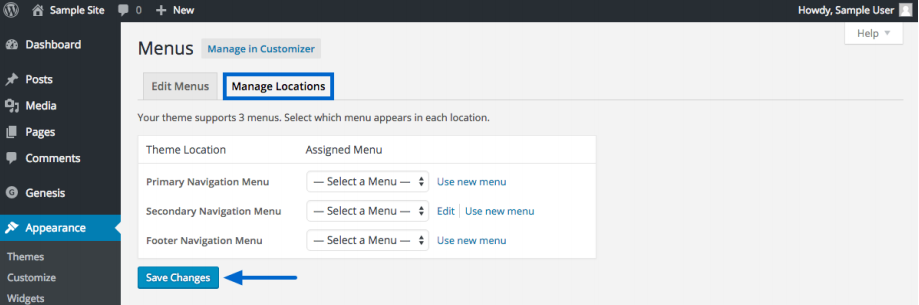
Each Child theme has specific menu locations. You can click the Manage Locations tab and manage each menu position. Click Save Changes to save your settings.
3 – Widget Areas in Genesis Child Themes
Many themes include some common widget areas where you can add content like:
- Header Right Widget Area
- Primary Sidebar Widget Area
- After Entry Widget Area
- Footer Widget Areas
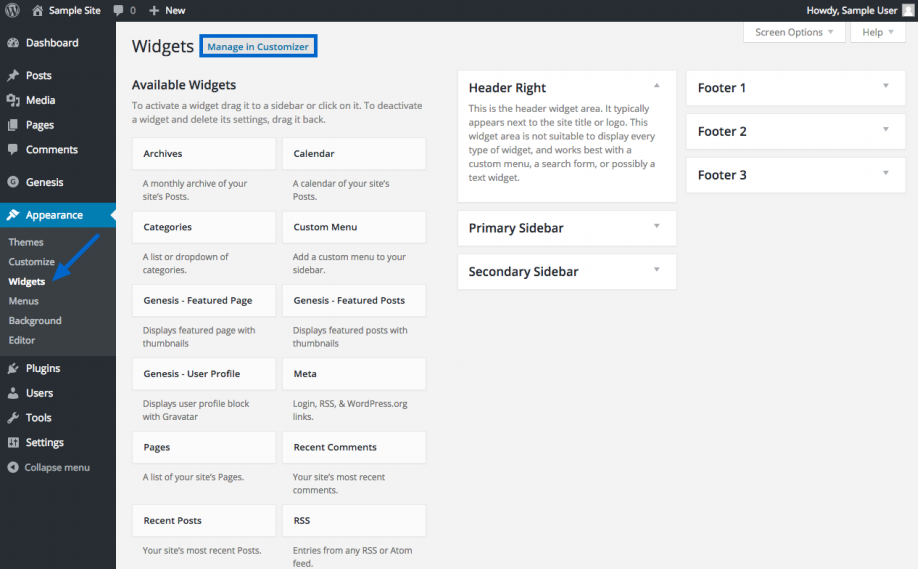
You can configure widgets in the Customizer or Appearance > Widgets area.
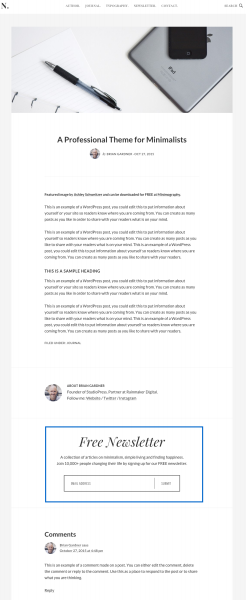
a- Header Right Widget Area
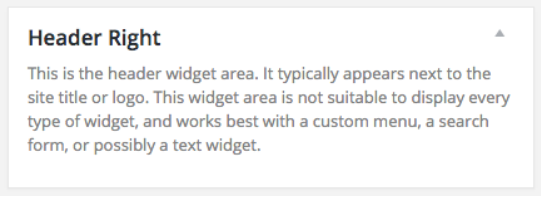
It is available in some child themes, which is displayed next to your site’s title or logo.
![]()
It contains menus and other kinds of company information.
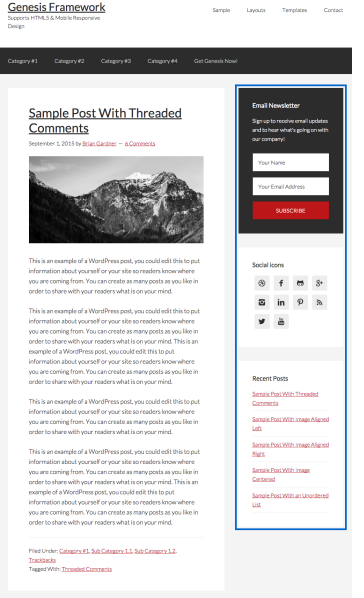
b- Primary Sidebar Widget Area
You can add widgets in this area, e.g. subscription boxes, social icons, recent posts and many others.
After Entry Widget Area
Widgets added here will show at the end of every single post, e.g. newsletter signup.
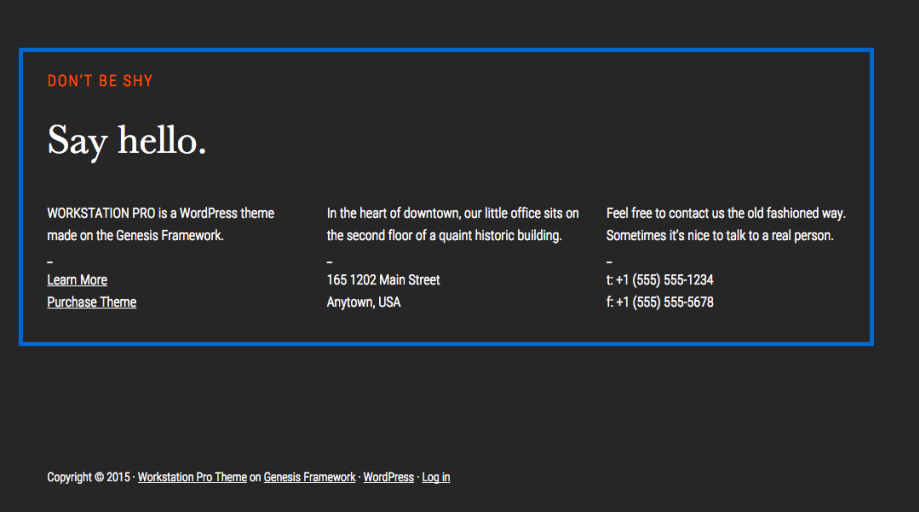
Footer Widget Areas
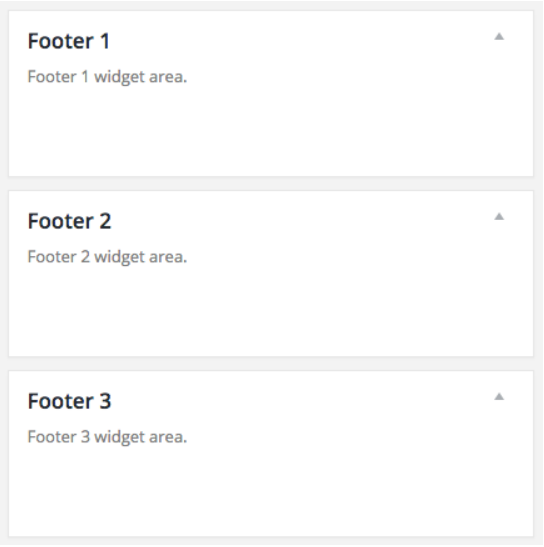
To activate Footer 2 or Footer 3, you have to first put a widget in Footer 1.
4 –Genesis Framework included Widgets
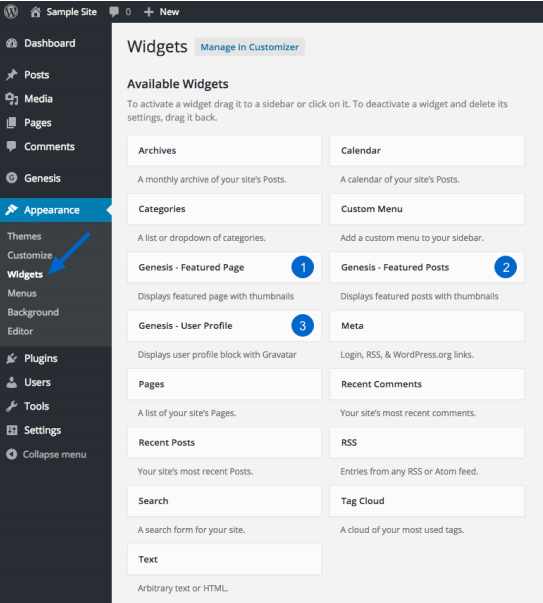
Genesis provides three widgets to your widget area in Appearance > Widgets
- Genesis – Featured Page widget
- Genesis – Featured Post widget
- Genesis – User Profile widget
- Genesis – Featured Page Widget
It is used to display a featured image and an excerpt of the article from a single page. It can be used on your site’s homepage, sidebars and footer as well. Here are the configuration settings for this widget:
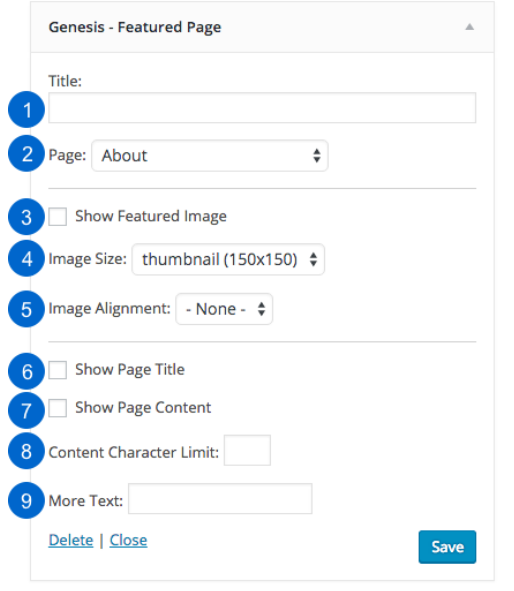
After completing the configuration, click Save to store the settings.
- Genesis – Featured Post Widget
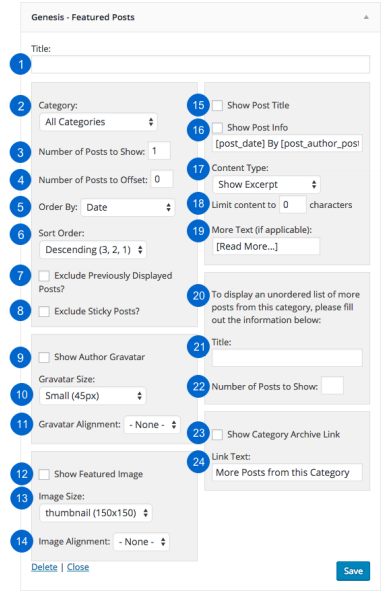
It is used to display a featured image and an excerpt of the article from the blog post.
To add the widget to a widget area, go to Appearance > Widgets.
After completing the configuration, click Save to store the settings.
- Genesis – User Profile Widget
It shows a user’s Gravatar, along with their bio or custom link on the sidebar, homepage or footer. To add the widget to a widget area, go to Appearance > Widgets.
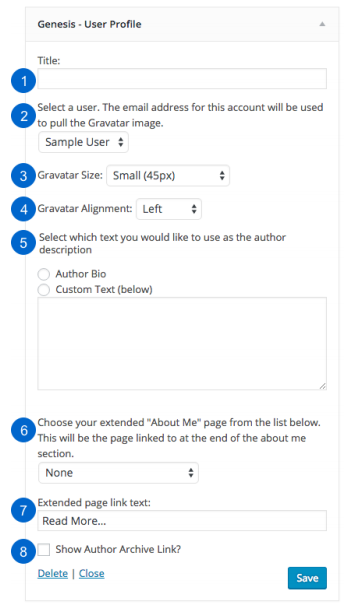
After completing the configuration, click Save to store the settings.
Note: Most of the settings here are self-explanatory, but for detailed knowledge, you can visit the Genesis documentation here.
5 – Using your Logo or Header Image
In this section, I will guide you on how to setup logo or header image on your website with the following two possible ways depending on what options your theme provides.
a – WordPress Customizer
![]()
Go to Appearance >Customize> Header Image to add your logo.
![]()
Click Add a new image to upload or select an already uploaded image as your Header. The recommended header image size is displayed here as well. Click Save & Publish to save settings.
b – Genesis Theme Settings
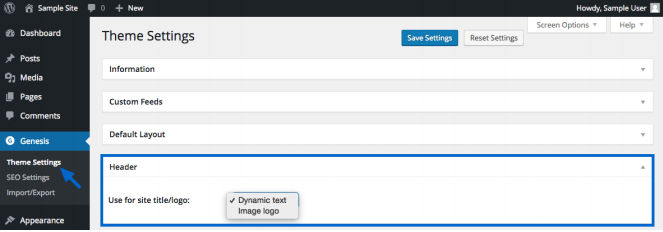
Go to Genesis > Theme Settings and in the Header section, select one of the following:
- Dynamic text
If you don’t have a logo right now, you can use your site’s title and tagline as your logo. You can set it from here: Appearance > Customize > Site Identity or in Settings > General.
- Image logo
An image logo will be displayed if this option is selected. Image logo.png or in some themes header.png file is chosen as your Header logo.
To upload your logo, you have to replace the logo.png file with your logo.png file. Go to the /wp-content/themes/child theme/images folder of your website via FTP and replace it.
6 – Using Genesis Templates
There are three templates that you can use for your Genesis-powered website.
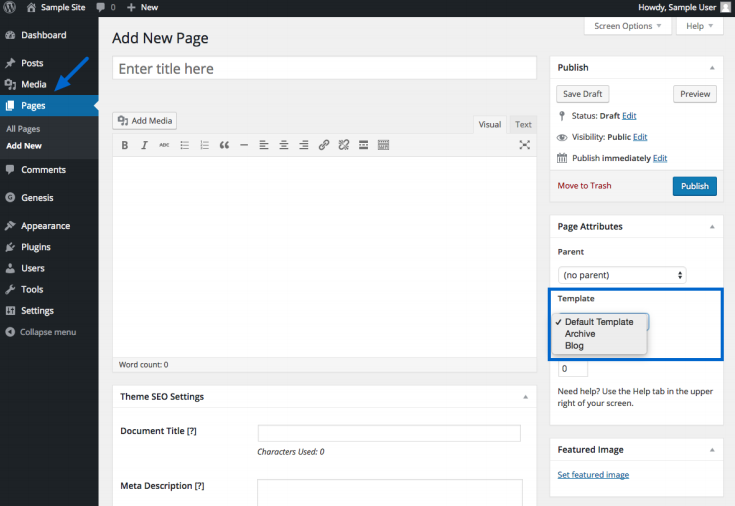
You can select any template from the Page Attributes section. This template applies only to pages, not to posts. Each theme may offer more or fewer templates.
Archive Template
Archive template is used to build a sitemap of your website. Here’s how you can use it:

- Create a new Page
- Enter the title of the Page.
- Select Archive from the template section.
- Leave the content area blank. Archive template will auto fill this page with a sitemap.
- Click Publish.
Blog Template
Blog Template creates a list of recent posts in a blog format. Here’s how to use it:
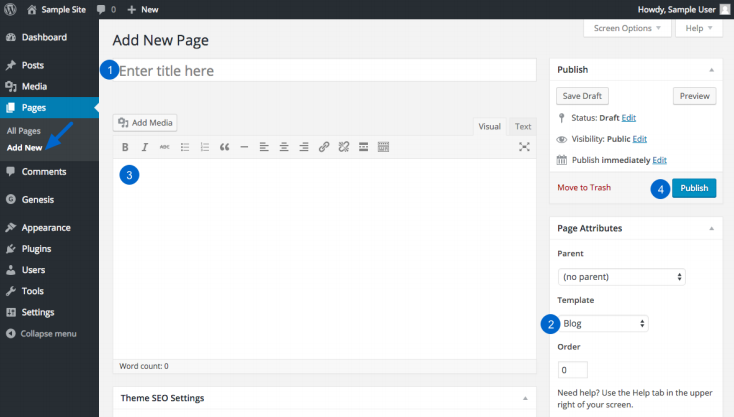
- Create a new Page.
- Select a Blog from the Page Attributes section.
- Leave the content area blank. The Archive template will auto fill this page with your recent posts.
- Click Publish.
Conclusion
In this installment of the Genesis series, I have gone through more specific and custom settings of the Genesis Framework. It offers rich customization options and child themes add more to these layout customization features. In case you are experiencing technical difficulties in configuring the Genesis Framework, log into the Member’s Area at http://my.studiopress.com/ and open a support ticket. In the last part of this series, I will cover the additional resources and useful plugins.

Create Faster WordPress Websites!
Free eBook on WordPress Performance right in your inbox.

Moeez is ‘The’ blogger in charge of WPblog. He loves to interact and learn about WordPress with people in the WordPress community. Outside his work life, Moeez spends time hanging out with his friends, playing Xbox and watching football on the weekends. You can get in touch with him at moeez[at]wpblog.com.