Add a Registration Form to WooCommerce Stores

Registration forms are an essential aspect of all websites. In particular, WooCommerce stores could use registration form to collect information about existing and potential clients.
In this tutorial, I will demonstrate how to add fields to the default registration form available at the WooCommerce stores.
Enable the Form
The first step of the process is to enable the form from the WooCommerce backend. for this go to WooCommerce > Settings > Accounts > Enable Registration. In the window that opens, check the box beside Enable customer registration on the “My account” page.
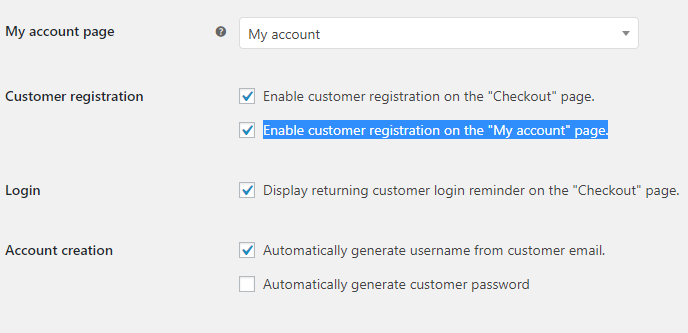
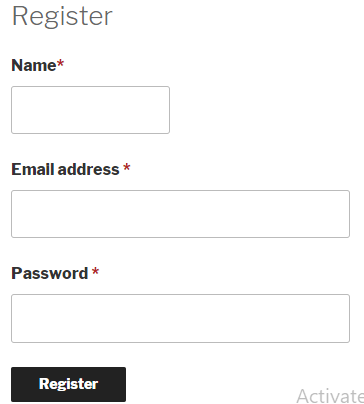
At this point, the registration form is visible at the WooCommerce frontend.
Add the fields in the Form
Now you could see that the form is pretty basic with very limited fields. The good news is that I could easily add the fields I want by adding the following code at the end of functions.php (found in the theme folder):
|
1 2 3 4 5 6 7 8 9 10 |
function wpblog_register_fields() {?> <p> <?php _e( 'Name', 'woocommerce' ); ?><span class="required">*</span> <input type="text" class="input-text" name="registration_name" value="<?php if ( ! empty( $_POST['registration_name'] ) ) esc_attr_e( $_POST['registration_name'] ); ?>" /> </p> <div class="clear"></div> <?php } add_action( 'woocommerce_register_form_start', 'wpblog_register_fields' ); |
Validate the Fields
Validation of the data in the fields is carried out by the following code that would be added to functions.php:
|
1 2 3 4 5 6 7 |
function wpblog_validatoin_fields( $username, $email, $validation_errors ) { if ( isset( $_POST['registration_name'] ) && empty( $_POST['registration_name'] ) ) { $validation_errors->add( 'registration_name_error', __( 'Error: Name is required!', 'woocommerce' ) ); } return $validation_errors; } add_action( 'woocommerce_register_post', 'wpblog_validatoin_fields' ); |
The above code snippet checks the $_POST array for the data and include an error message in case the data is not found or fails the validation process.
Save Values in the Database
Once the values have been collected and validated, the next step involves saving the values in the database. For this, add the following code to functions.php:
|
1 2 3 4 5 6 7 |
function wpblog_save_register_fields( $customer_id ) { if ( isset( $_POST['registration_name'] ) ) { update_user_meta( $customer_id, 'registration_name', sanitize_text_field( $_POST['registration_name'] ) ); update_user_meta( $customer_id, 'registration_name', sanitize_text_field( $_POST['registration_name'] ) ); } } add_action( 'woocommerce_created_customer', 'wpblog_save_register_fields' ); |
Conclusion
This tutorial highlight the simple process of enabling the forms in WooCommerce stores. I have also added validations of the data collected form the form.once validated, thi data will be stored in the database.
If you need help in setting up forms at your WooCommerce stores, do leave a comment below

Create Faster WordPress Websites!
Free eBook on WordPress Performance right in your inbox.

Moeez is ‘The’ blogger in charge of WPblog. He loves to interact and learn about WordPress with people in the WordPress community. Outside his work life, Moeez spends time hanging out with his friends, playing Xbox and watching football on the weekends. You can get in touch with him at moeez[at]wpblog.com.