How to Set Up Variable Products in WooCommerce
If you are here reading about WooCommerce Variable Products, I assume that you have basic operational knowledge about running a WooCommerce store. So I will not bore you with the fundamentals. You already know that WooCommerce is perhaps the most popular WordPress plugin and that you can easily launch your ecommerce business within minutes on a WooCommerce powered platform.
Steps to Add Variable Products in WooCommerce
Rather, I will dive straight into the idea of variable products and how you can leverage WooCommerce Product Variation to present more options and value to your visitors. I will start with a short description of the idea and then demonstrate how to add WooCommerce variable product to your store. I will cover the simplest process of adding the product to your inventory and sales landing pages.
WooCommerce Variable Product
Variable products are varieties of an item that allows the store owners to add multiple inventory items to their WooCommerce stores. The variations allow the owners to play on price, stock, image and similar areas. In short, a WooCommerce variable product allows you to base your inventory on several versions of a small number of units.
Apparel stores that deal in common clothing items such as hoodies, sweatpants or t-shirts can take full benefit of this idea. All the items mentioned in this example have multiple versions that differ on color, size, and material. Now instead of adding several versions of a shirt as separate items, store owners can use WooCommerce variable product to group all the instances of the shirt as a related product.
The good idea about WooCommerce variable product is this: As easy as it sounds, implementing the idea on your WooCommerce stores is even easier. All you have to do is follow a simple process and your store can start leveraging the benefits of WooCommerce variable products.
Let’s begin
Step 1: Create the Attributes
Log in to WooCommerce store using Admin credentials. Next, go to the left menu bar, and under the Products section, you will see the Attributes option.
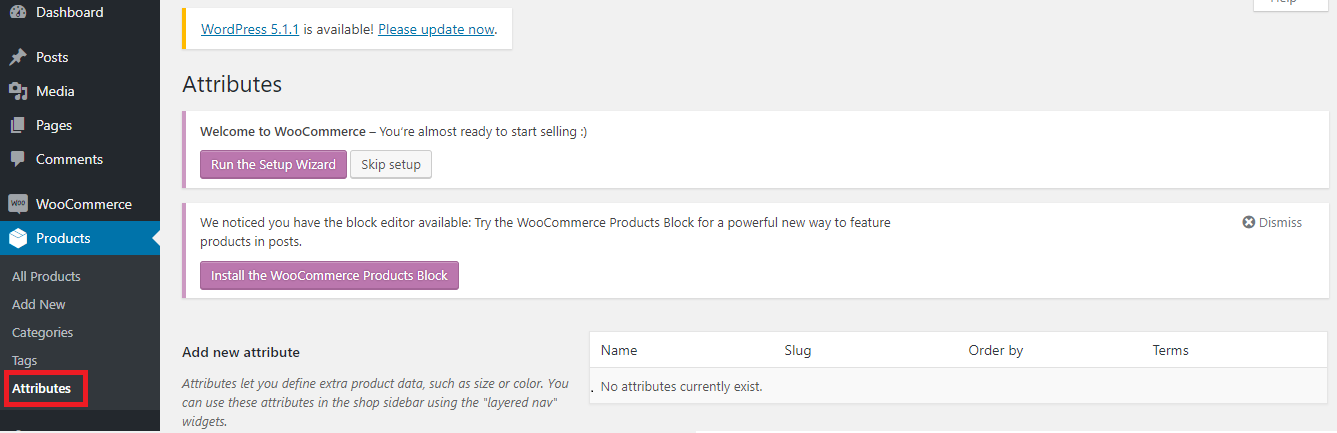
Click on the option to see the detailed fields:
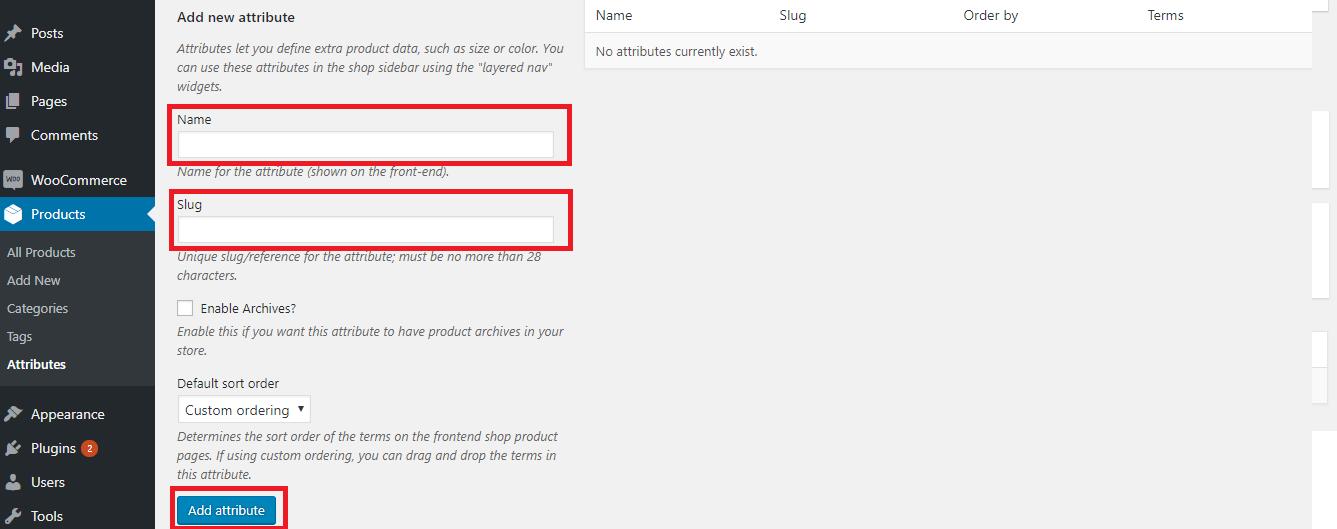
As you can see, there are two text fields labeled Name and Slug.
In the Name field, add the title of the attribute such as size or color. Note that the Slug field is optional and you can leave it out for the moment. Click the Add Attribute button to add the attribute.
For the purpose of this example, I have added the attribute ‘Size’, as shown in the following screenshot:

Under the heading ‘Terms’, you can see the Configure Items. Click the option to add related options.
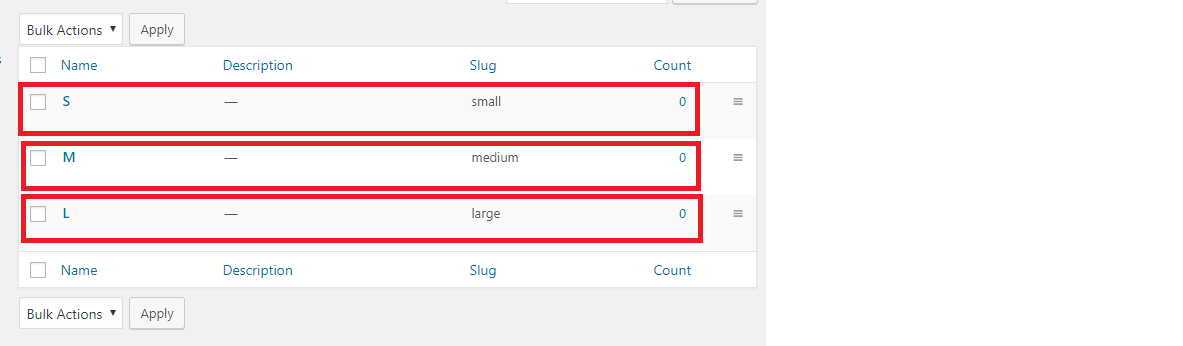
Now, let’s mention the various size options for this item:
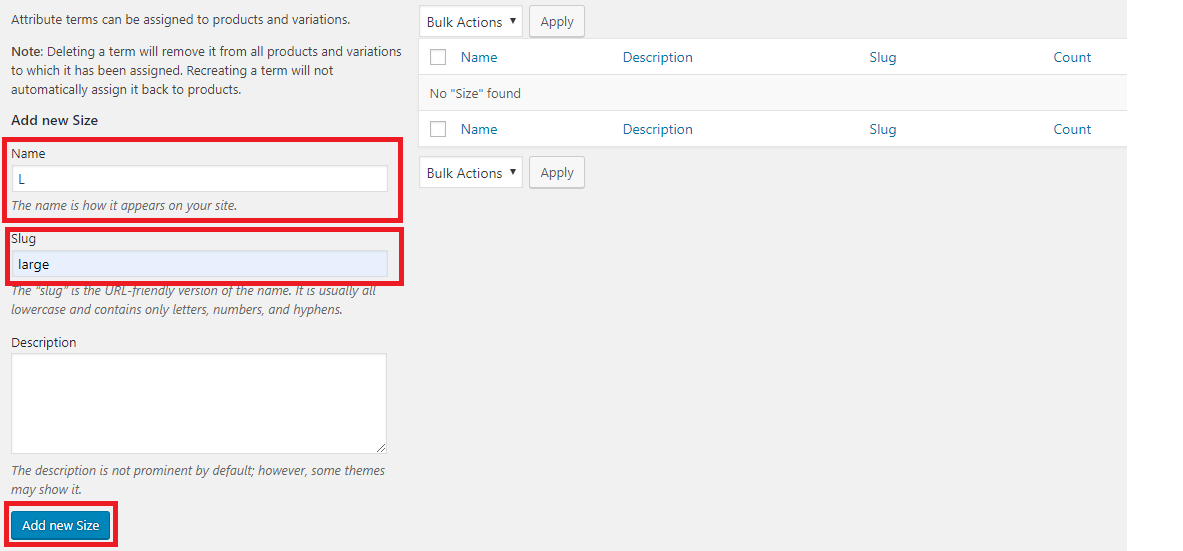
As you can see from the example, I have added a size option with the Name as ‘L’ and Slug as ‘large’. By following this process, you can add all the available sizes for your inventory item. Remember to click the button to finalize the changes.
Once done, my list looks like:
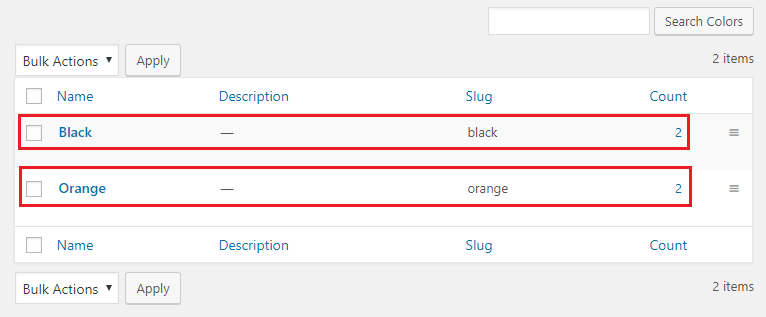
Now, I will add another attribute of Color, another important variation for my product. here’s how the final results look like;
Step 2: Add Attributes to the Product
Now that the attributes have been created, it is time to add them to the product.
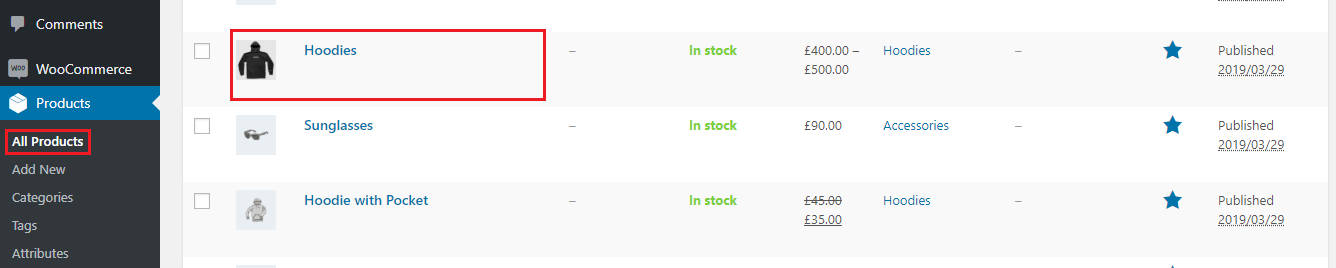
In the left menu bar, under the Products section, you will find All Products option. Next, select the item you wish to apply the attributes. For the purpose of this example, I have selected the item hoodies.
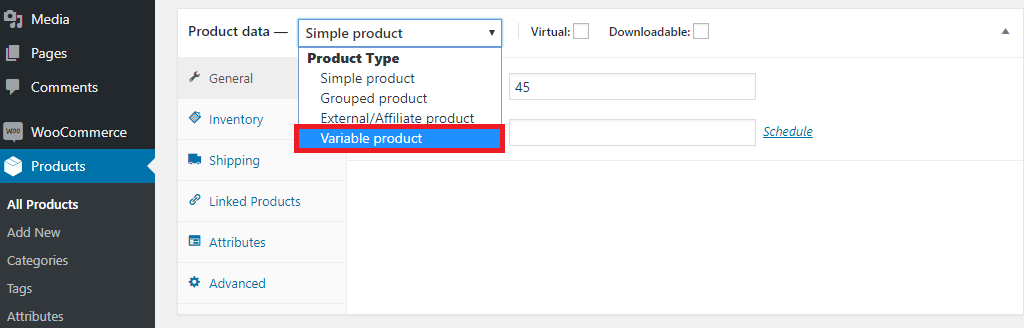
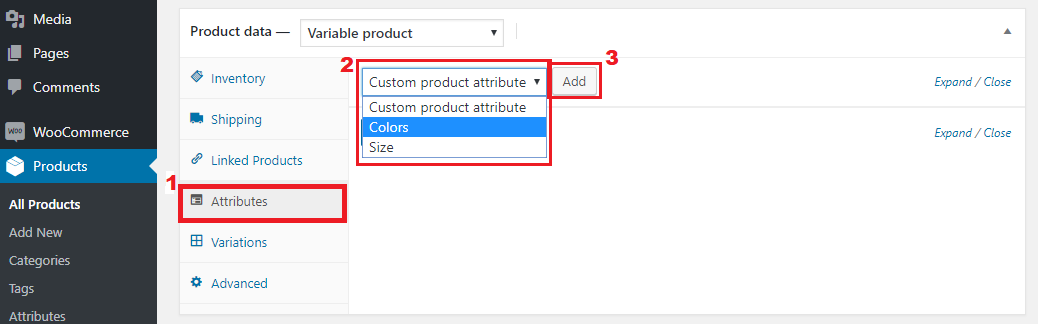
Next, go to the Product data dropdown, and select the Variable product option.
Next, select Attributes and you will see the list of all the attributes you have created for your products. Note that I have selected the Colors attribute for this example:
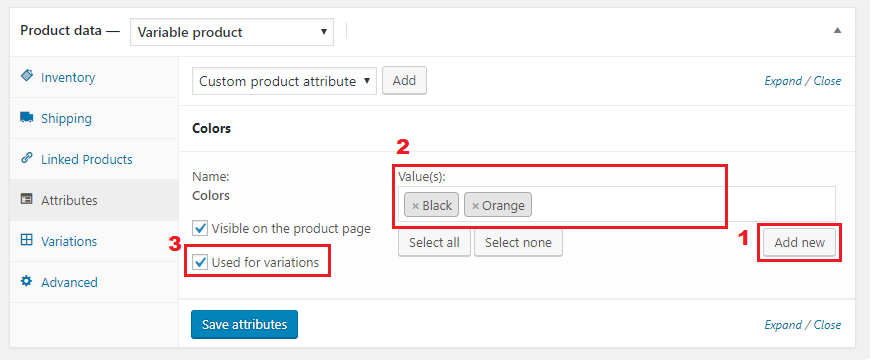
Next, add the values (such as black, orange etc), and check the Used for variations checkbox.
Next, I will add the ‘Size’ attribute and add available variations:
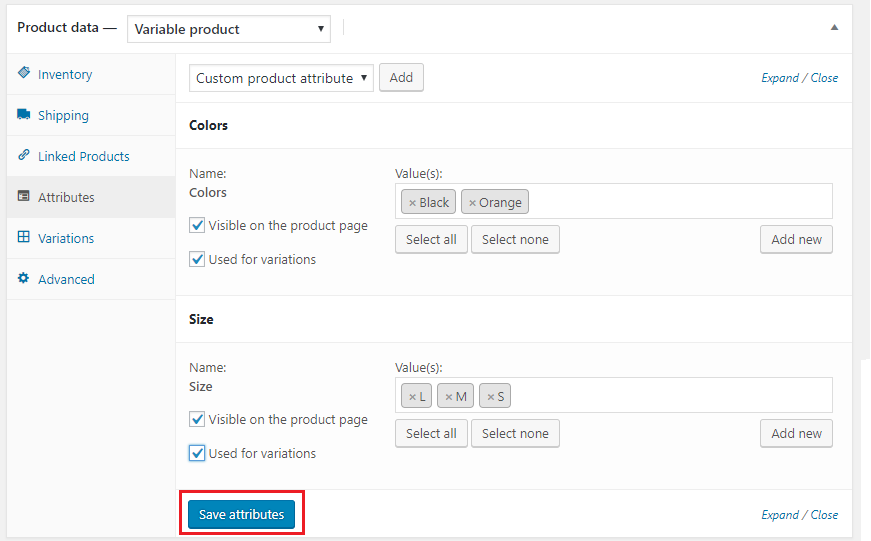
Once done, click the Save attributes button to finalized the changes.
Step 3: Add the Variations
It’s time for the third and the final step.
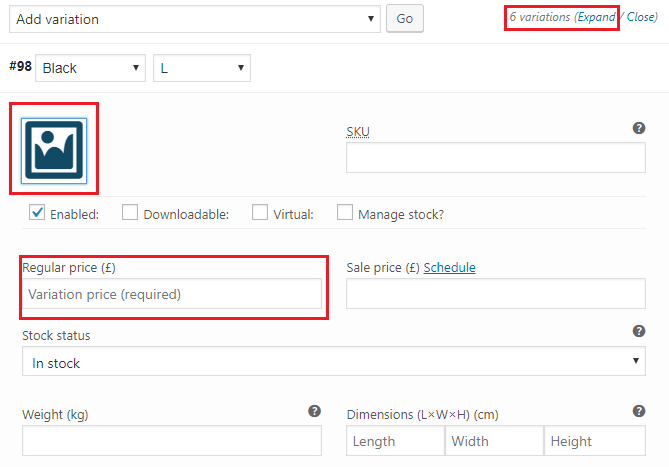
Click on the Variations (right below the Attributes option) and click the Go button:
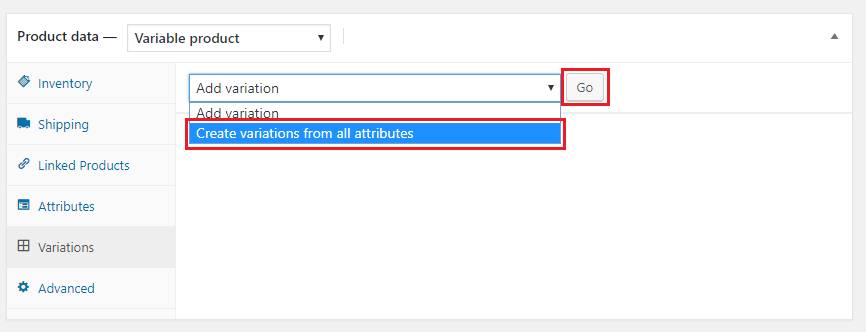
This option is amazing, as I can create variations using all the available attributes.

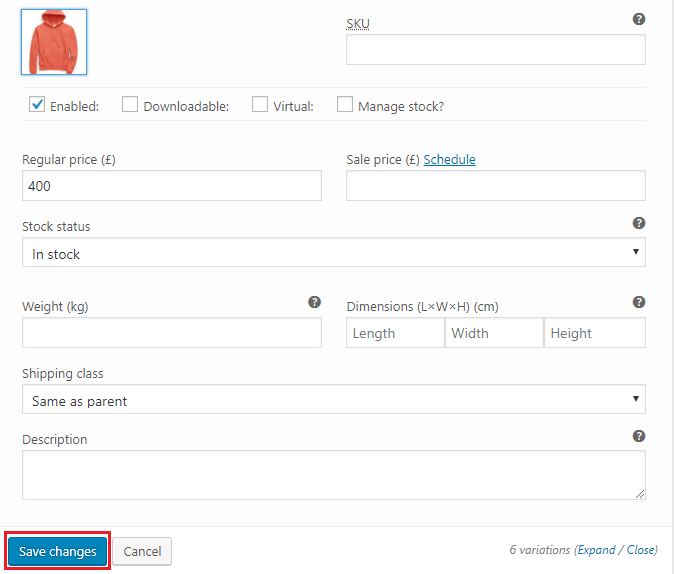
Once you have set the variations, expand each variation and insert an image, price, weight, dimensions, and other aspects:
Click the Save changes button to finalize the changes.
You are almost done. Now publish the items and see the results live!
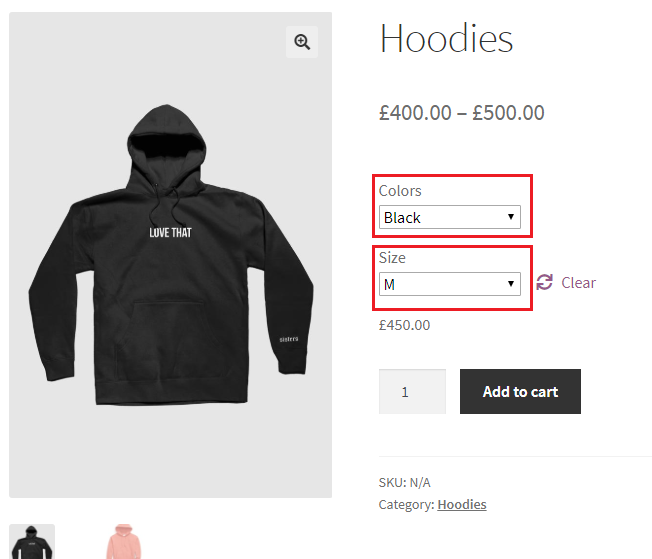
Looks stunning, right? You have now added a WooCommerce variable product to your store.
Wrapping Up!
As you saw, how simple it is to leverage WooCommerce variable product for providing a fabulous user experience to all the visitors on your store. By opting to use WooCommerce variable product, you can create a major impact on your online stores. Add as many variations you want to present all the variations available in your inventory. Using WooCommerce variable product is so simple that anyone with basic WordPress and WooCommerce skills can do it without any issues!
Finally, if you want to manage your WooCommerce store only (without dealing with server management), and are looking for a reliable hosting platform, Cloudways is a great option.
If you get stuck at any point, do leave a comment and I will get back to you ASAP!

Create Faster WordPress Websites!
Free eBook on WordPress Performance right in your inbox.

Moeez is ‘The’ blogger in charge of WPblog. He loves to interact and learn about WordPress with people in the WordPress community. Outside his work life, Moeez spends time hanging out with his friends, playing Xbox and watching football on the weekends. You can get in touch with him at moeez[at]wpblog.com.