A Step by Step Guide to Setup WooCommerce Shipping on Your Online Store

In the world of ecommerce, WooCommerce is one of the leading and the most preferred platforms of store owners. It has tons of handy, and useful features that are helpful for building and enhancing the online store.
See: Getting Started With WooCommerce
Offering a shipping option to your online store is one of the necessary requirements which can result in more sales and conversions. To allow shipping on your WooCommerce store, you have to set up WooCommerce shipping in order to set shipping locations, shipping fee and how will you ship products.
Let’s Start!
Setup WooCommerce Shipping
You have to follow these steps:
- Configure Shipping Zone and Method
- Configure Shipping Rates
- Configure Shipping Classes
WooCommerce Shipping Setup: Configure Shipping Zone and Method
WooCommerce shipping zone is a great way to define the areas where you allow shipping and can assign different Shipping Methods/Rates to that specific zone.
Without further ado, let’s first configure WooCommerce Shipping Zone!
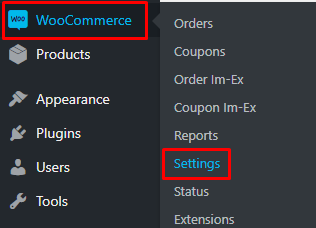
Open the admin panel of your WooCommerce and then navigate to WooCommerce → Settings:
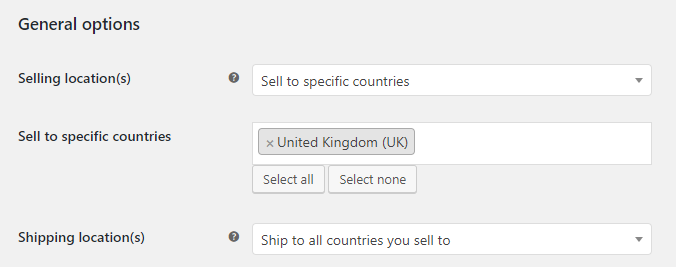
Now scroll the page and you will see the General Options section under which you can see the Shipping location(s) option. Generally, most numbers of sellers allow shipping to all countries where they sell their products. So, I am selecting Ship to all Countries you sell to. However, you can also select specific locations for shipping:
Now click on Shipping tab from the top the page:

Here, you have to create WooCommerce Shipping Zone and Method.
Click on Add Shipping Zone to create one:

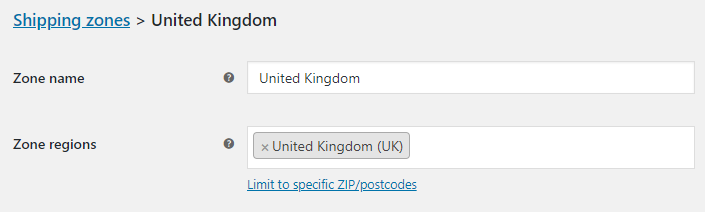
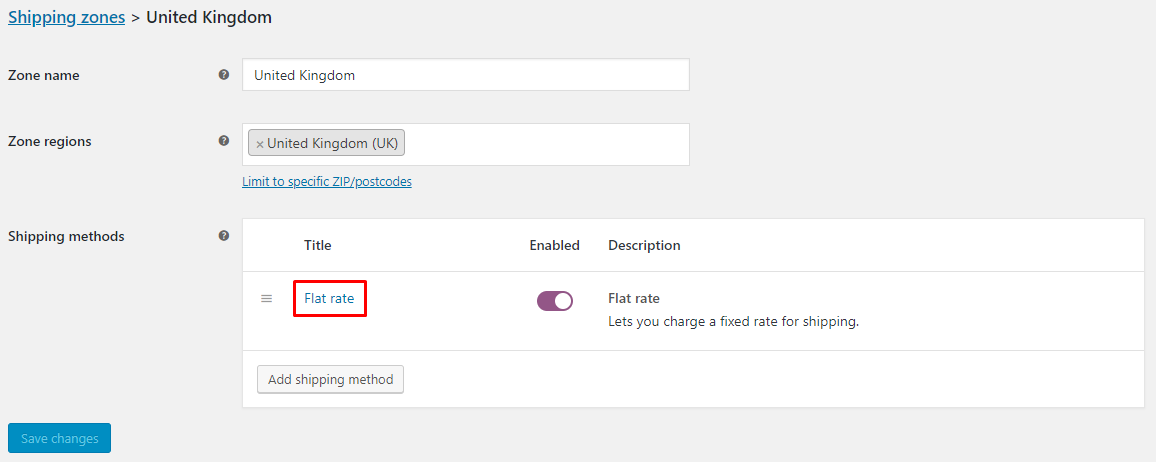
Then enter the Zone name and Zone regions. As I want to allow shipping in the UK, I am setting up the name as the United Kingdom and region as United Kingdom (UK):
Note: You can set Zone name and region(s) according to your need.
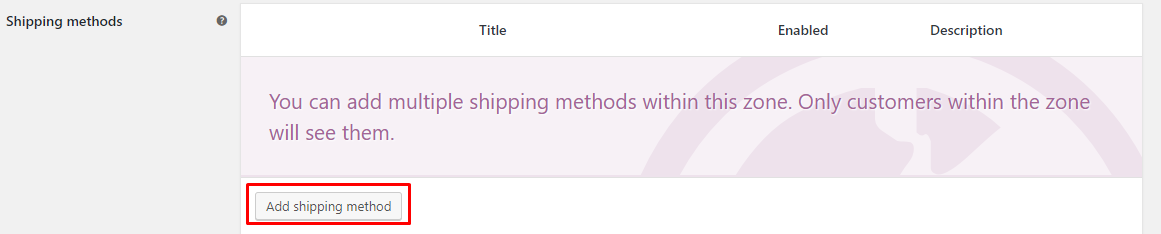
Next, you have to create WooCommerce Shipping method. Just click on Add Shipping Method
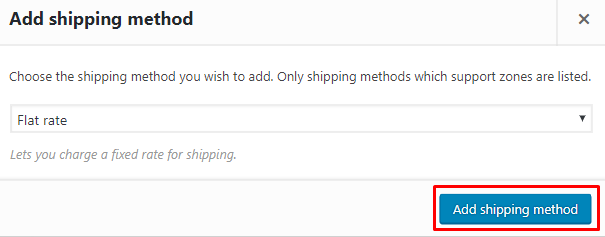
Here you have multiple WooCommerce Shipping methods:
Free Shipping: By selecting this option, no shipping charges will be added to customers orders.
Flat Rate: By selecting this method, you can add a flat fee or percentage of the total order
Local Pickup: By selecting this method, you can allow customers to pick their purchased product from your location and you can also add a fee for it.
Based on the above description, select Shipping Method of your choice. For this tutorial, I am selecting Flat Rate. Then just click on Add Shipping Method:
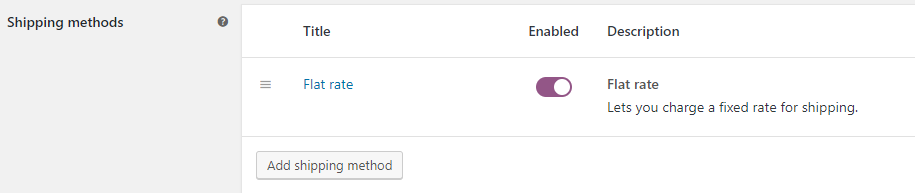
You will see that the shipping method is added:
WooCommerce Shipping Setup: Configure Shipping Rates
As the shipping zone and method is configured, now you have to assign shipping rates to that method.
From your created WooCommerce shipping zone, click on Flat Rate under Shipping Methods section:
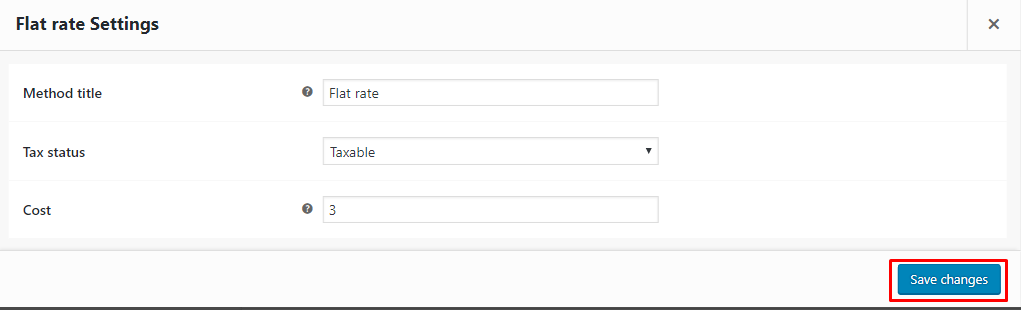
Here you can add flat-rate shipping fees. There are multiple ways to set it up like:
- Flat shipping fee for each order
- Flat shipping fee for each item
- Shipping fee as a percentage of the order total
Let’s explore each way one by one:
Flat shipping fee for each order
Suppose you are going to charge $3 shipping fee for each order, then just add 3 in the Cost textfield:
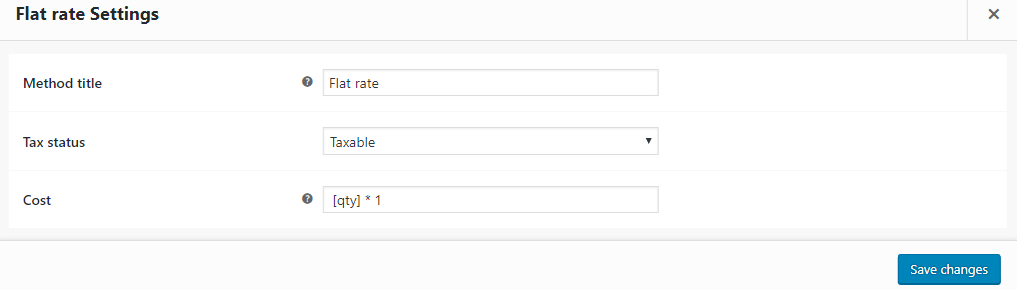
Flat shipping fee for each item
Suppose you want to charge $1 shipping fee per item, then you have to add a formula [qty] * 1 in Cost textfield:
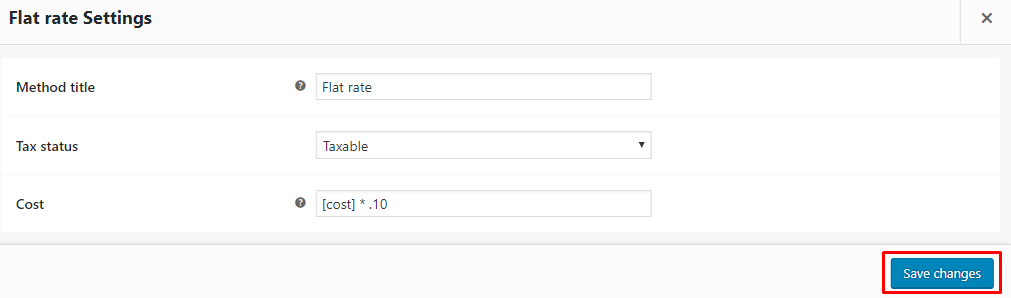
Shipping fee as a percentage of the order total
Suppose you want to charge 10 percent of the order total as a shipping fee, then just add this formula, [cost] * .10:
WooCommerce Shipping Setup: Configure Shipping Classes
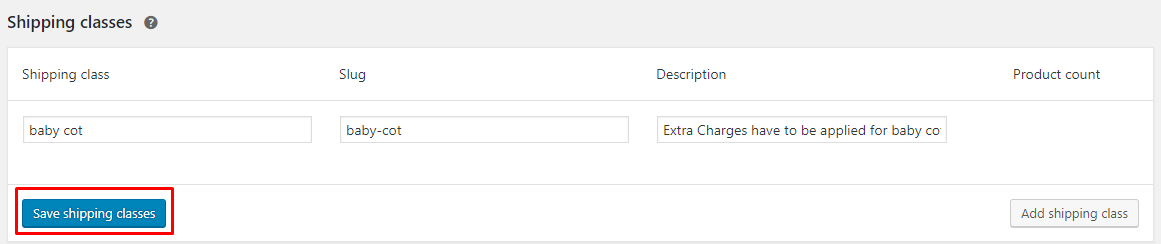
Suppose you have a product Baby Cot, as it’s an oversize product, you may want to charge an extra shipping fee for it. To do that, you have to use WooCommerce Shipping Classes.
To Configure WooCommerce Shipping Classes, click on Shipping classes:

Now click on Add shipping class:

Here enter your shipping class name, slug, and description. Then just click on Save shipping classes:
No again go to your created shipping zone and then click on Flat rate under the Shipping methods section:
Now here you will see a new section, Shipping class costs. Enter the cost which you want to charge for your oversize product (baby cot) and then click on Save changes:

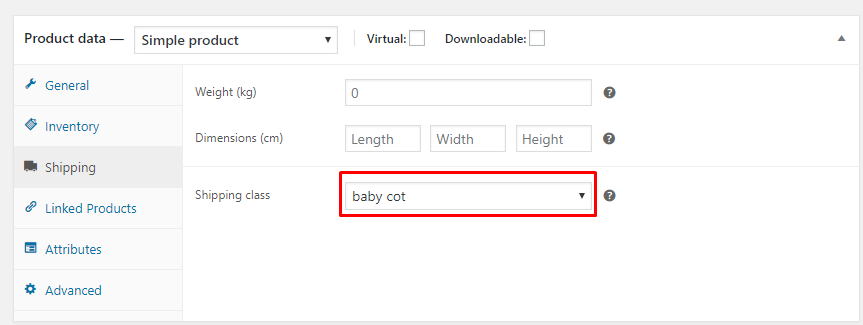
Now go to your heavy product edit page and select shipping class (baby cot) so that when anyone wants to ship this product, they will have to pay extra shipping fee which you have set in the previous step.
All Done, you have now successfully setup Shipping Classes in WooCommerce.
Final Words
Add shipping set up in your online store and you will start receiving a large number of orders in no time. With the help of this guide, you have learned about WooCommerce Shipping Zone, WooCommerce Shipping Methods, WooCommerce Shipping Rates, and WooCommerce Shipping Classes. So, I believe that you can now easily set up WooCommerce shipping.
See: Why You Should Use SSL For Your WooCommerce Store
Still having issues in its implementation? Leave your comment below and I will get back to you!

Create Faster WordPress Websites!
Free eBook on WordPress Performance right in your inbox.

Moeez is ‘The’ blogger in charge of WPblog. He loves to interact and learn about WordPress with people in the WordPress community. Outside his work life, Moeez spends time hanging out with his friends, playing Xbox and watching football on the weekends. You can get in touch with him at moeez[at]wpblog.com.