Most Common WordPress Errors And How To Fix Them
.It’s been more than 15 years since one of the most powerful platforms for developing websites burst onto the scene. Yes, you guessed it right, we’re talking about WordPress!
Despite being a popular platform and having a strong developer community, WordPress developers still come face to face with fundamental errors.
Over the years, we’ve seen many WordPress Development Companies who struggle with the most basic WordPress errors. Whenever any error occurs, they seem like fish out of the water.
So, let’s get things moving and analyze common errors.
1. Internal Server Error
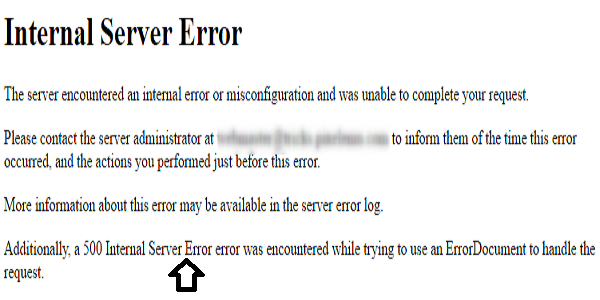
This is perhaps the most intimidating error especially for a person who has just started to learn the traits of WordPress. The error is also known as the “500 Internal Server Error.”
This type of error occurs when there is something wrong, but the server is unable to identify the real reason for that. The most frustrating part about this error is that you have to identify the root cause yourself since the server itself is unable to.
How To Fix the Internal Server Error
Option 1: Increasing The PHP Memory Limit
One of the main reasons for the internal server error is lack of memory and that’s why you should try to increase it by following the steps outlined below.
● Log In to WordPress Admin
● Create a blank text file called php.ini
● Paste this code: memory=64MB (or any limit you desire)
● Save the file
● Upload it into your /wp-admin/ folder using FTP
Option 2: Deactivating All The Plugins
If the above two options are not working for you, then one of the plugins could be causing the internal server error for the website.
You should deactivate all the plugins which are installed on your site.
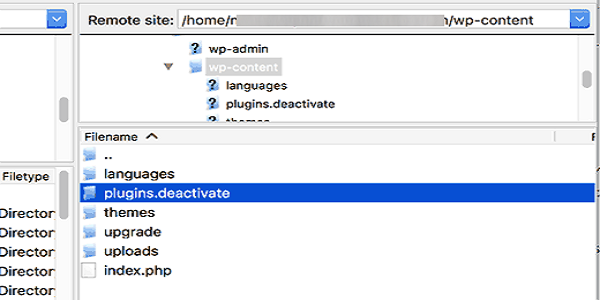
If the error is solved by deactivating all the plugins, then you’re sure that one of the plugins caused the problem.
Now, the challenge is to find which plugin was causing this issue. For that, you need to reactivate one plugin at a time until you find your answer.
2. Database Connection Error
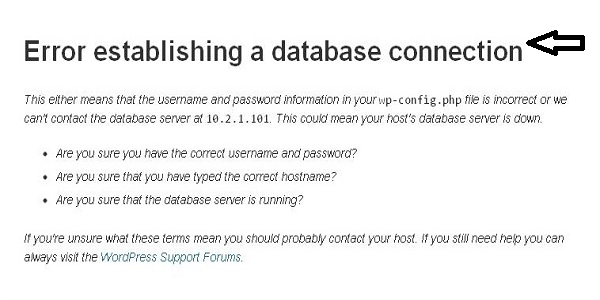
This type of error usually occurs when a user has modified database credentials (database host, database username, and database password) incorrectly.
Sometimes it could be due to the database being nonresponsive or there is also a chance that it could be corrupted.
Ways To Fix Database Connection Error
Option 1: Check If The Same Problem Occurs For / Wp-Admin / As Well
The first thing you should do when there is a database connection error is to check whether the same error occurs for both front-end and back-end.
If you’re getting the same problem on both sides, then you should look for other options, but if you’re getting a different error on both sides, then one or more database tables have become temporarily unavailable and you need to repair the database.
In order to repair the database, you need to add the following line in the wp-config.php file:
|
1 |
define('WP_ALLOW_REPAIR', true); |
Once you do that, you will see a message as shown in the screenshot below:
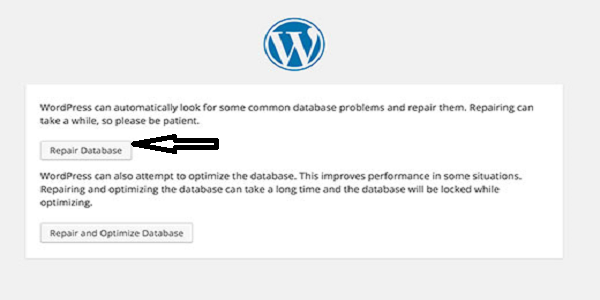
This means you can repair the database now.!
Option 2: Check The WP-Config.php File
WP-Config.php is the most important file in WordPress as it is the location where you define details for WordPress to be connected with your database.
Now, if you’ve changed the root password or database user password, then you need to change this file as well. For that purpose, you can use the following syntax:
|
1 2 3 4 |
define('DB_NAME', 'database-name'); define('DB_USER', 'database-username'); define('DB_PASSWORD', 'database-password'); define('DB_HOST', 'localhost'); |
If everything in the file is correct, then you should once check for typos and if that’s the case, then it is fair to say to that there is something wrong on the server’s side.
Option 3: Check Your Web Host (MySQL Server)
You should always check with your service provider whether your MySQL Server is responsive or not. If you want to test the MySQL Server, then there are plenty of ways for that.
You can test other sites on the same server to check if the server is working well or not. If you’re getting the same error with other sites, then there is something wrong with your MySQL server.
Go to cPanel and try to access phpMyAdmin to connect the database if you don’t have any other site. If you can connect the database, then the next step is to check whether the user has sufficient permissions or not.
To test this, you need to create a new file testconnection.php and use the following code:
|
1 2 3 4 5 6 7 8 |
<?php $link = mysql_connect('localhost', 'root', 'password'); if (!$link) { die('Could not connect: ' . mysql_error()); } echo 'Connected successfully'; mysql_close($link); ?> |
After implementing this piece of code, if the connection is established then you can say that the user has sufficient permissions and there is something wrong with MySQL Server. Still, if you can’t connect with the database, then the user may not have sufficient permissions.
3. White Screen Of Death
“White Screen Of Death” is a situation when you get a plain white screen as an error with no message displayed on it. It is the most mysterious WordPress error to date, as developers have no clue about where to look and how to solve it.
Ways To Fix White Screen Of Death Error
Option 1: Increasing The PHP Memory Limit
One of the root causes of the White Screen Of Death is your memory being exhausted and therefore, you need to increase the PHP memory limit to resolve this issue.
Following are the steps to increase the memory:
● Log In to the WordPress Admin
● Create a blank text file called php.ini
● Paste this code in there: memory=64MB (or any limit you desire)
● Save the file
● Upload it into your /wp-admin/ folder using FTP
Option 2: Disabling All The Plugins
If increasing the memory didn’t solve the issue for you, then you should consider disabling all the plugins on your website.
One of your plugins may be causing this type of error and therefore, by disabling all the plugins, you can solve this error.
Now, in order to find the plugin that causes the error, you need to re-activate all the plugins one-by-one until you find the culprit.
Option 3: Replace Your Theme With The Default Theme
If the above two options didn’t provide you with the solution you were after, then it’s time to replace your theme with the default theme.
The best way of doing this is by backing up your theme folder and then deleting it. This will automatically roll back your theme to the default one.
4. 404 – Page Not Found Error
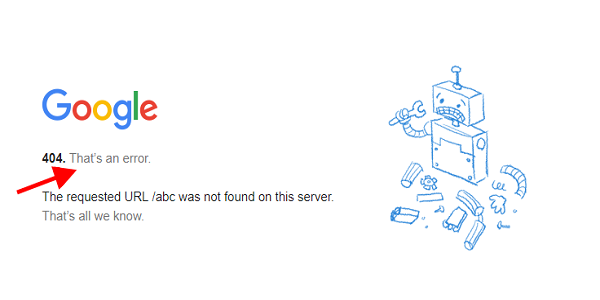
This type of error occurs when the user wants to visit a particular blog post on its website but could not find it. Instead of the desired page, the page a 404 page – page not found.
Ways To Fix 404 – Page Not Found Error
Option 1: Reconfigure Permalink Settings
One of the main reasons for 404 – page not found error is the change in the permalink settings. So, to solve that issue, you need to reconfigure permalink settings.
For that, simply go to Settings » Permalinks, and click on Save Changes button as shown in the screenshot below.
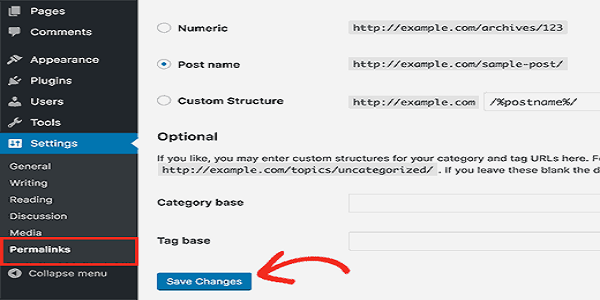
This will resolve the issue in most cases as your permalinks settings will be updated. But, if this doesn’t solve your problem, then you need to update your .htaccess file manually.
Option 2: Update .htaccess File
In order to update the .htaccess file, you need to login to the server using FTP and find the .htaccess file which is located in the same folders as /wp-content/ and /wp-includes/.
Now, add the following code to your .htaccess file which will solve the issue:
|
1 2 3 4 5 6 7 8 9 10 11 12 13 14 15 16 17 18 19 |
# BEGIN WordPress <IfModule mod_rewrite.c> RewriteEngine On RewriteBase / RewriteRule ^index\.php$ - [L] RewriteCond %{REQUEST_FILENAME} !-f RewriteCond %{REQUEST_FILENAME} !-d RewriteRule . /index.php [L] </IfModule> # END WordPress# BEGIN WordPress <IfModule mod_rewrite.c> RewriteEngine On RewriteBase / RewriteRule ^index\.php$ - [L] RewriteCond %{REQUEST_FILENAME} !-f RewriteCond %{REQUEST_FILENAME} !-d RewriteRule . /index.php [L] </IfModule> # END WordPress |
5. Locked Out Of WordPress Admin
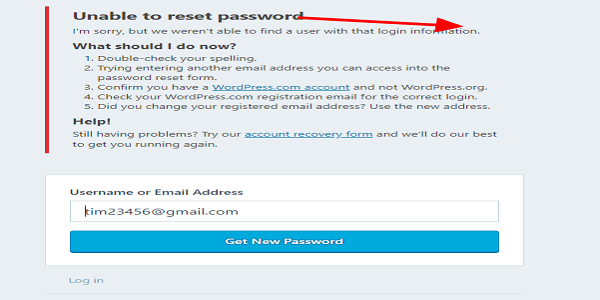
Sometimes you may find that you have locked yourself out of the WordPress Admin and not able to login back to the admin dashboard. This happens when you have forgotten your password and also don’t have access to the password recovery email.
Ways To Fix Locked Out Of WordPress Admin Error:-
Option 1: Reset Your Password From phpMyAdmin
One of the reasons for being locked out of the WordPress Admin is due to an incorrect password. So, for that, you need to reset your password from the phpMyAdmin.
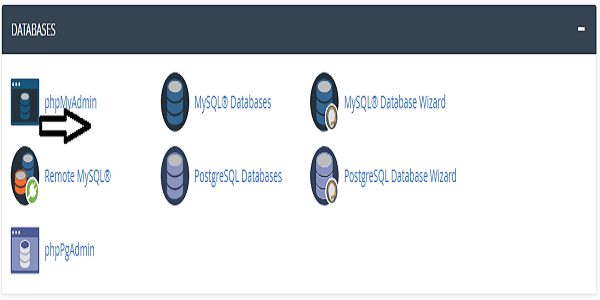
Firstly, log in to the cPanel dashboard of your WordPress Hosting account and click on the phpMyAdmin icon as shown in the screenshot below.
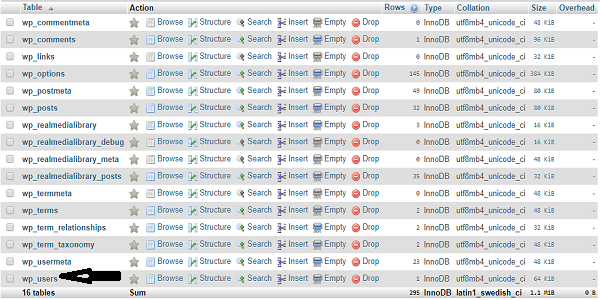
Once you click on phpMyAdmin, it will open the app where you need to select the WordPress Database. Once you select the database, you will get the list of all the tables where you need to find out the ‘{table-prefix}_users’ table and click on the browse link as shown in the screenshot.
After clicking on the browse button, you will see the numbers of rows in the WordPress users table. Now, go ahead and click on the edit button next to the username for which you want to change the password.

Once you click on the ‘edit’ link, you will be shown a form with user information fields. Now, delete the value from the user_pass field and replace it with a new password.
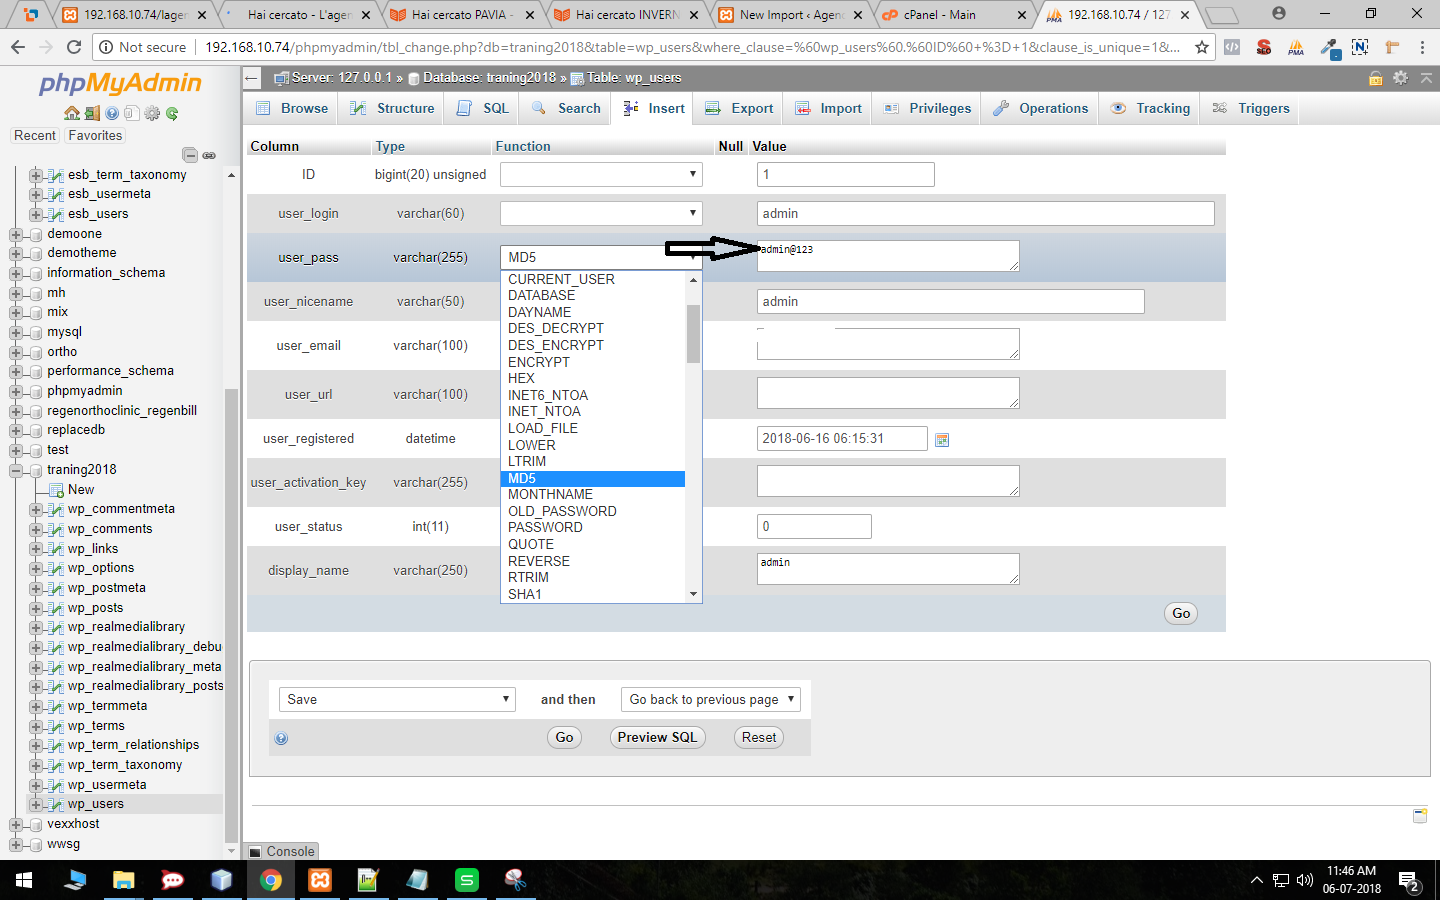
Don’t forget to choose MD5 from the function as it will secure your password.
This means you’ve successfully changed your WordPress Admin password.
6. Image Upload Issue
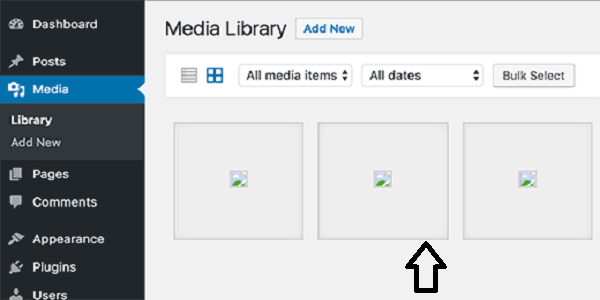
If you’ve been using the WordPress platform for a long time, then you may have encountered this kind of error many times. Sometimes you would notice that all the images from the site are gone and the site is showing broken image placeholders.
Now, when a user tries to upload an image to the post using the media uploader, he/she will encounter an error.
Ways To Fix Image Upload Issue
Option 1: Changing the File Permissions
One of the major reasons behind the image upload issue is a change in the file’s permission. Sometimes, when your hosting provider runs an update, the file’s permissions could change and therefore cause this type of issue.
You need to change the file’s permissions back to the normal to solve this issue.
To achieve this, connect to your site using an FTP client and go to / wp-content / directory where you will see / uploads /folder. Now, right-click on uploads and select file permissions.
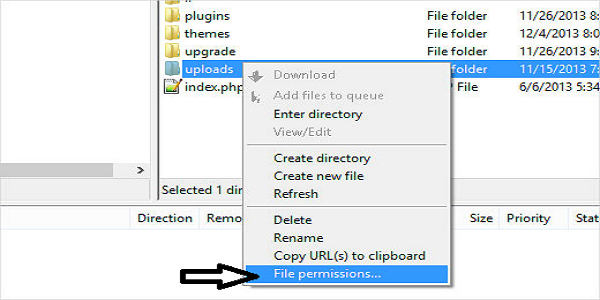
Once you click on ‘file permissions’ a new dialog box will appear as shown in the screenshot below.
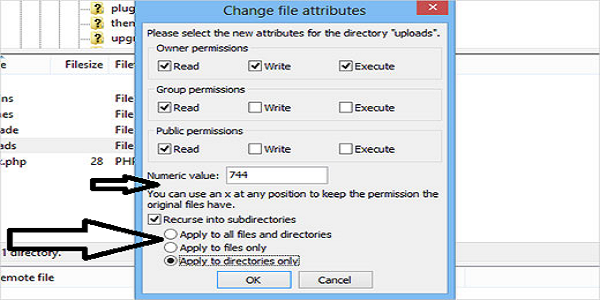
Now, to change the file’s permission, first, you need to apply changes to all the directories and subdirectories. For that, enter 744 in the ‘numeric value’ box, and then check the box next to Recurse into subdirectories.
Lastly, you need to click on ‘Apply to directories only’ radio button and click on the OK button which will reflect the changes.
In the next step, you should change the permission for files. For that you need to enter 644 in the ‘numeric value’ box, and then check the box next to Recurse into subdirectories.
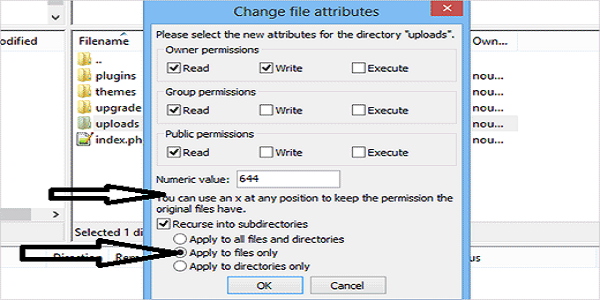
Lastly, you need to click on ‘Apply to files only’ radio button and click on the OK button which will reflect the changes.
You will now be able to upload all the images.
Final Thoughts…
WordPress is ruling the CMS world and it is more than likely most of you would be using this wonderful platform for your business website.
In this article, we have analyzed the most common WordPress errors which are encountered on a daily basis. We have also provided a step-by-step guide on how to fix them.
If you have your own viewpoint on this article, then do mention them in the comments section. We like to hear from our lovely audience.

Create Faster WordPress Websites!
Free eBook on WordPress Performance right in your inbox.

Harikrishna Kundariya is an accomplished Design & Development executive with over 10 years experience in the Developing industry. He is currently President and CEO of eSparkBiz Technologies, a Website Design Company. Connect with him on twitter @eSparkBiz