How to Setup PayPal Payment Gateway on WooCommerce
PayPal is arguably one of the most popular payment method used for online shopping around the world. If your online store doesn’t support payments with PayPal, then you may be missing out on a huge chunk of your customers who prefer paying through this popular method.
WooCommerce comes with built in PayPal functionality which you can be enabled and disabled with a click of a button. However, this is not enough if you want to accept payments via PayPal or credit card payment. You must integrate your PayPal account with WooCommerce.
This article will cover all the steps you’ll need to follow in order to help your WooCommerce store accept payment through WooCommerce.
Create a “Sandbox” PayPal Account
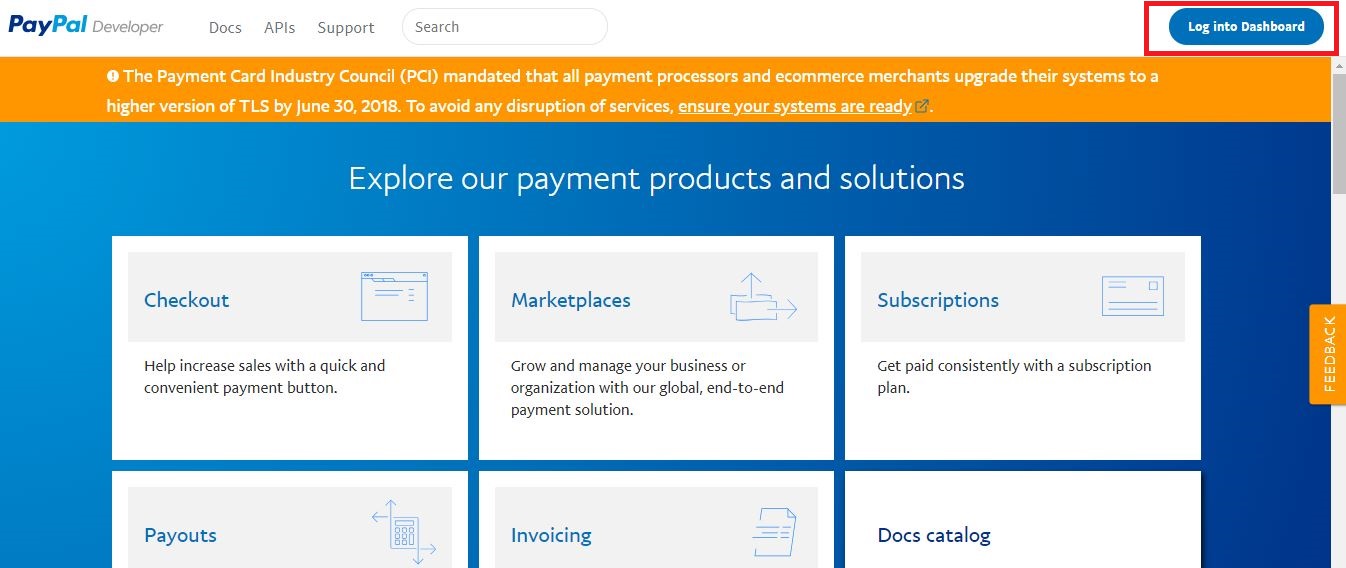
The first step for integrating PayPal with WooCommerce is to create a Sandbox PayPal account that you can use to test transactions on your online store. The account can be created in PayPal’s Developer Section.
On the Developer Section, you will see the login button on the top right corner. This is where you will sign up to create a sandbox paypal account.
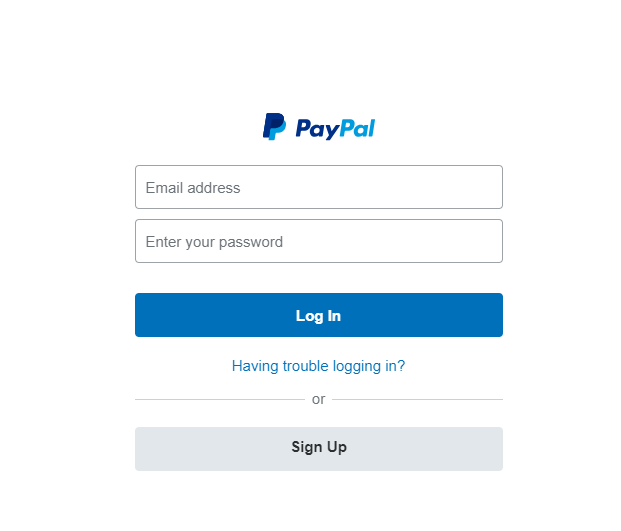
Next, you will see the PayPal login page. Click on the Sign-Up button to create a new account.
Once you Sign Up, PayPal will ask you if you want to create a Personal Account or a Business Account.
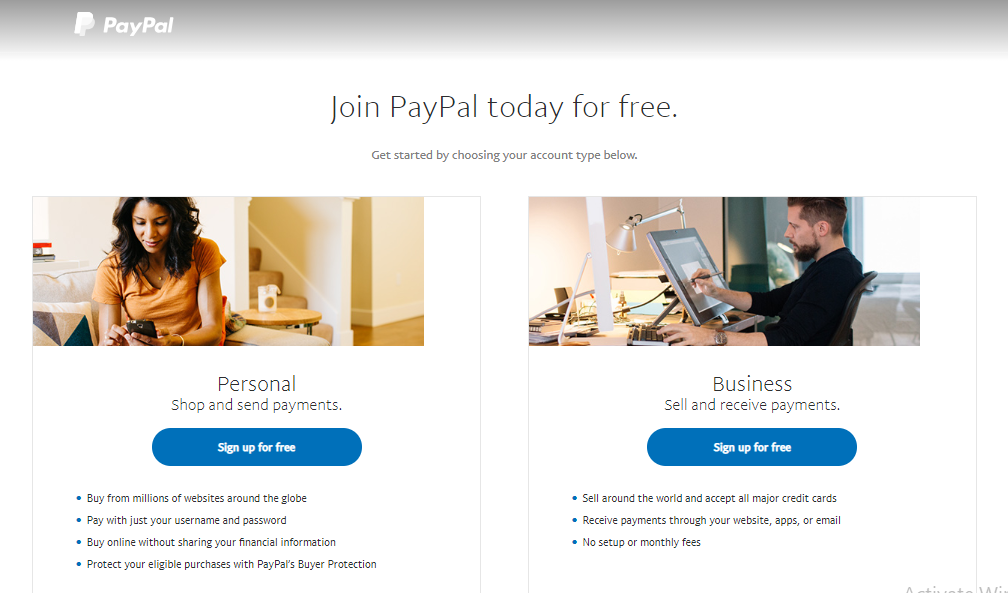
A Personal Account is one which can be used to make purchases online. A Business Account is used to accept payments through PayPal on your WooCommerce store.
For this tutorial, we will be creating a Business Account because we want to integrate it into our online store. However, to test your transactions, make sure you have a Personal Account as well.
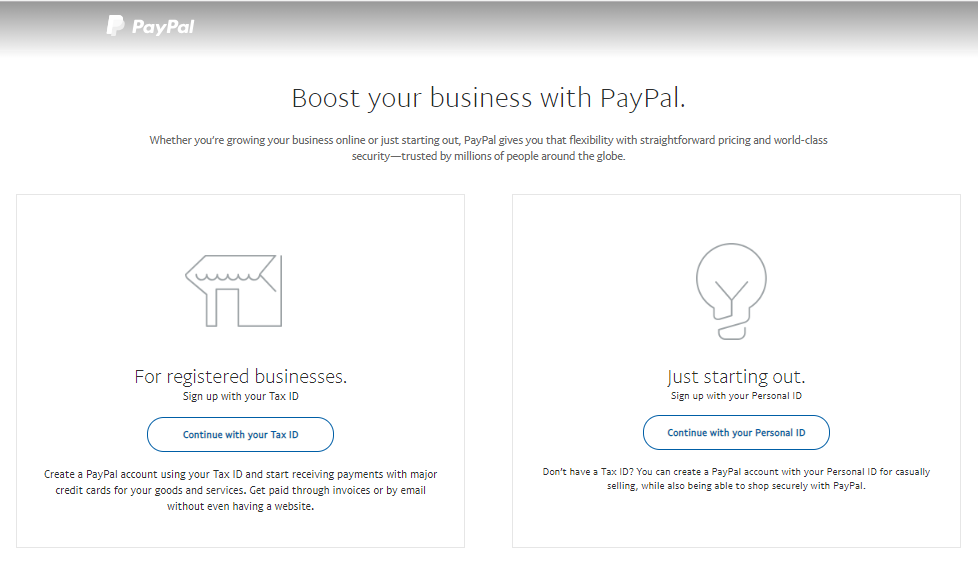
After choosing the Business Account, you will have to select if you want to create your account with your business ID or your personal ID. For the purpose of this tutorial, we have used a personal ID but you can use your business ID.
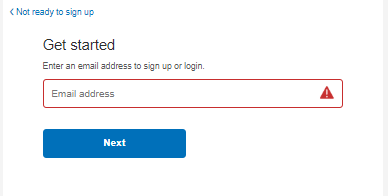
Just enter the email address and click next.
Integrate PayPal account with WooCommerce
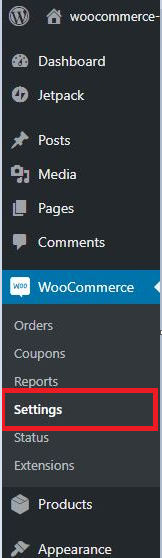
Now that you have created your PayPal account, it is time to integrate it with your WooCommerce store.
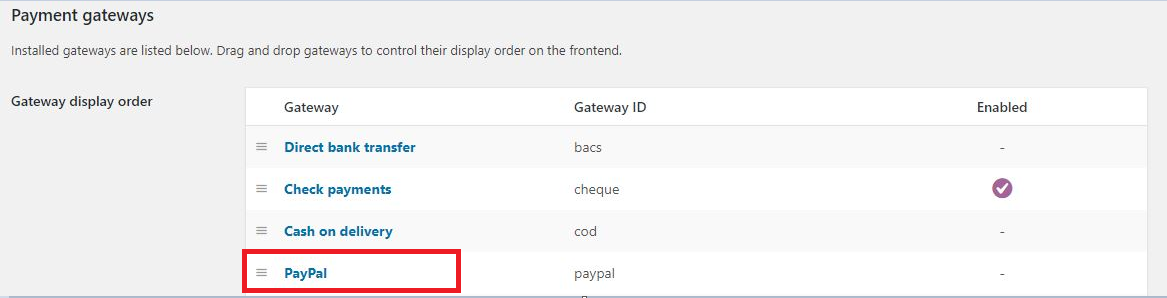
From the sidebar of your WordPress admin panel, navigate to WooCommerce and click Settings
From the Settings page, go to the Checkout tab
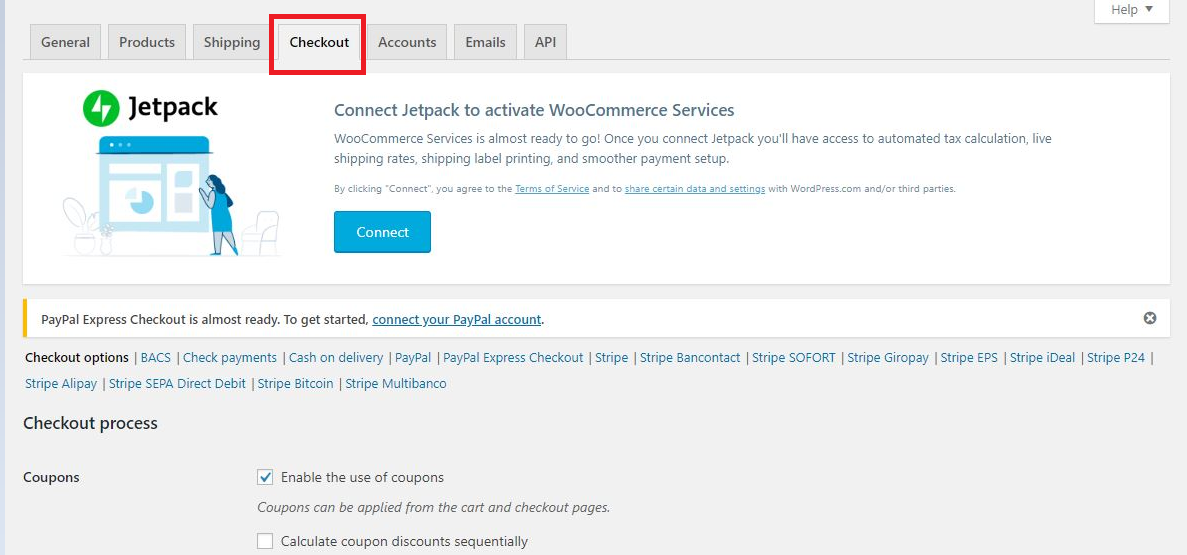
Scroll down to Payment Gateways and find PayPal.
Enable/Disable PayPal
Select PayPal and place a check on Enable/Disable PayPal Standard.

If the option is disabled, the checkout store will not display the PayPal payment on your checkout page.

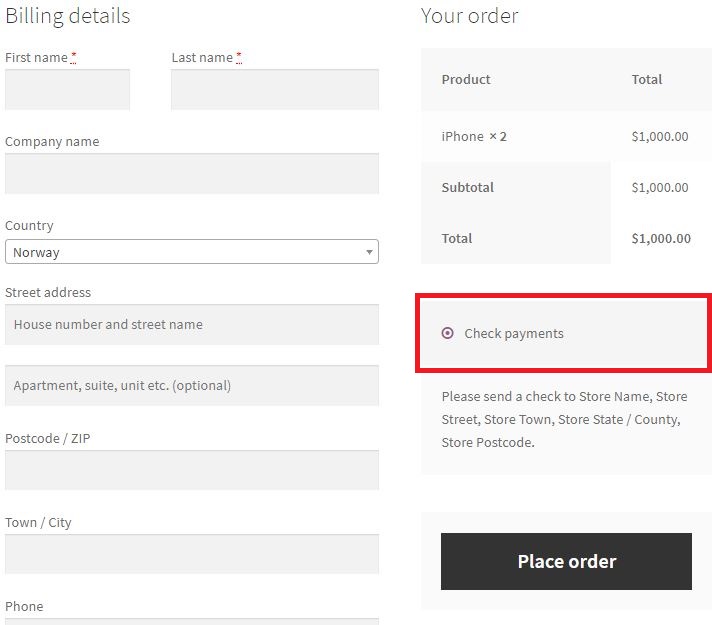
You can see that only the “Check Payments” option is displayed as it was the only one enabled from within the WooCommerce checkout settings. The PayPal option is disabled which is why it is not displayed here.
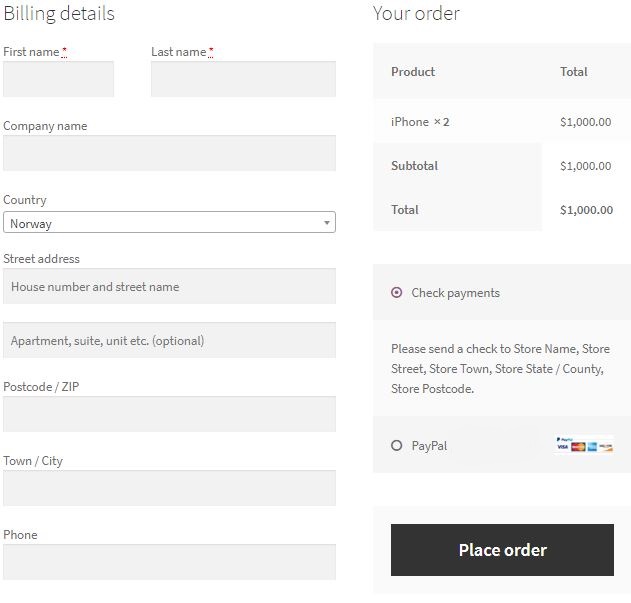
Once you enable Standard PayPal, it will be displayed on the checkout page as the image shows below
Title
The next field is Title. You can set the Title with any text you want to be displayed next to the PayPal Payment Option on your checkout page as the image shows below


PayPal Emails
You will notice there are two email fields on the PayPal settings page. The first is the PayPal Email.

The email that we used to create the PayPal sandbox account in the beginning of this tutorial, must be entered in this field. You must be very careful when entering your PayPal email as it is the account where you will be receiving your payments.
The next email field is the Receiver Email.

If your PayPal email differs with your primary email address, then you may want to enter additional information in this field. You can choose to receive payment information on your PayPal email address or on your primary email address by entering it in the Receiver Email address field.
This field is optional.
PayPal Sandbox

As we spoke earlier, a sandbox account allows you to test your PayPal transactions. This can be done only if you place a check on this option.
PayPal Identity Token
PayPal Identity Tokens are used to verify payments without the use of PayPal’s IPN (Instant Payment Notification). The token allows you to view your transaction and its details even when they are under process. You can provide this token to your customer and they can use it to get the details of their payment process. This provides a secure way of sharing information with your customers.

The identity token is easy to generate. Just log in to your PayPal account > Navigate to Profile > Select Manage Website Preference > Enable Payment Data Transfer
Invoice Prefix

The invoice prefix is the initial code that helps the store owner identify the transaction. Once the purchase is made from the store, an invoice is generated with a unique number and a prefix. You can set your invoice prefix to be anything that you want which will help you identify that the invoice is generated after a purchase from a particular store. This is specifically useful in cases where a store owner owns more than one online store. The dedicated Invoice Prefix helps to understand that a purchase is made from a particular store.
By default, the prefix is set WC. You can change it to, for example, MyShop and your invoice would contain MyShop for you to identify that the purchase is made from that particular store.
Shipping Details

Placing a check on this option sends your shipping details to your PayPal address instead of the billing address. If you have different addresses for both these purposes, then you may face a problem because PayPal deals with a single email only.
Payment Action
The drop down on Payment Action shows two options:
- Capture
- Authorise

If you select the Capture option, the payments from your customers will be processed immediately, without any sort of verification. The payment would be completed in a couple of minutes which saves a lot of time on both ends, customers, and merchants.
The Authorise option lets you first authorize the payments manually before finalizing and completion. This is, of course, time-consuming and customers often get annoyed as they want their payments to be processed right away.
I hope that this article has enabled you to integrate PayPal payment gateway into your WooCommerce store. If you still have any more questions, let me know in the comments below.

Create Faster WordPress Websites!
Free eBook on WordPress Performance right in your inbox.

Moeez is ‘The’ blogger in charge of WPblog. He loves to interact and learn about WordPress with people in the WordPress community. Outside his work life, Moeez spends time hanging out with his friends, playing Xbox and watching football on the weekends. You can get in touch with him at moeez[at]wpblog.com.