How to Create WordPress Staging Site with WP Staging
Disclaimer: WPblog is a part of Cloudways, a Managed Cloud Hosting service, but any assumptions or analysis made on this property belong solely to their writers.
Imagine you want to install a new feature on your website. What’s the best way to do it? On a WordPress Staging website.
A live site is not a safe zone for testing/installing new tools and plugins because if something goes wrong, your website will malfunction, and you don’t want that.
A WordPress staging website, on the other hand, gives you a safe environment to install, test, and then duplicate the functionality on your live site when you’re sure that everything is working fine.
In this article, I will take you through the process of creating a staging site where you can test new features and then deploy them on your live website.
Table of Content
What is a WordPress Staging Website?
Who Needs a WordPress Staging Website?
How to Create WordPress Staging Website with WP Staging
What is a WordPress Staging Website?
A WordPress staging website, or a staging environment, is a clone of your website. It’s a replica of your live website that allows you to test new features or functionalities. Changes you make on a staging site do not reflect on your live website.
Also, when your website is in the development phase, designing it in a staging environment is the preferred method before you take it live.
However, apart from the advantages, there are a few drawbacks to this method that you should know about. Let’s take a look at both.
Advantage
As already discussed, the ability to test features and functionalities without affecting your live website is one of the biggest benefits of having a staging environment.
Secondly, a staging site lets you catch bugs and errors without putting your live website at risk. And since you can set up a WordPress staging websites locally or online, it’s an easy and convenient process.
Disadvantages
There aren’t really disadvantages to creating a staging site, so we’d rather call these drawbacks.
For starters, a staging site may not be an exact replica of your original websites because a staging environment doesn’t take cache into consideration
Secondly, you can’t push the changes to your website on short notice when you’re testing them on your staging websites.
Also, if you’re relying on your web host to create a staging environment for you, they may charge a fee for it, so be prepared to cough up some cash for testing purposes!
Who Needs a WordPress Staging Website?
Before we learn how to set up a staging site, it’s important to understand who needs it and who doesn’t.
In an ideal scenario, anyone running a WordPress website would need a WordPress staging environment.
However, there can be some exceptions.
If your website is simply informational, there’s no danger in making changes directly on the live site. Hence, you don’t need a staging environment in this case.
On the flip side, if your WordPress website is generating business/revenue, is used as a service you provide, or if your users depend on it on a daily basis, then you should test all your changes on a staging website.
You just can’t test new features on such a website and risk losing business.
Create WordPress Staging Website with WP Staging
There are two most common ways to create a staging environment for your website.
- Asking your hosting provider to build you a staging environment
- Using a WordPress staging website plugin to build it yourself
Now I’ll show you how you can create a staging environment for your WordPress website using a plugin.
WP Staging is one of the best WordPress plugins that let you create a staging environment in a few clicks.
Note: I’m using Cloudways for this tutorial.
The first step is to install the WordPress staging website plugin.
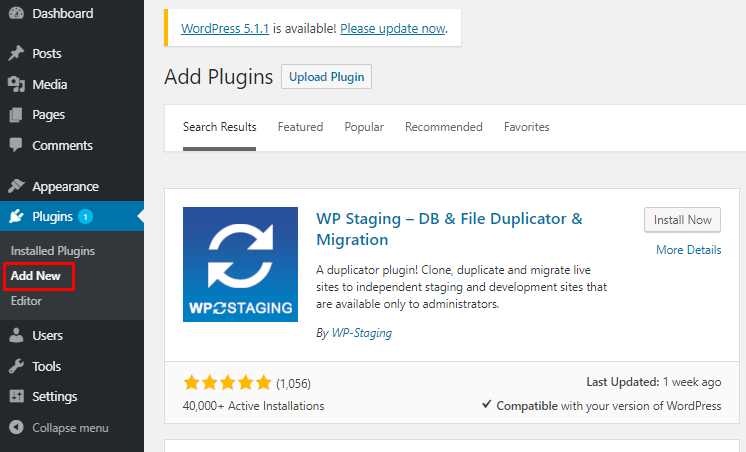
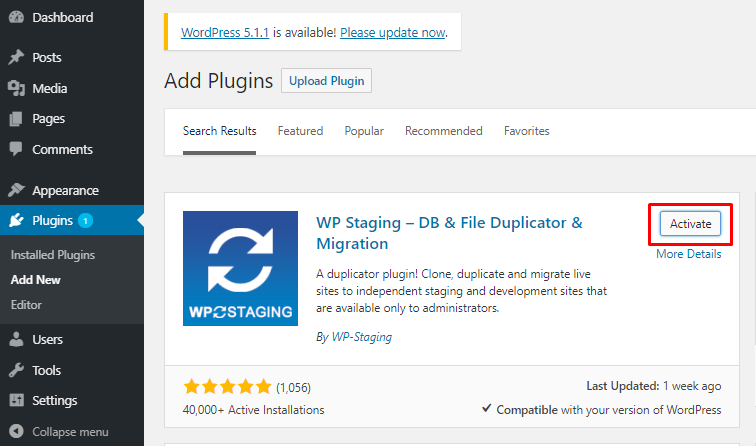
Click on the Install Now button to install WP Staging on your website. Once it’s installed, click Activate.
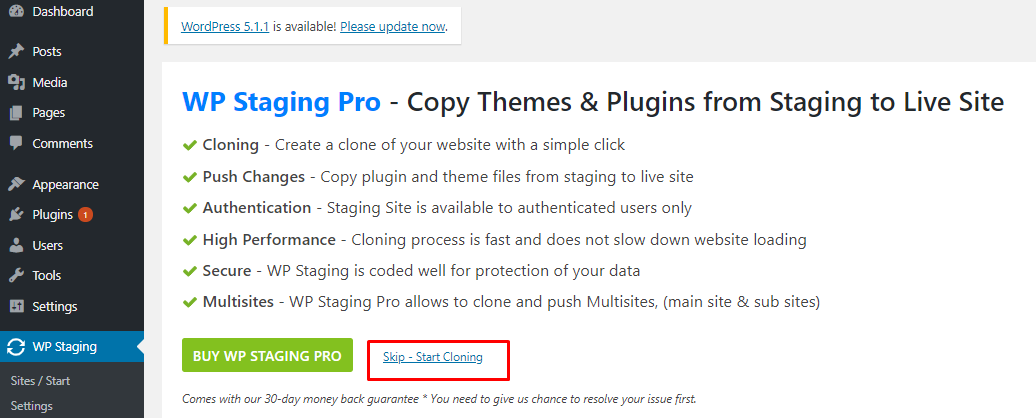
Once activated, the plugin will ask if you want to buy WP Staging Pro.
You can skip this and start cloning (your website) by clicking on the Skip – Start Cloning button.
On the proceeding page, you’ll have the option to create a new staging site. But before you do that…
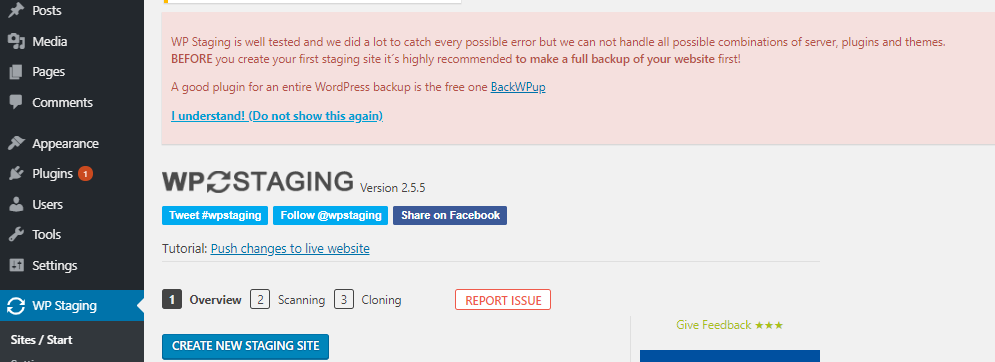
…notice the red banner on top? It’s a disclaimer asking you to create a full backup of your site just in case. You should do it to be on the safe side.
After you’ve created the backup, click on the CREATE NEW STAGING SITE button to start the process.
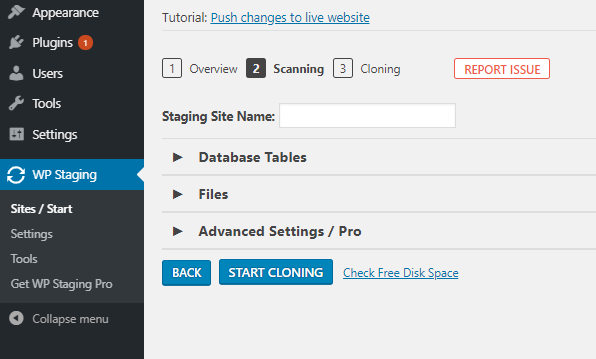
Next, give your staging site a name.
Then, click on Database Tables from the three dropdowns and select the database that you’d like to clone on to your staging website.
Now select the files you want to copy to your staging website from Files.
Since you’re using the free version of this plugin, you won’t be able to change anything in the Advanced Settings option.
Click START CLONING
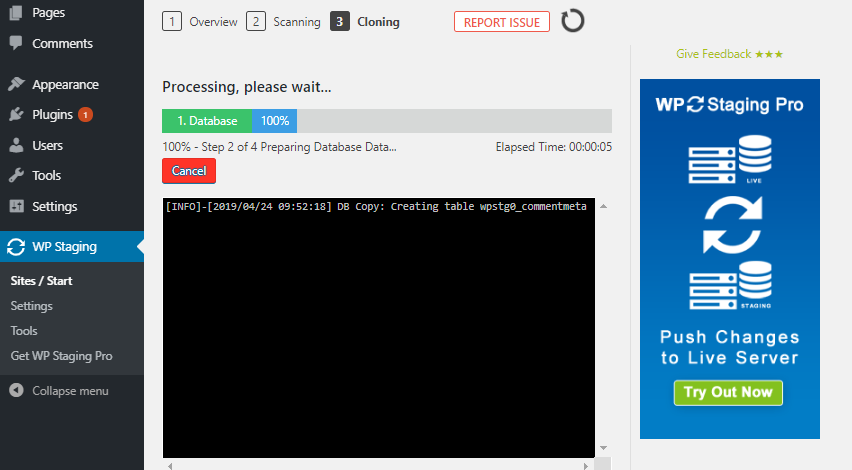
In a minute or two, your staging site will be ready.
To access your staging site, click Open Staging Site.
The URL will redirect you to a login page where you’ll have to use your WordPress website’s credentials to access your staging site.
Your staging site is now ready and you can test out any new features and functionalities on it without affecting your live website!
Also Read: Set Up WordPress Staging Environment With 1-Click Push N’ Pull
Final Words
The process of creating a WordPress staging website with a plugin is quick and easy. I always recommend users to use this method since your web host might charge you a fee for creating a staging environment for you.
If you have any questions regarding WordPress staging website, let me know your thoughts in the comments below and I’ll get back to you.

Create Faster WordPress Websites!
Free eBook on WordPress Performance right in your inbox.

Moeez is ‘The’ blogger in charge of WPblog. He loves to interact and learn about WordPress with people in the WordPress community. Outside his work life, Moeez spends time hanging out with his friends, playing Xbox and watching football on the weekends. You can get in touch with him at moeez[at]wpblog.com.